GEDRAFT LOGIQ P9/P7
D
IRECTION 5604324, REVISION 11 DRAFT (JANUARY 24, 2019) SERVICE MANUAL
Chapter 4 - Functional Checks 4-36
4-3-9 OPIO Interface Check (R3 only)
NOTE: Alternatively, OP Panel Interface test may be executed from Common Service Desktop.
However, performance / response of the diagnostics may be degraded when executed with scanner
software still active.
It is located under Diags -> Run Diags -> Service Menu -> OpPanel -> OpPanel Test in the Diagnostics
page.
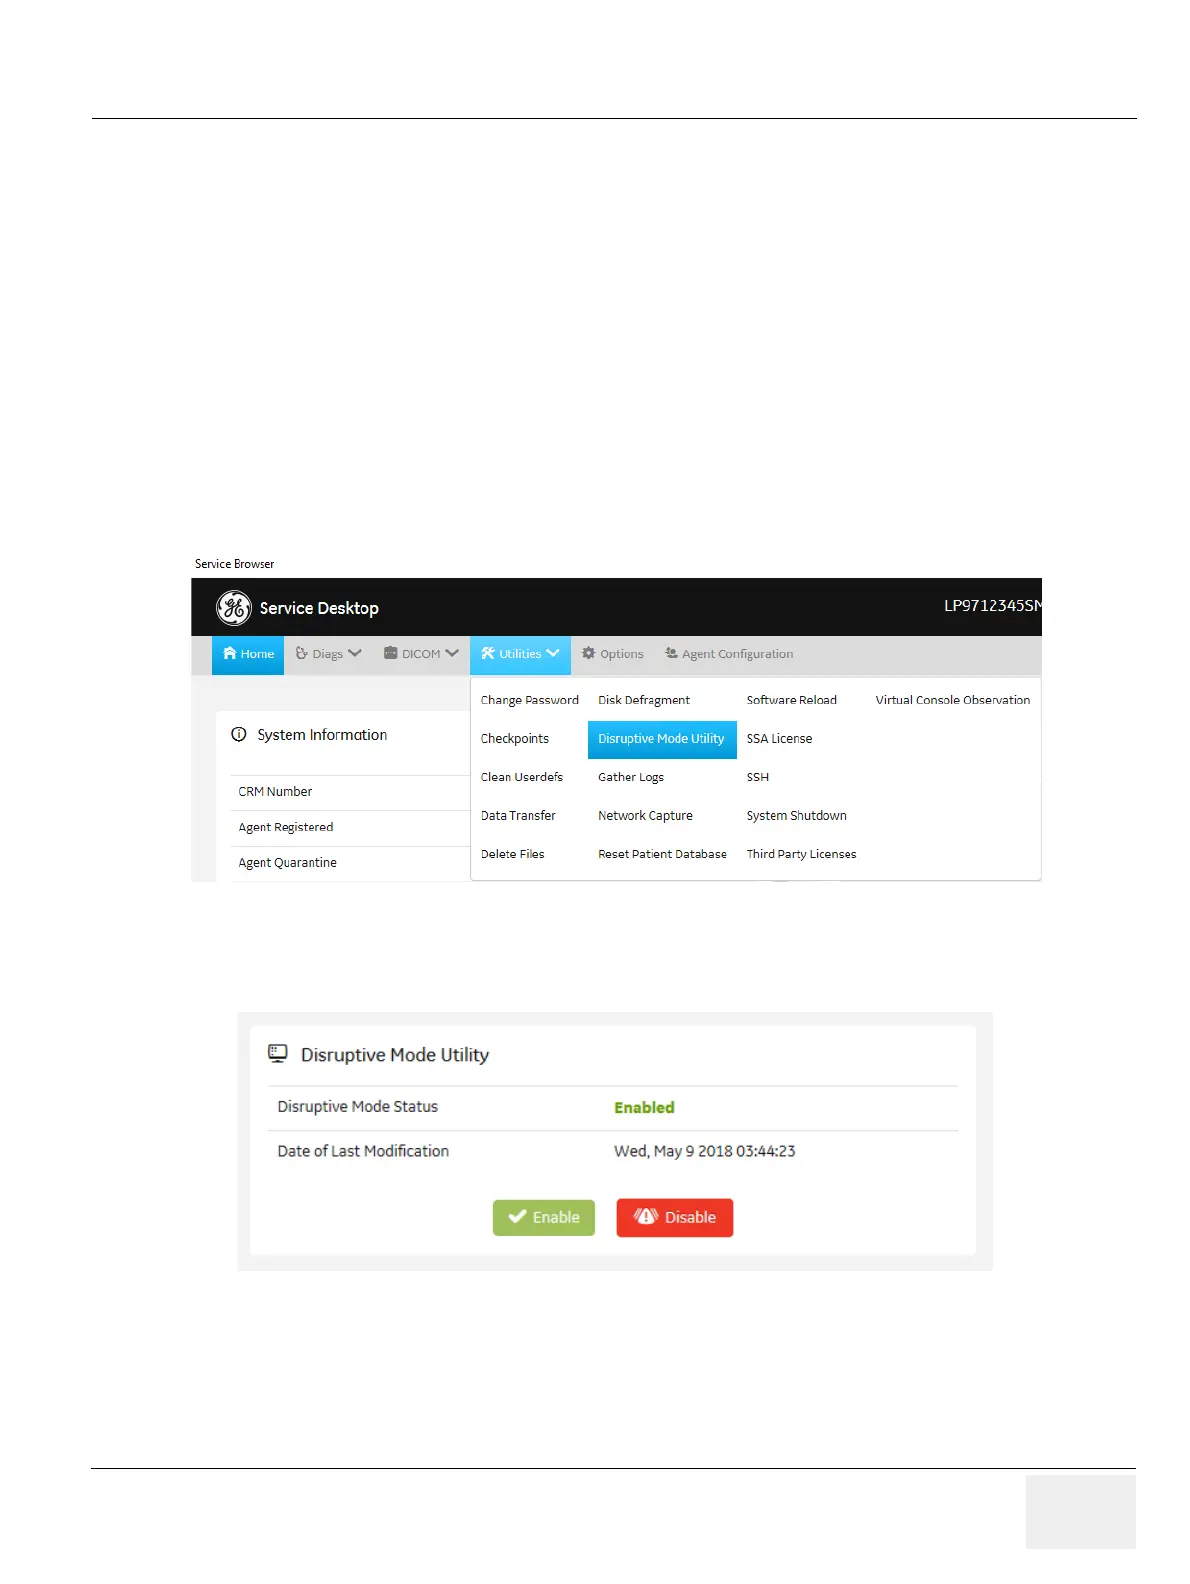
Before OP Panel Interface test execute from Common Service Desktop, you have to enable the
Disruptive Mode in Utilities -> Disruptive Mode Utility
To perform OPIO Interface Check using Diagnostics
1) Enter Common Service Desktop
2) Select Utilities -> Disruptive Mode Utility
3) Click the "Enable" on Diagnostic Mode Utility page
Figure 4-37 Disruptive Mode Utility
Figure 4-38 Diagnostic Mode page screen after enable the Disruptive mode

 Loading...


