EasyManuals Logo

GE LOGIQ P9 Service Manual

GE LOGIQ P9
602 pages
To Next Page IconTo Next Page
To Previous Page IconTo Previous Page
Page #177 background imageLoading...
Page #177 background image
GEDRAFT LOGIQ P9/P7
D
IRECTION 5604324, REVISION 11 DRAFT (JANUARY 24, 2019) SERVICE MANUAL
Chapter 4 - Functional Checks 4-37
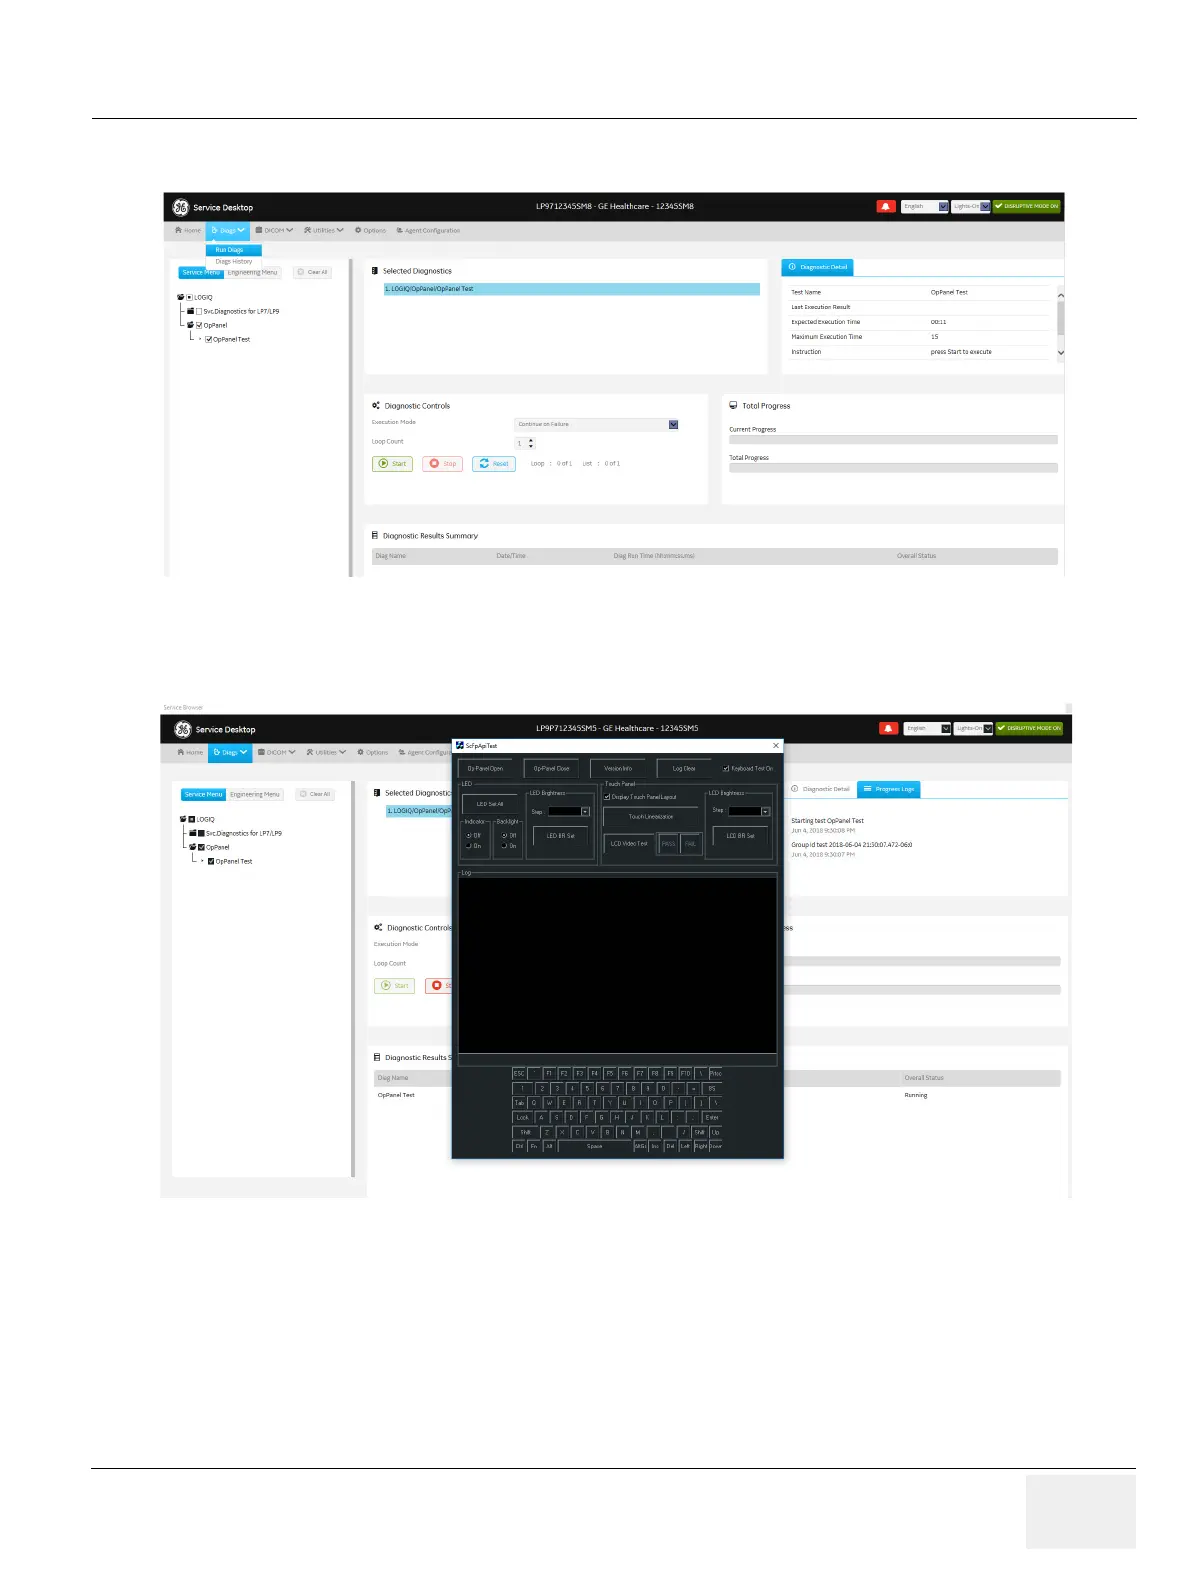
4) Select Diags -> Run Diags -> Service Menu -> OpPanel -> OpPanel Test
5) Click the "Start" on OP Panel Interface page
6) Select "Op-Panel Open"
7) Verify OP Panel button operation is reflected on diag window.
8) Check the “Display Touch Panel Layout” and Press the four Points in Touch Panel.
The four Points is (80, 80), (720, 80), (80, 520) and (720, 520) points.
9) Verify that 4 touch points have the almost same position between appeared log points and touch
points. The possible error range of touch points is plus or minus 20 points. If this step is failed,
Please execute section 4-3-10
Figure 4-39 OP Panel Interface page screen
Figure 4-40 OP Panel Interface page screen

Table of Contents

Other manuals for GE LOGIQ P9

Questions and Answers:

Question and Answer IconNeed help?

Do you have a question about the GE LOGIQ P9 and is the answer not in the manual?

GE LOGIQ P9 Specifications

General IconGeneral
TypeUltrasound System
3D/4D ImagingYes
ElastographyYes
ConnectivityDICOM, USB, Ethernet, HDMI
Doppler ModesColor Doppler, Power Doppler
Probesconvex, linear, phased array
Imaging ModesM-Mode, Color Doppler, Power Doppler
PortabilityCart-based
ApplicationsVascular, Cardiac, OB/GYN, Musculoskeletal
WeightApprox. 80 kg
Touch Panel10.1-in touchscreen

Related product manuals