GEDRAFT LOGIQ P9/P7
D
IRECTION 5604324, REVISION 11 DRAFT (JANUARY 24, 2019) SERVICE MANUAL
Chapter 4 - Functional Checks 4-13
4-3-3 Power On/Off
4-3-3-1 Scanner Power On
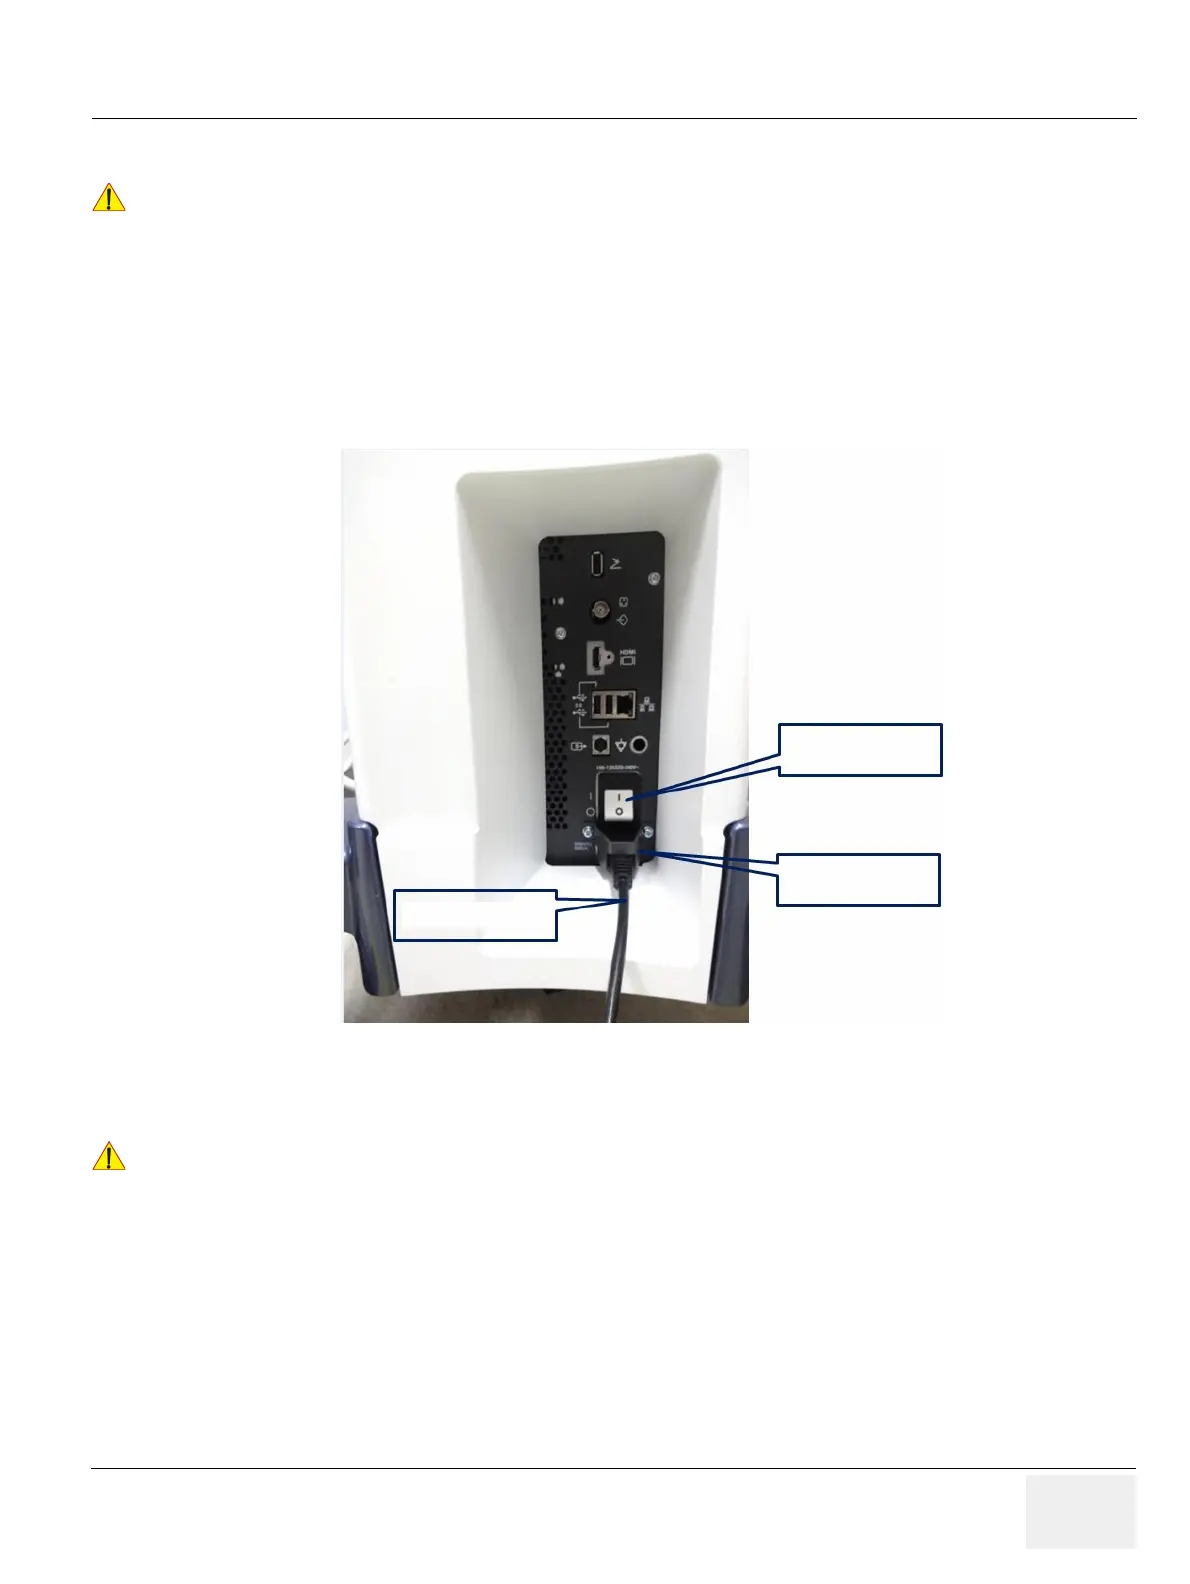
1) Connect the Main Power Cable to the back of the system.
2) If not already done, screw on the pull-out protection of the mains power cable with the 2 screws.
3) Connect the Main Power Cable to a hospital grade power outlet with the proper rated voltage. Never
use an adapter that would defeat the safety ground.
4) Switch ON the Circuit Breaker at the rear of the system. (see: Figure 4-10)
Figure 4-11 Circuit Breaker, pull-out protection and main power cable at rear of system.
5) Hold down the On/Off button (see: Figure 4-12) on the control panel for ~3 seconds.
NOTE: The power for on-board peripheral auxiliary equipments are commonly switched with the ON/OFF
button. The power switch of any attached printer(s) needs to be in ON position before starting the
system. However, be aware some auxiliary equipment may switch itself to standby mode (e.g., Color
video printer) and must therefore be switched on separately.
!! NOTICE:
After turning off a system, wait at least 10 seconds before turning it on again.
The system may not be able to boot if power is recycled too quickly.
!! NOTICE:
When AC power is applied to the scanner, the On/Off button on the control panel illuminates BLUE
indicating that the system (including back-end processor) is in Standby Mode.
Circuit Breaker
Pull Out Protection
(Metal Bracket)
Mains Power Cable

 Loading...


