Gocator Line Profile Sensors: User Manual
Gocator Web Interface • 439
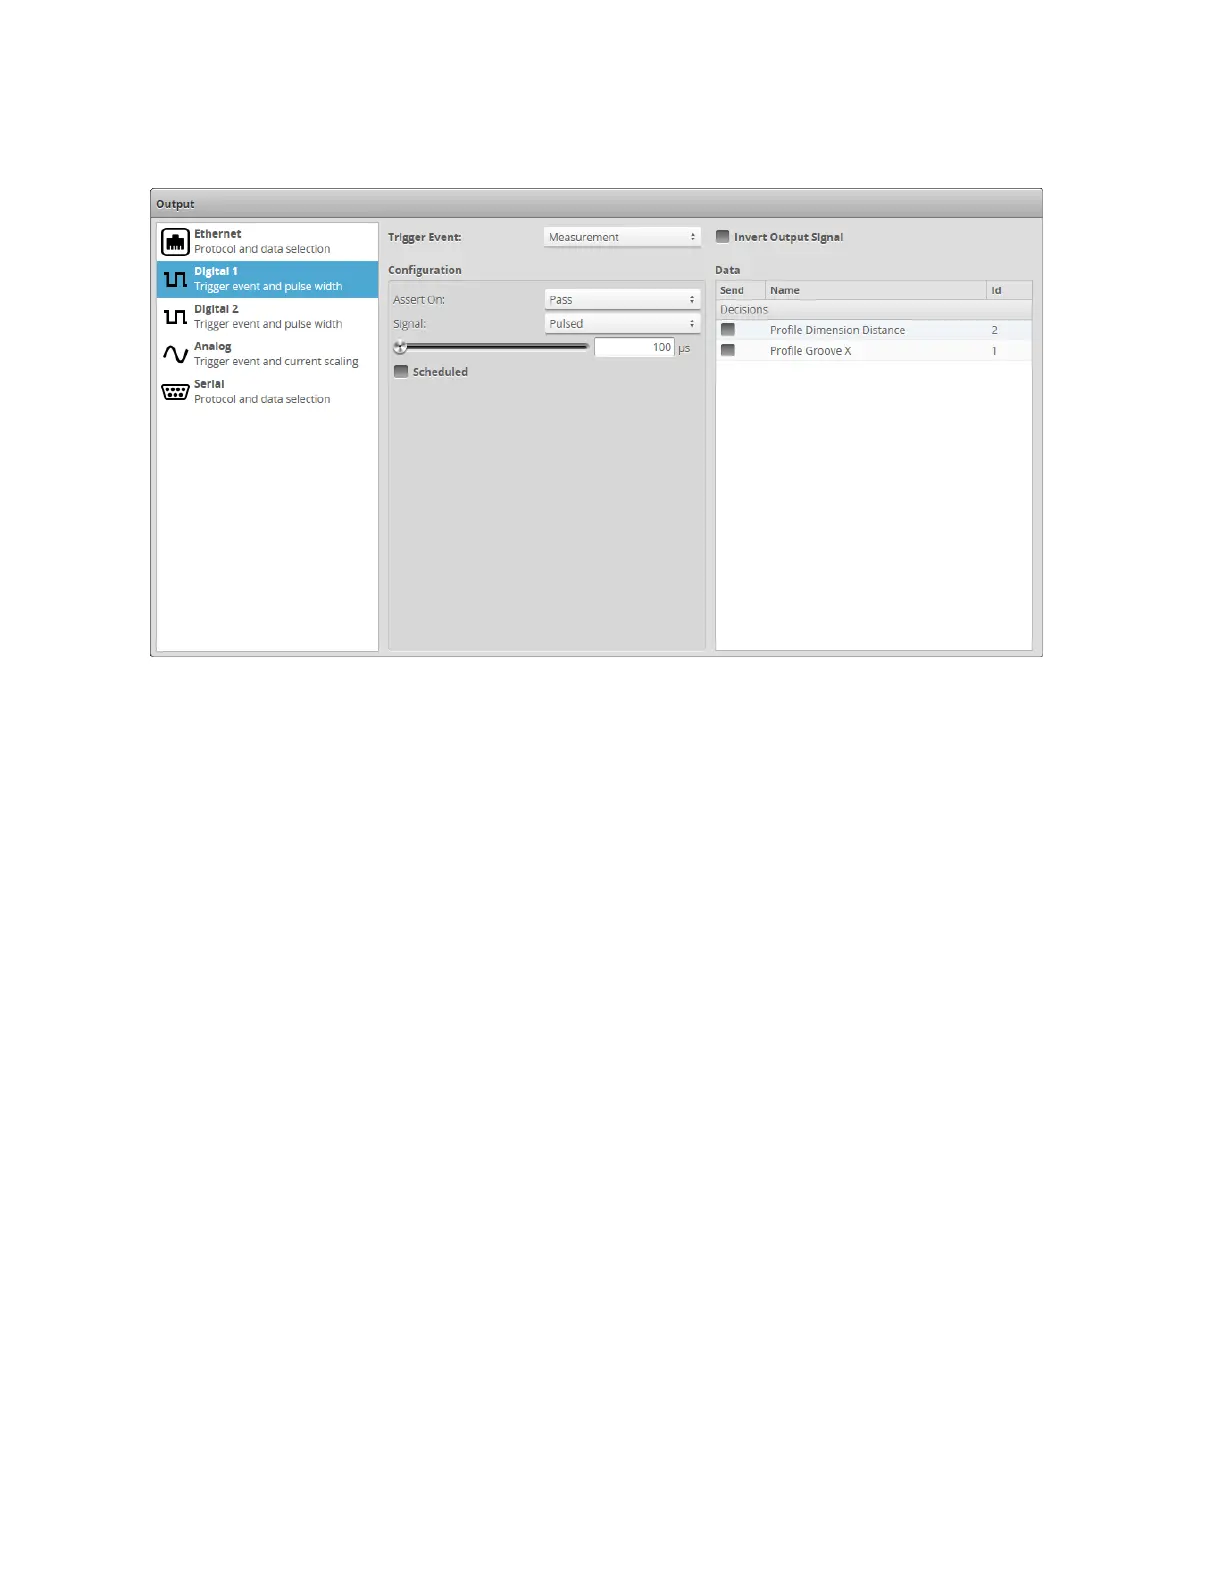
Trigger conditions and pulse width are then configured within the panel.
To output measurement decisions:
1. Go to the Output page.
2. Click Digital 1 or Digital 2 in the Output panel.
3. Set Trigger Event to Measurement.
4. In Configuration, set Assert On and select the measurements that should be combined to determine
the output.
If multiple measurement decisions are selected and Assert On is set to Pass, the output is activated
when all selected measurements pass.
If Assert On is set to Fail, the output is activated when any one of the selected measurements fails.
5. Set the Signal option.
The signal type specifies whether the digital output is a continuous signal or a pulsed signal. If Signal is
set to Continuous, the signal state is maintained until the next transition occurs. If Signal is set to is
Pulsed, you must specify the pulse width and how it is scheduled.
6. Specify a pulse width using the slider.
The pulse width is the duration of the digital output pulse, in microseconds.
7. Check the Scheduled option if the output needs to be scheduled; otherwise, leave it unchecked for
immediate output.
A scheduled output becomes active after the delay from the start of Gocator exposure. A scheduled
output can be used to track the decisions for multiple objects as these objects travel from the sensor to
the eject gates.
The Delay setting specifies the distance from the sensor to the eject gates.
An immediate output becomes active as soon as measurement results are available. The output
 Loading...


