Gocator Line Profile Sensors: User Manual
Getting Started • 50
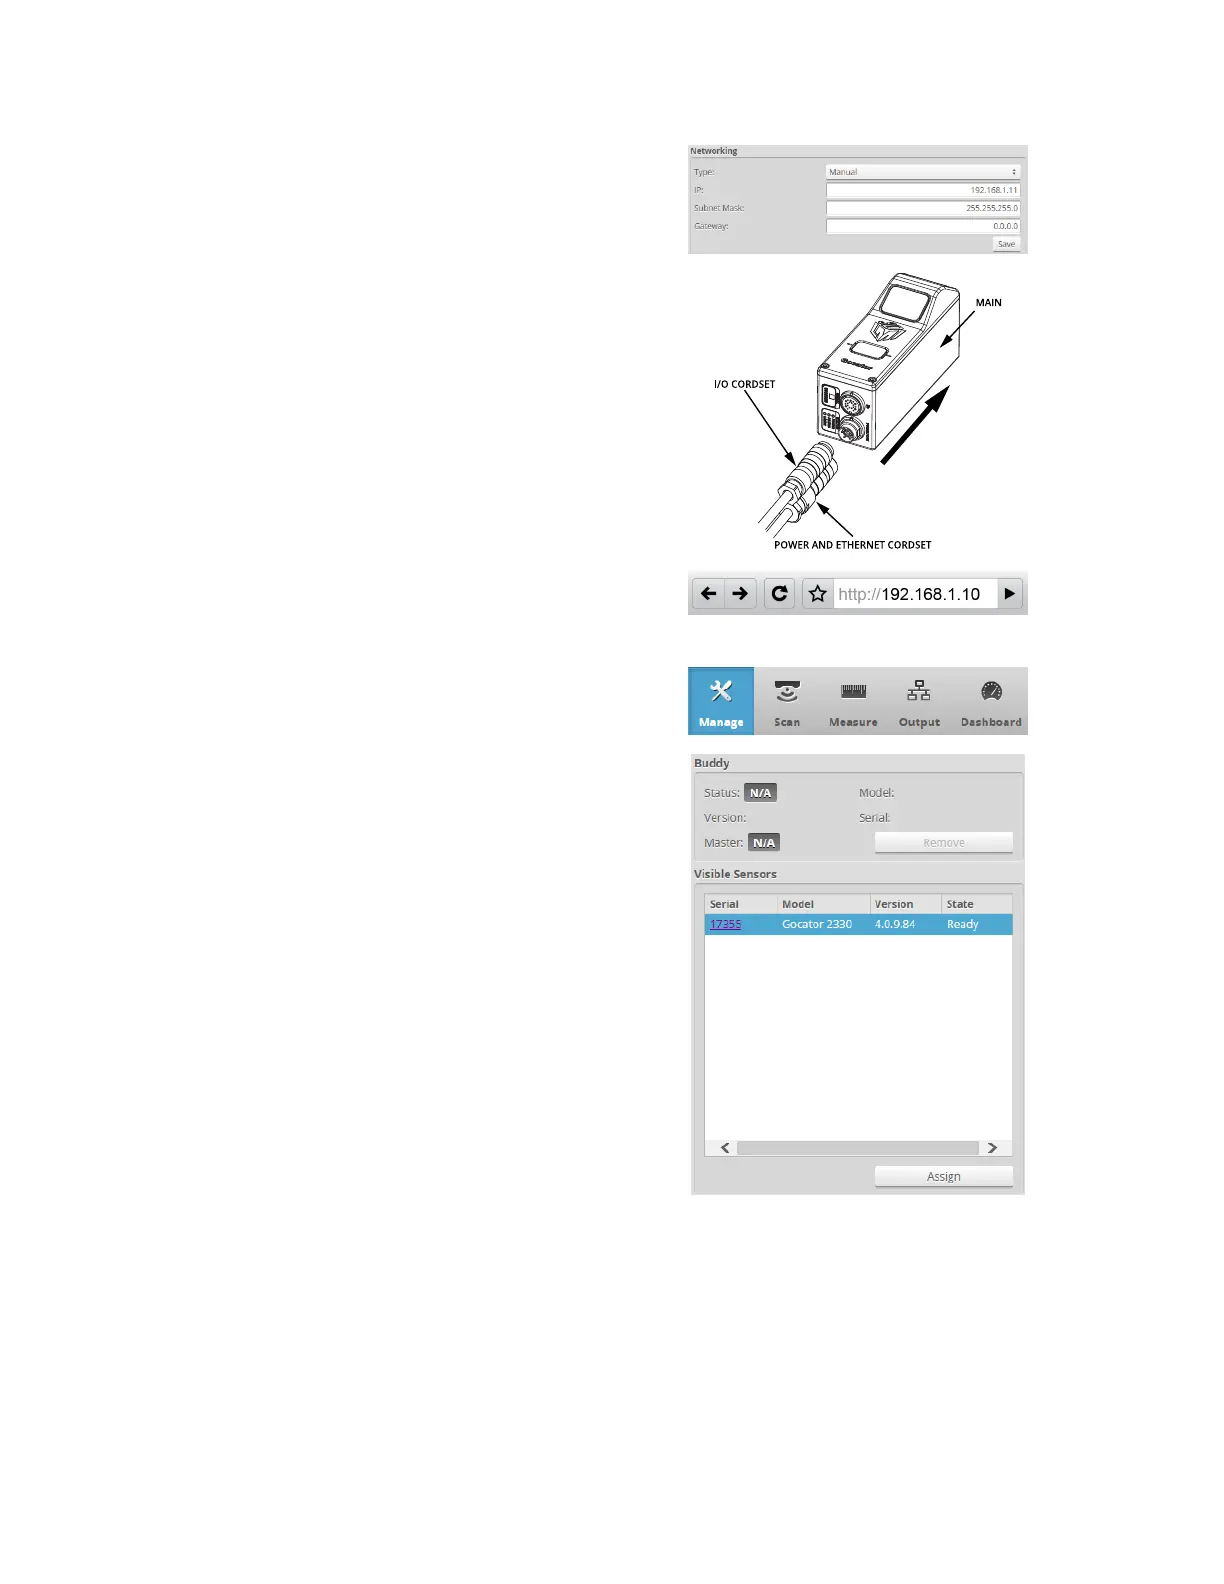
5. Modify the IP address to 192.168.1.11 in the Networking
category and click the Save button.
When you click the Save button, you will be prompted to
confirm your selection.
6. Turn off the sensors, re-connect the Main sensor's
Ethernet connection and power-cycle the sensors.
After changing network configuration, the sensors must
be reset or power-cycled before the change will take
effect.
7. Enter the sensor's IP address 192.168.1.10 in a web
browser.
The Gocator interface loads.
8. Select the Manage page.
9. Go to Manage page, Sensor System panel, and select the
Visible Sensors panel.
The serial number of the Buddy sensor is listed in the
Available Sensors panel.
10. Select the Buddy sensor and click the Assign button.
The Buddy sensor will be assigned to the Main sensor and
its status will be updated in the System panel.
The firmware on Main and Buddy sensors must be the
same for Buddy assignment to be successful. If the
firmware is different, connect the Main and Buddy sensor
 Loading...