Chapter 12 Installing, Removing, and Replacing
Replacing an Expansion Module
Scalar i500 User’s Guide 400
7 Open the module’s access door and raise the guide pin by pulling it
up and turning it slightly as if it were a screw. Otherwise, the guide
pin may scratch the front doors of the module beneath it.
8 From the front of the library, slide the entire module toward you and
lift it off of the module below it.
9 Repeat these procedures for each module that you need to remove.
10 Remove and replace the cover plates, if appropriate.
a If you plan to stack the control module at the top of the library,
and if a 9U expansion module will be located below it, remove
the control module’s bottom cover plate and the 9U expansion
module’s top plate.
b If you plan to stack the control module between 9U expansion
modules, remove both the top and bottom plates of the control
module. Also remove the top plate of the 9U expansion module
located below the control module and the bottom plate of the 9U
expansion module located above the control module.
c If you plan to stack the control module at the bottom of the
library, and if a 9U expansion module will be located above it,
remove the control module’s top plate and the 9U expansion
module’s bottom plate.
Replacing the 9U
Expansion Module 12
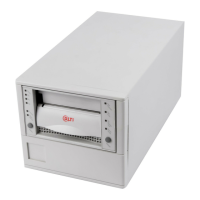
1 Remove all tape drives from the expansion module that you are
adding. See Adding, Removing, and Replacing Tape Drives
on
page 444 for instructions on removing tape drives.
2 Remove the power supplies from the expansion module that you are
adding. See Adding, Removing, and Replacing Power Supplies
on
page 420 for instructions on removing power supplies.
3 Open the expansion module’s access door and raise the guide pin by
pulling it up and turning it slightly as if it were a screw. Otherwise,
the guide pin may scratch the front doors of the module on which
you are stacking it.
Caution: Before removing the control module’s bottom cover
plate, the robot assembly must be parked as described
in Preparing to Remove or Replace a Module
on
page 362.