Section 05 ENGINE (4-TEC)
Subsection 02 (INTAKE SYSTEM)
Apply engine oil on supercharger shaft. Press
shaft with distance sleeve together in supercharg-
er housing half.
1
F00B2HA
2
1. Supercharger shaft
2. Distance sleeve
Applyengineoilonsealandpushintoretaining
disc by hand.
NOTE: Always use a new oil seal when assem-
bling the supercharger.
1
R1503motr242A
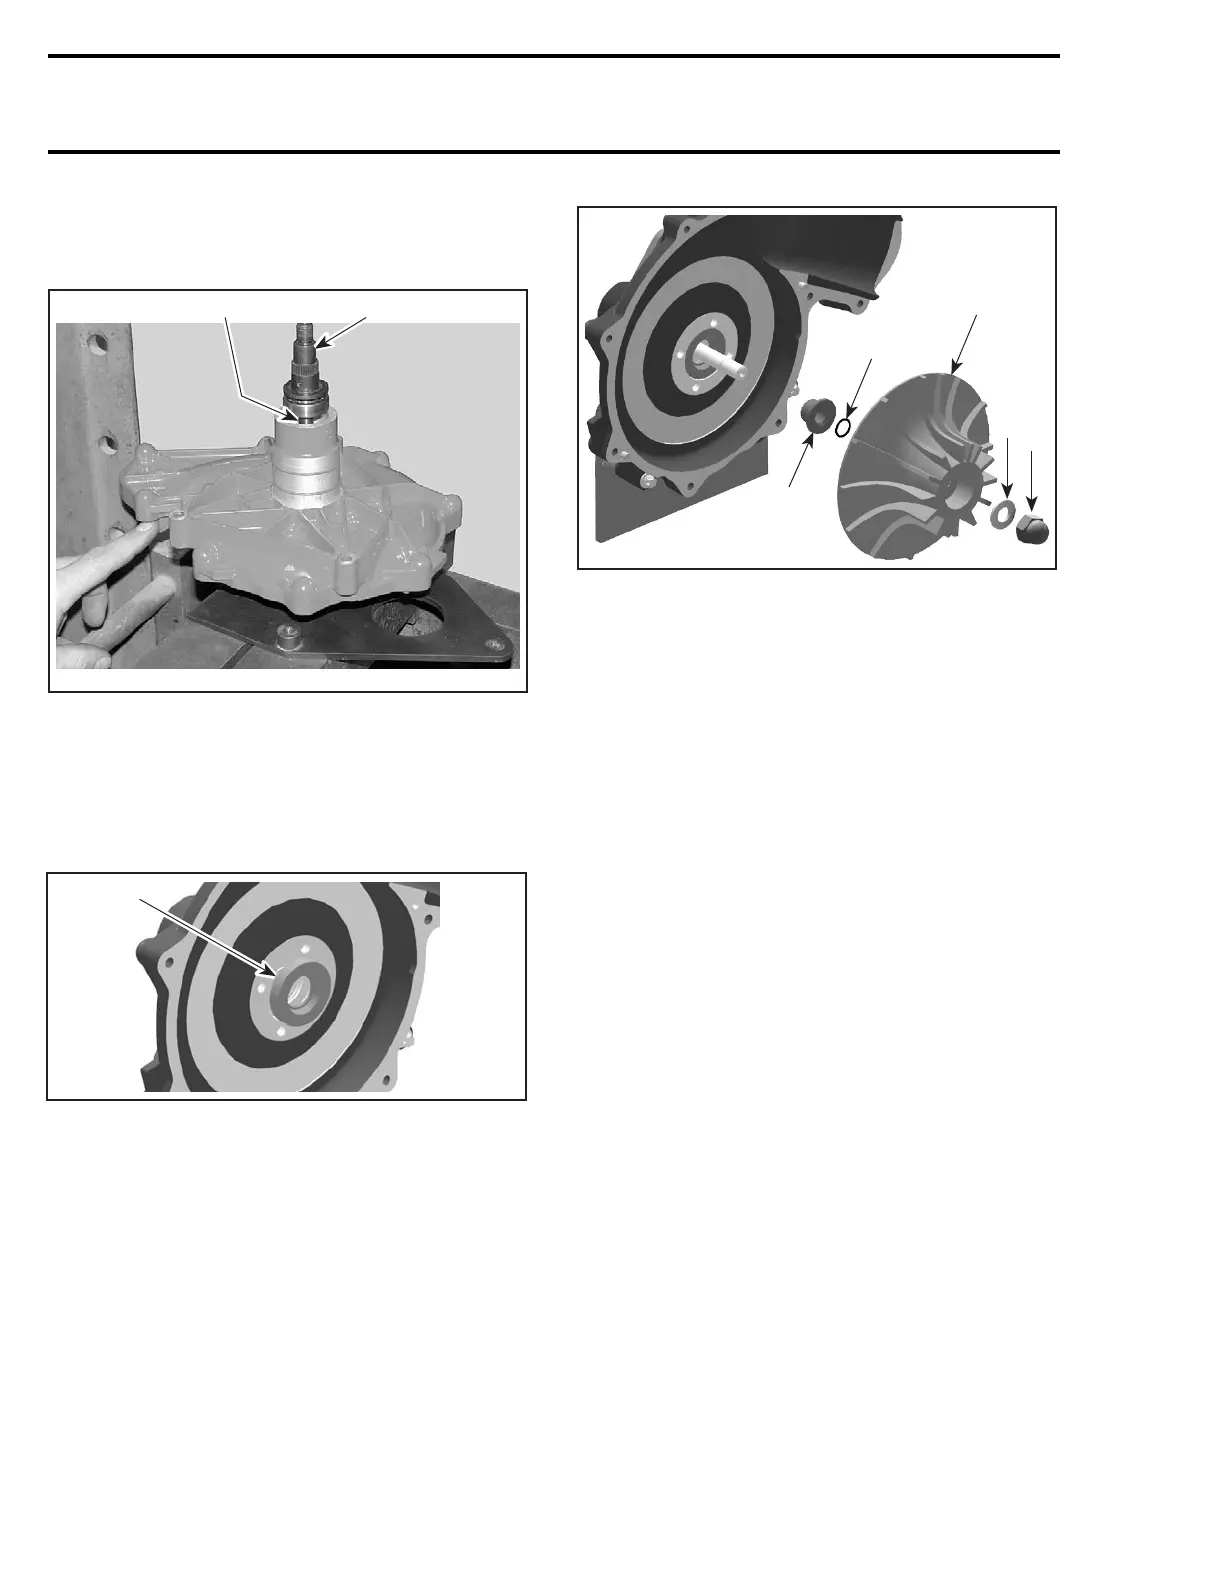
1. Oil seal
Install step collar, O-ring, supercharger impeller
and washer on supercharger shaft. Apply Loctite
243 on cap nut and temporary finger tight cap nut.
NOTE: The cap nut on the supercharger shaft has
a left-handed thread. The Loctite has to be appli
ed
in a small dose into the nut.
4
R1503motr229B
3
2
1
5
1. Step collar
2. O-ring
3. Supercharger impeller
4. Washer
5. Cap nut
Complete installation of supercharger shaft, en-
gine side as follows:
CAUTION: It is of the utmost importance that
all parts be absolutely clean. The compressor
shaft spins at up to 45 000 RPM and any debris
could cause a failure.
Install the first ceramic washer.
NOTE: On the RXP 4-TEC supercharged inter-
cooled engine, the ceramic washers differ in their
inner diameter. Install first the ceramic washer
with the bigger inner diameter. The ceramic
washer with the smaller inner diameter will be
installed on the lock washer side.
CAUTION: Manipulate ceramic washers with
care, those parts are fragile.
IMPORTANT: Apply Kluber Isoflex grease
(P/N 293 550 021) to the inner diameter of
the gear thrust surface on the shaft, ceramic
washers, needle bearings shaft surface and lock
washer.
CAUTION: No other grease can be used, other-
wise damage to bearings will occur.
Install the 40 needle bearings on the compressor
shaft.
NOTE: The 40 needle bearings comes in a wax
strip with an adhesive backing.
Remove the adhesive backing.
Install the drive gear over the needle bearings.
Install the other ceramic washer.
204 smr2004-Complete Line Up

 Loading...


