Section 04 ENGINE (2-STROKE)
Subsection 07 (EXHAUST SYSTEM)
Tip seat forward.
Unfasten fuel tank straps.
Move fuel tank forward as much as possible.
Push muffler forward, rotate and pull out rear-
ward.
All Models
Pull muffler no. 11 outofbilge.
TUNED PIPE REPAIR
This procedure is given to repair tuned pipe cracks
using T.I.G. welding process.
Procedure
– Sand the cracked area to obtain bare metal.
– Perform a 1.50 mm (1/16 in) depth chamfer over
crack.
– Use pure argon gas with 5.55 mm (3/32 in)
tungsten electrode (puretung “green”, zirtung
“brown”) and AC current.
– Use a 5.55 mm (3/32 in) aluminum welding rod
(no. 4043), to fill crack.
– Sand welding slightly to remove material sur-
plus.
Test
– Usecompressedairat124kPa(18PSI)topres-
surize tuned pipe.
CAUTION: Always ensure water passages are
not blocked partially or completely while weld-
ingtunedpipe.
NOTE: Prior to verify leaks, plug all holes and pres-
surize tuned pipe while immerging it in water.
INSTALLATION
Installation is essentially the reverse of removal
procedures. However, pay particular attention to
the following.
Exhaust Manifold
Make sure gasket(s) no. 16 are properly posi-
tioned prior to finalizing manifold installation.
717 Engines
Apply Molykote 111 on threads of screws no. 12.
Install exhaust manifold no. 14 and torque screws
no. 12 to 24 N•m(17lbf•ft) as per following illus-
trated sequence.
F01D59A
1 3
5
8
2
4
7
6
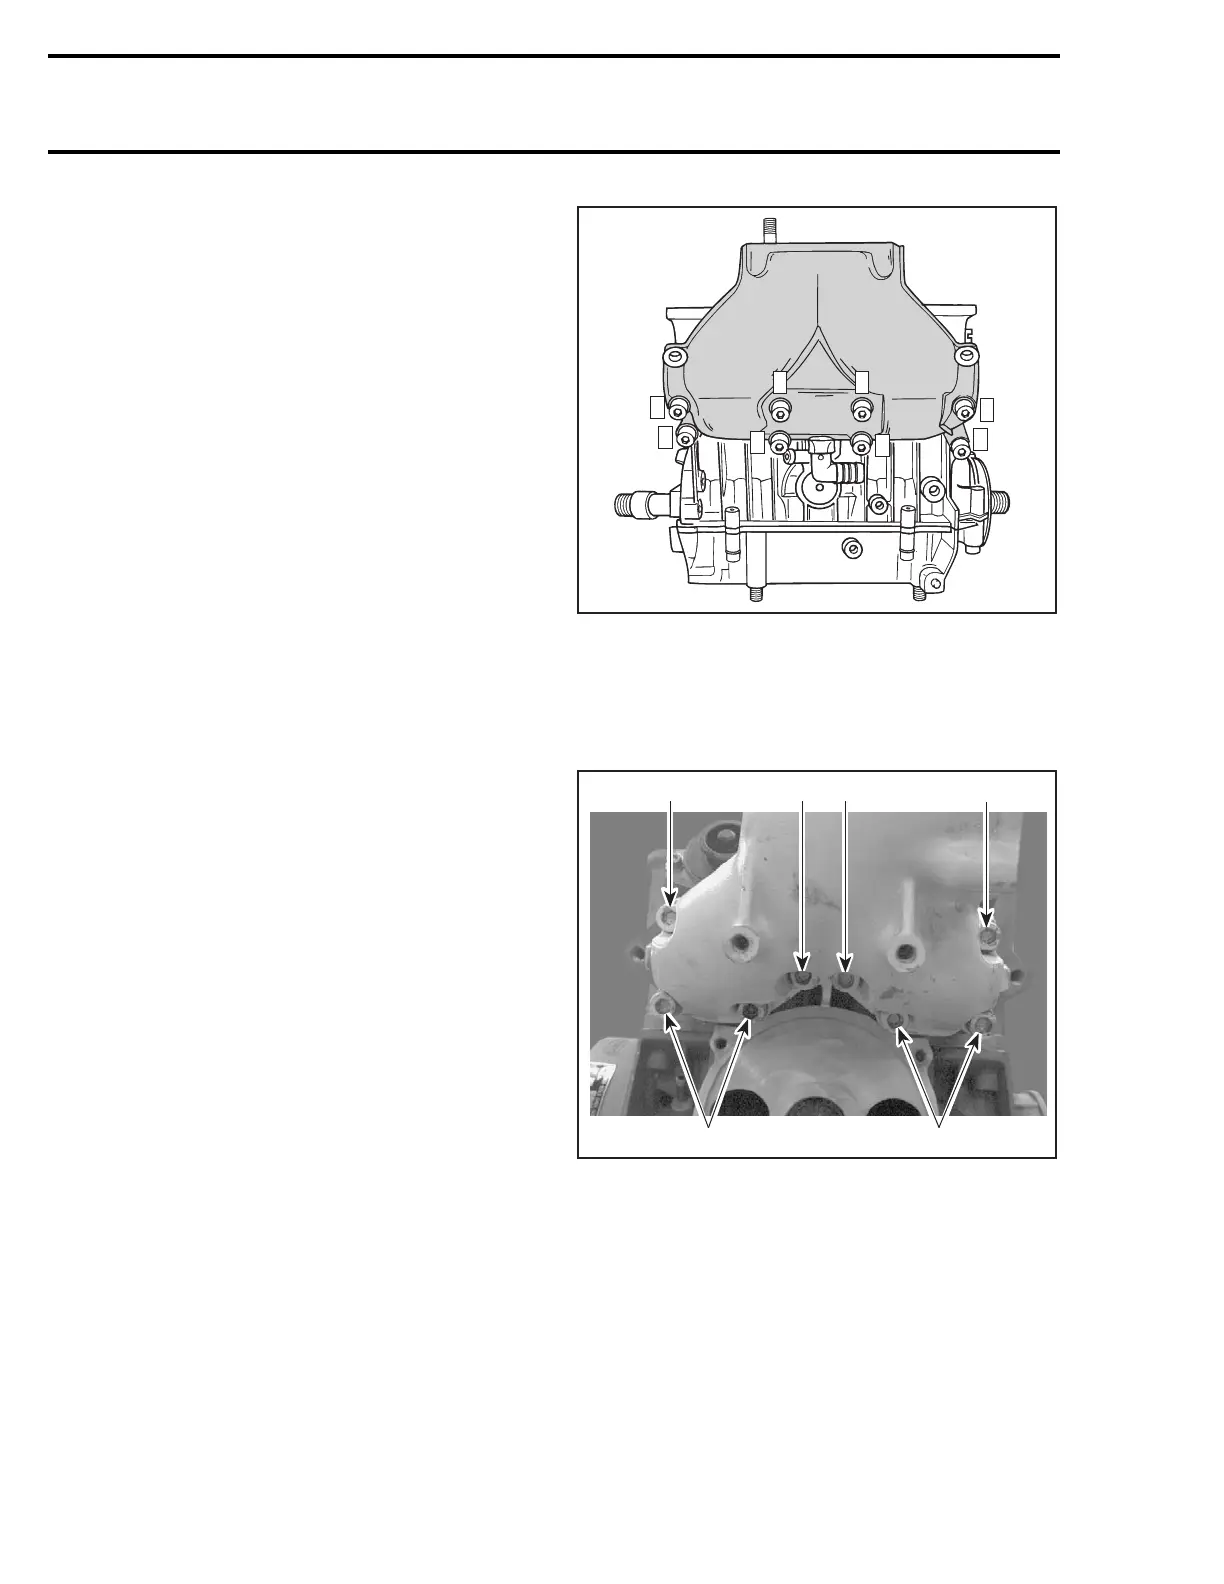
787 RFI Engines
Apply Loctite 518 on 2 screws no. 12. On the oth-
er screws no. 12, apply Molykote 111 on threads.
Install screws. Refer to the following illustration
for proper position of screws.
F01D82B
2
2
2
121
1. Screw with Loctite 518
2. Screw with Molykote 111
Torque exhaust manifold screws to 24 N•m
(17 lbf•ft) as per following illustrated sequence.
Repeat the procedure, retightening screws to
40 N•m(30lbf•ft).
174 smr2004-Complete Line Up

 Loading...


