Charts ECDIS-E User Guide
4-54 65934012
7. If required, enter notes on the shape in the Notes and
Labels tab. If a name is entered in the Display Label
field, the name will be displayed underneath the origin
point of the shape.
8. To create a date dependency for the object see `Creating Date
Dependent Objects'.
9. To exit the Create Chart Objects mode click the Done button, the
symbols created are fixed in position and the view returns to the
Edit folder.
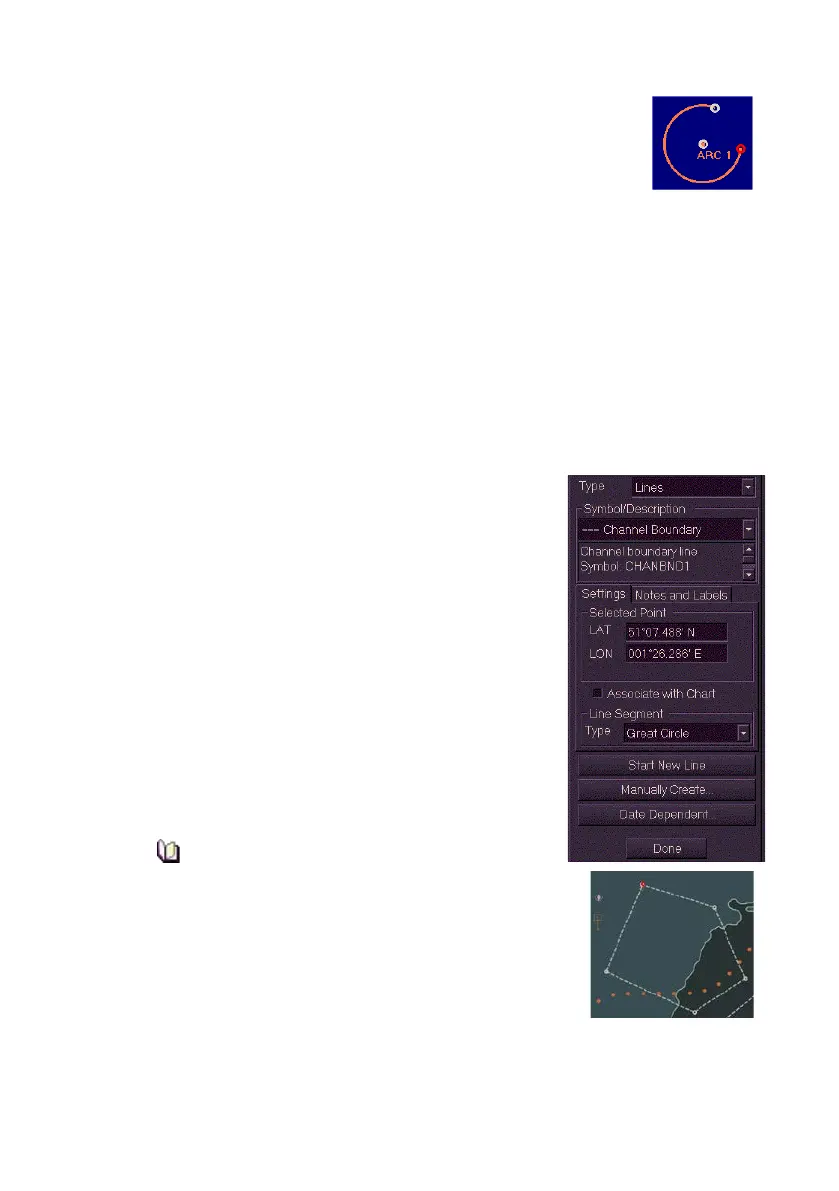
Creating Lines and Areas
In the creation of line and area objects you must specify the multiple
geographic positions that form the line or area.
To create a line or area do the following:
1. From the Type drop down arrow select either
Line or Area.
2. Click on the Symbol/Description drop down
list and select the symbol you want to create.
3. Move the cursor into the display and click in
the area of the where you want the first point
of the line or area positioned. The first point is
created as a small red circle and its LAT/LON
position is shown, you can edit the position by
changing the LAT/LON values.
4. To enter further points left click in the display.
The points previously created appear as white
circles and the last created point appears as a
red circle. The system automatically connects
each point with direct lines, and areas created
are automatically shaded.
Lines require two points or more and
areas require three or more points to be
correctly specified.
5. To save the current chart object and start a new
line or area click on the Start New Line/Area
button. A new line or area can now be created
on the display.
6. To append a new point to a line or area click on the Manually
Create button. The screen prompts for a LAT / LON position.
 Loading...