Multi Pro 5800Hydraulic System Page 5 − 82
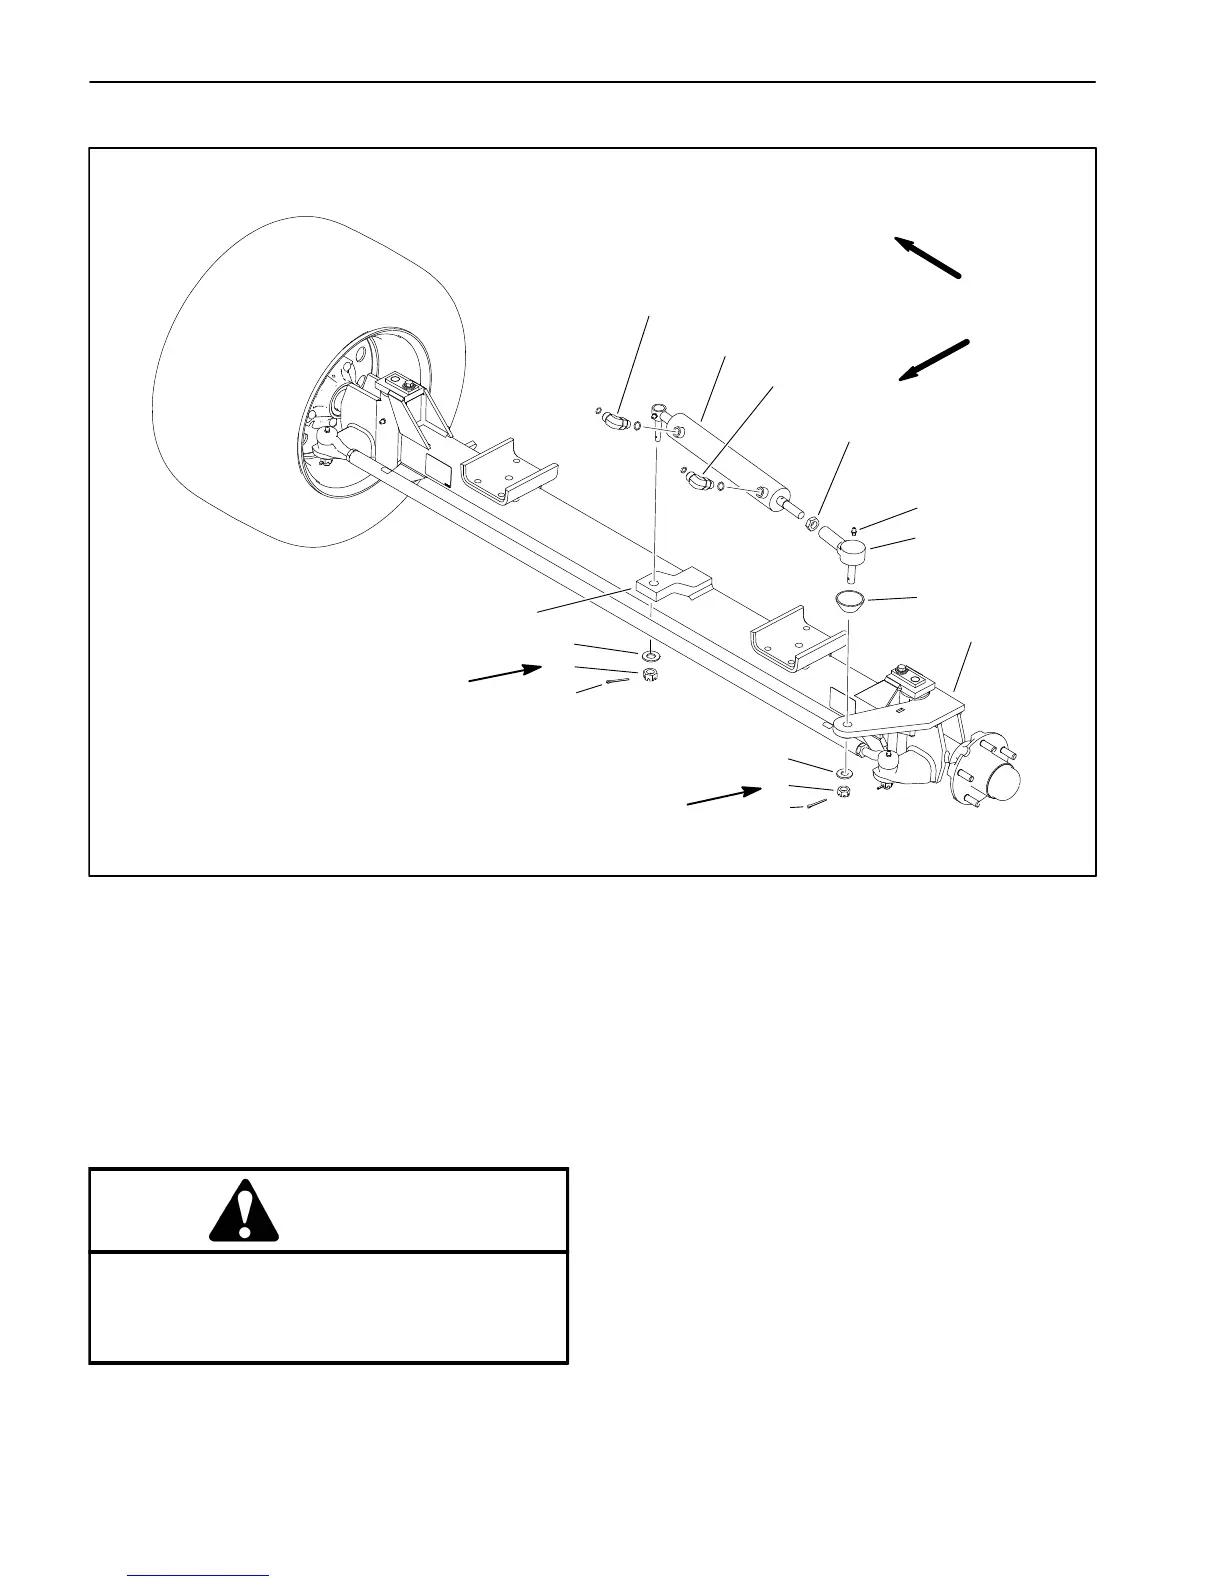
Steering Cylinder
1. Front axle
2. 90
o
hydraulic fitting (2)
3. Steering cylinder
4. Jam nut
5. Grease fitting
6. Ball joint
7. Rod end seal
8. Front axle spindle
9. Thrust washer
10. Slotted hex nut
11. Cotter pin
12. Thrust washer
13. Lock nut
14. Cotter pin
Figure 59
FRONT
RIGHT
20 to 25 ft−lb
(27 to 34 N−m)
11
12
1
2
2
3
4
7
8
9
10
20 to 25 ft−lb
(27 to 34 N−m)
13
14
5
6
Removal (Fig. 59)
1. Park the machine on a level surface, engage the
parking brake and stop the engine. Remove the key
from the ignition switch.
CAUTION
Rotate steering wheel and depress traction ped-
al in both forward and reverse to relieve hydrau-
lic system pressure and to avoid injury from
pressurized hydraulic oil.
2. Operate all hydraulic controls to relieve hydraulic
system pressure.
3. Read the General Precautions for Removing and
Installing Hydraulic System Components at the begin-
ning of the Service and Repairs section of this chapter.
4. Label hydraulic hoses for assembly purposes. Thor-
oughly clean hydraulic hose ends and fittings prior to
disconnecting the hoses from steering cylinder.
5. Disconnect hydraulic hoses from steering cylinder
(Fig. 60). Allow hoses to drain into a suitable container.

 Loading...


