Multi Pro 5800−DPage 3 − 18Kubota Diesel Engine
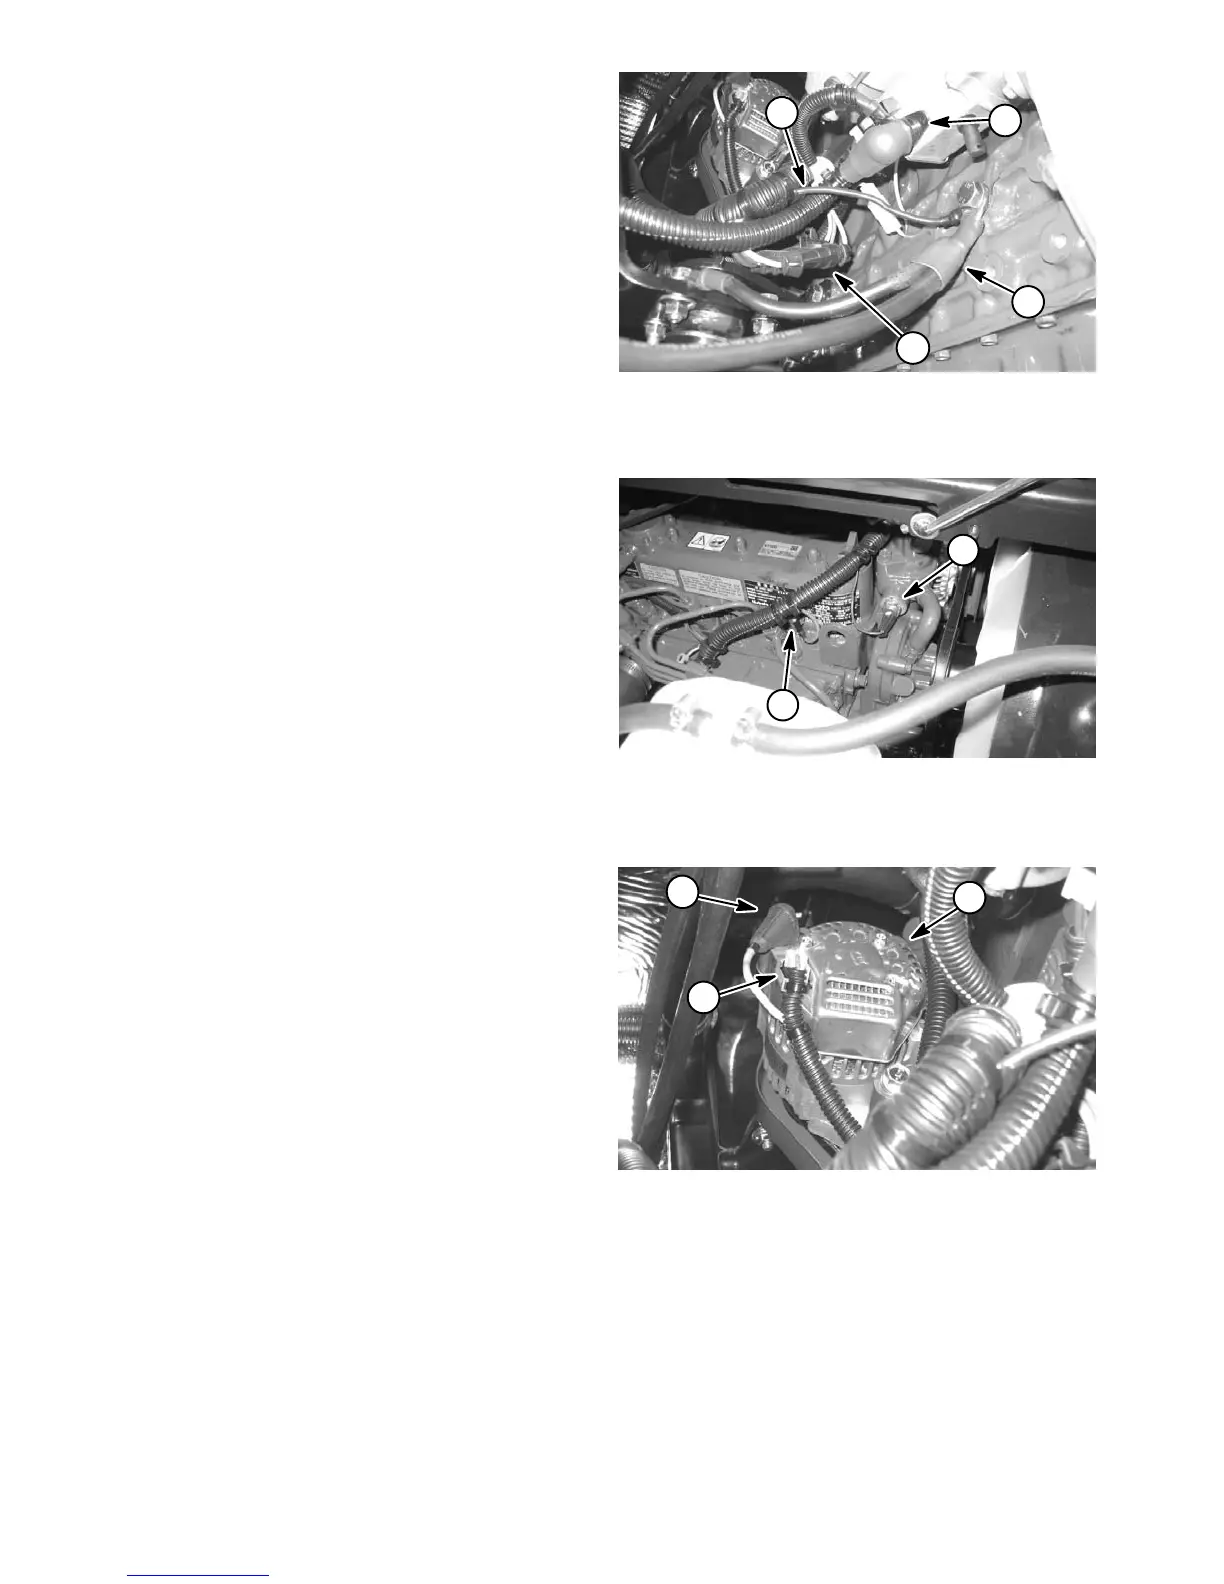
17.Label and disconnect wire harness connectors at the
following locations:
A. Remove positive battery cable and fusible link
connector from starter motor solenoid stud (Fig. 10).
B. Disconnect wire harness connector from starter
motor.
C. Remove cap screw and lock washer that secure
negative battery cable and wire harness ground wire
to engine block (Fig. 10).
D. Remove wire harness connector from glow plug
terminal (Fig. 11).
E. Disconnect wire harness connector from temper-
ature sender (Fig. 11).
F. Remove cable from alternator stud and discon-
nect wire harness connector from alternator
(Fig. 12).
G. Disconnect wire harness connector from oil pres-
sure switch.
H. Disconnect wire harness connector from fuel
stop solenoid (Fig. 13).
18.Clamp fuel supply hose after the fuel/water separa-
tor to prevent leakage (Fig. 13). Disconnect fuel supply
hose from the fuel injector pump on engine and fuel re-
turn hose from the fuel rail. Position disconnected fuel
hoses away from engine.
19.Remove throttle cable from injector pump (Fig. 13):
A. Loosen screw that secures cable stop on throttle
cable. Slide cable stop from cable.
B. Loosen cable clamp and remove throttle cable
from under clamp.
C. Slide cable end out of swivel and position throttle
cable away from the engine.
20.Record location of any cable ties used to secure the
wiring harness, fuel lines or hydraulic hoses to the en-
gine assembly. Remove cable ties attached to engine
assembly.
21.Remove flange nuts, snubbing washers and cap
screws securing the engine brackets to engine mounts
(Fig. 8).
Figure 10
1. Starter motor stud
2. Negative battery cable
3. Harness ground wire
4. Fusible link connector
1
2
3
4
Figure 11
1
2
1. Temperature sender 2. Glow plug terminal
Figure 12
1. Alternator
2. Alternator stud
3. Harness connector
2
3
1

 Loading...


