383
Corrective Maintenance
Pinch Roller
8/9/07 ZM400/ZM600 Maintenance Manual 14207L-001 A
4.
5.
Remove and discard the bearings and old pinch roller.
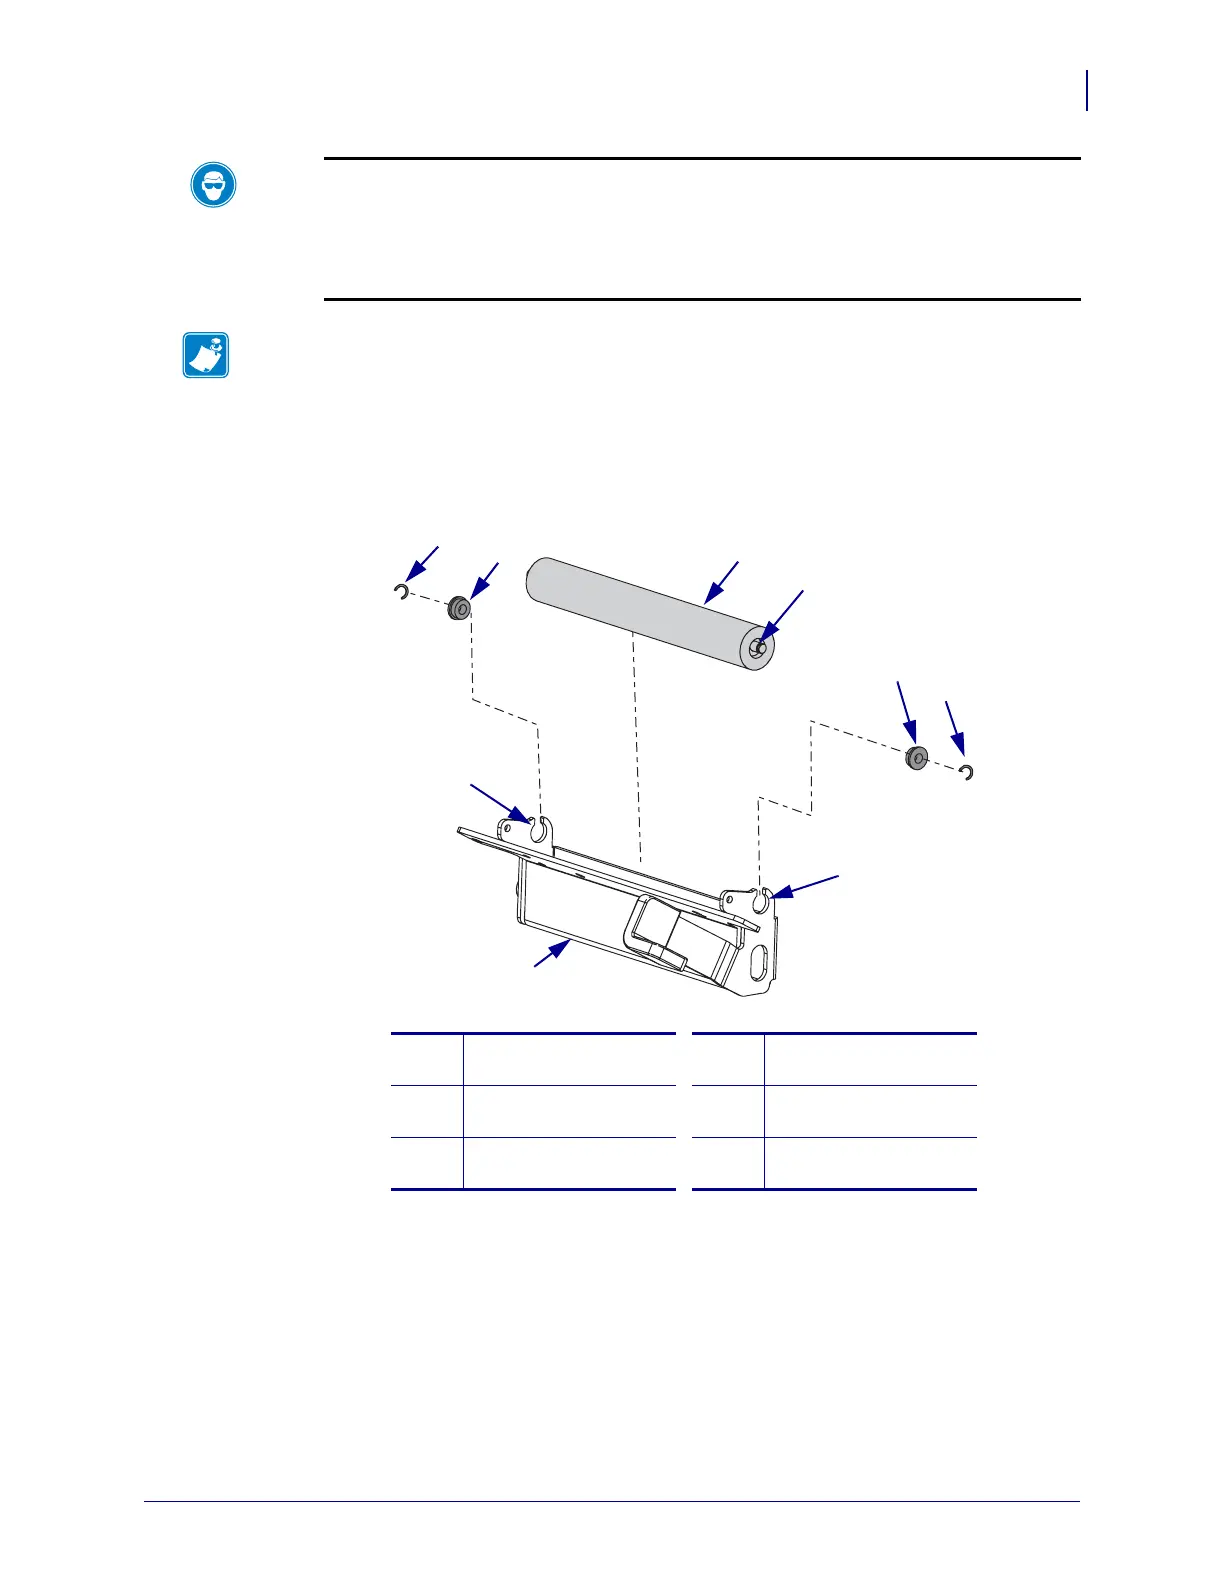
Figure 242 • Removing and Installing E-rings and Bearings
Install the Pinch Roller
1. See Figure 242 on page 383. Install the new pinch roller in the notches in the pinch roller
holder assembly.
2. Install the two new bearings on the shaft of the pinch roller, flange facing out, as shown.
3. Install two new E-rings in the grooves on the roller shaft.
Caution • Wear protective eyewear when installing or removing E-rings, C-clips, snap
rings, springs, and mounting buttons. These are under tension and could fly off.
See Figure 242. Using a small flat blade screwdriver or an awl, remove and discard the
two E-rings.
Note • If you have trouble reaching the E-rings and have a peel assembly installed, you
may have to remove it to access the E-rings. See Figure 244. Loosen the two mounting
screws, and then remove the peel assembly from the printer.
1
E-rings
(2 used, 2 spares)
4
Groove for E-ring
2
Roller bearings (2)
5
Pinch roller mounting
hole
3
Pinch roller
6
Pinch roller holder
assembly
1
2
3
4
2
1
5
5
6
 Loading...