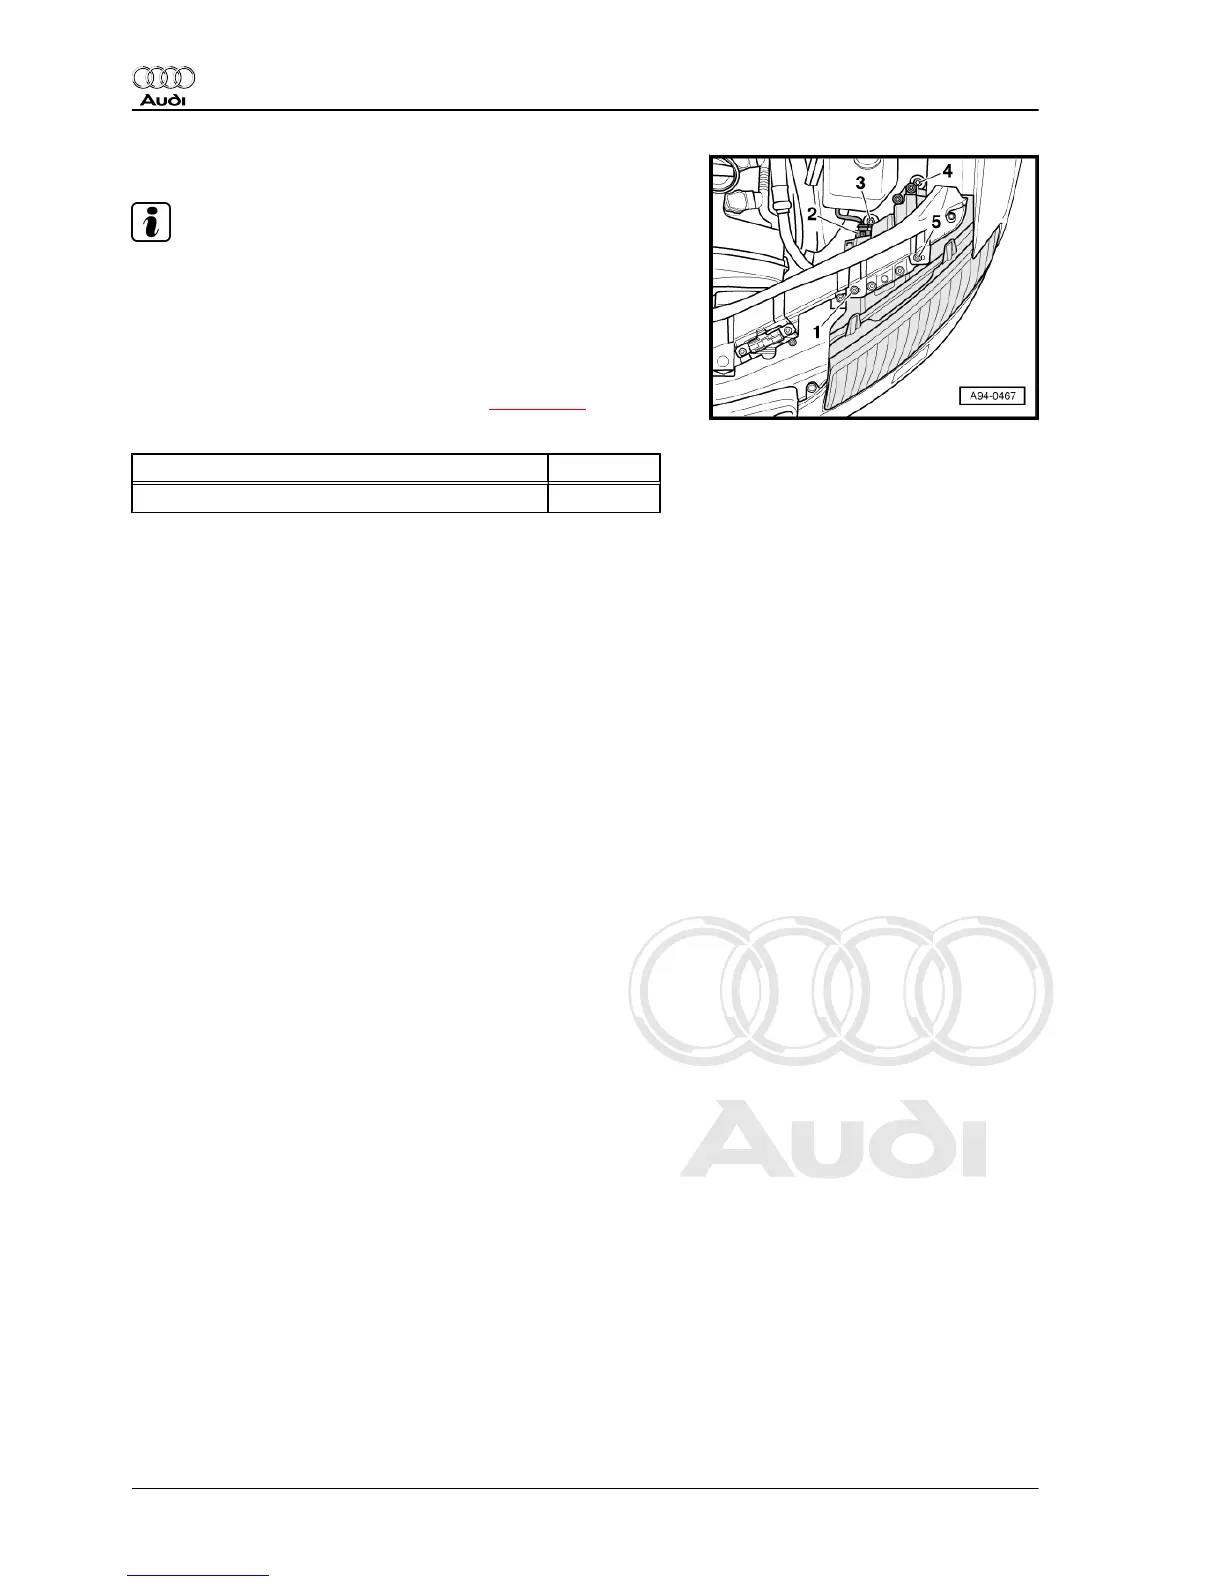
– Tighten bolts -1- and -3 ... 5-.
Note
When the bolt -3- is tightened the adjusting nut of the adjuster
automatically rotates against the mounting point of the headlight
housing and fixes it in place.
– Avoid applying pressure to the bolt when securing; the adjust‐
er nut of the adjuster must remain free to turn.
– Following installation, adjust headlights ⇒ page 140 .
Tightening torque
Component Nm
Headlight to lock carrier 6
3.3 Adjusting headlights
♦ The following checking and adjustment procedures apply to
all countries.
♦ However, national legislation and guidelines for individual
countries must be adhered to.
3.3.1 Requirements for checking and adjust‐
ing
♦ Tyre pressure OK
♦ Headlight lenses must be clean and dry.
♦ Headlight lenses must not be damaged.
♦ Reflectors and bulbs OK
♦ Air reservoir for air suspension full, if necessary start engine
and allow to run at idling speed for approx. 2 minutes then
switch off engine.
♦ Release electromechanical parking brake to relieve any load
on suspension.
♦ Make sure steering wheel is at centre position with wheels
pointing straight ahead.
♦ Vehicle and headlight adjustment unit must be on a level sur‐
face.
♦ Headlight adjustment unit must be aligned to vehicle ⇒ Op‐
erating instructions for headlight adjustment unit .
Ensure that headlight adjustment unit is in front of headlight at a
distance of 30 cm.
♦ Dip setting must be adjusted.
Dip settings (in “%”) are marked on the top of the headlight. The
headlights must be adjusted in accordance with these values. The
percentage value is for a range of 10 m. Example: Converting a
dip setting of 1.0 % = 10 cm.
3.3.2 Checking headlight settings
– Start engine.
– Switch on dipped headlights.
– Set vehicle level to normal.
Audi A8 2003 ➤
Electrical system - Edition 08.2014
140 Rep. gr.94 - Lights, bulbs, switches - exterior