Protected by copyright. Copying for private or commercial purposes, in part or in whole, is not
permitted unless authorised by AUDI AG. AUDI AG does not guarantee or accept any liability
with respect to the correctness of information in this document. Copyright by AUDI AG.
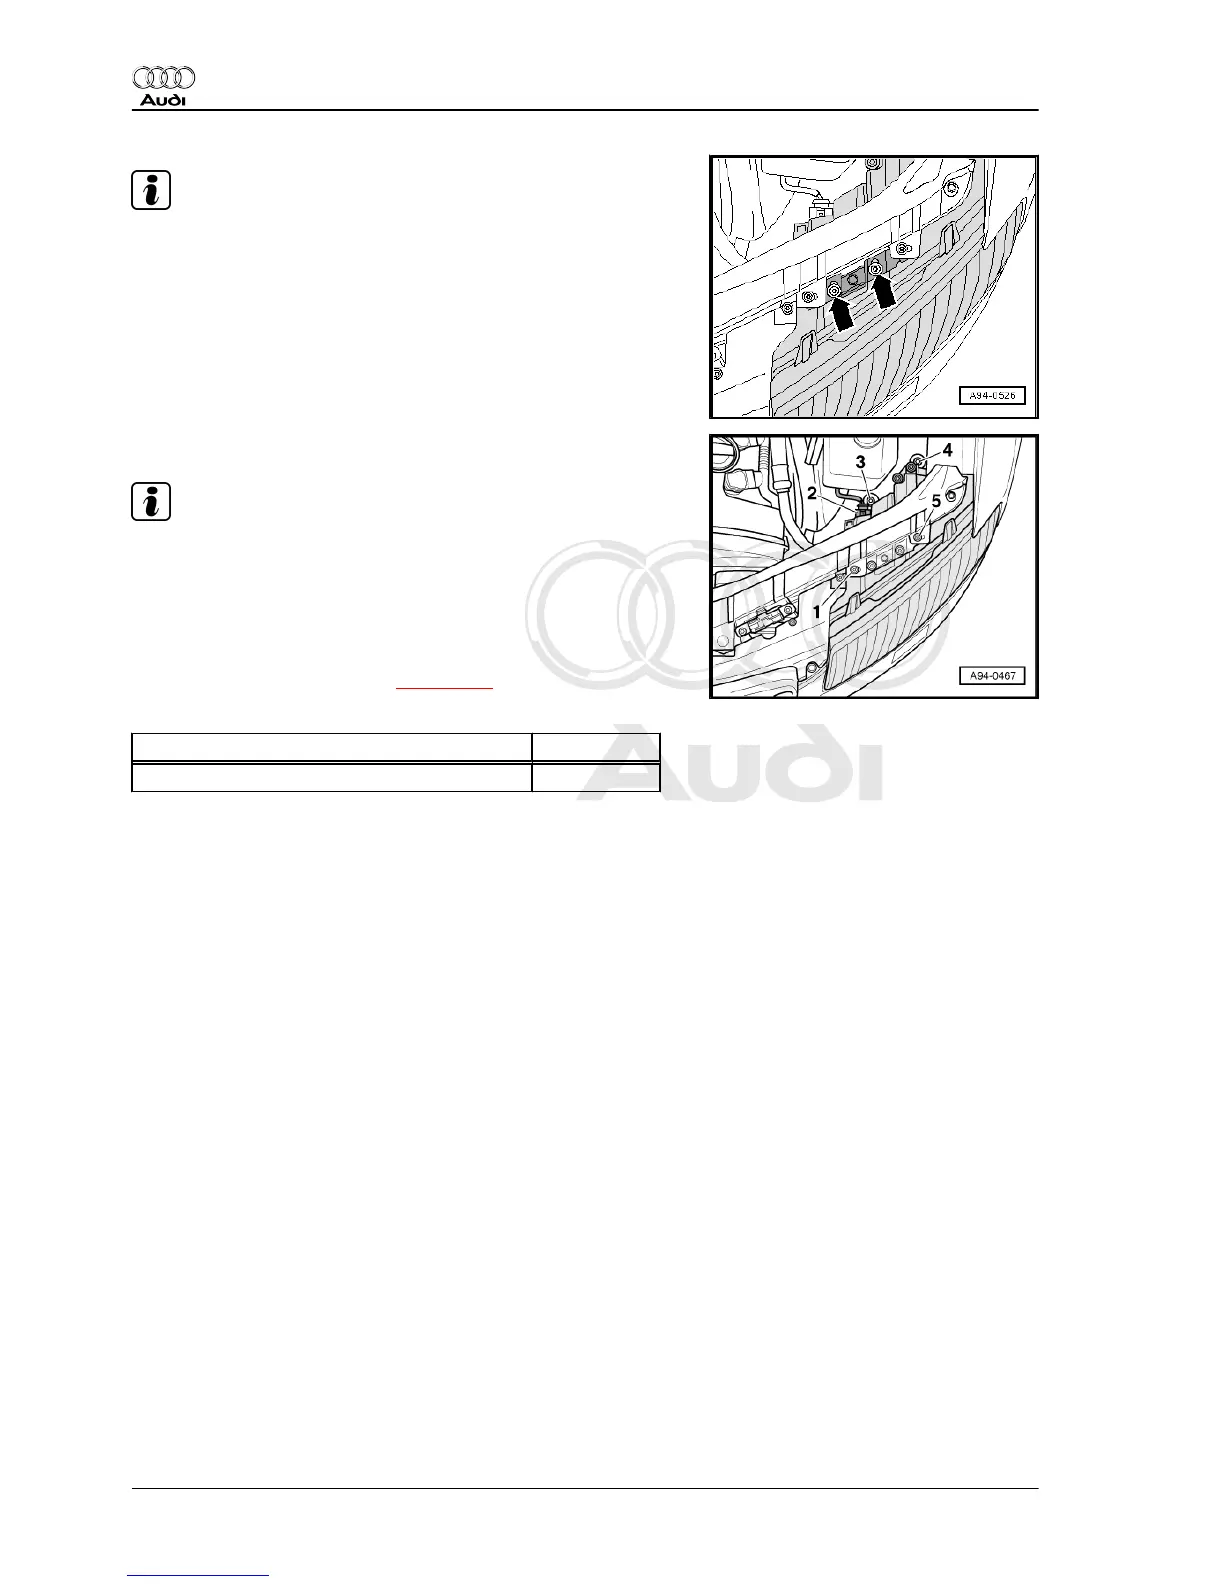
Note
Headlight can be aligned at top edge by slackening off both bolts
-arrows- and swivelling headlight housing.
– Tighten bolts -1- and -3 ... 5-.
Note
When the bolt -3- is tightened the adjusting nut of the adjuster
automatically rotates against the mounting point of the headlight
housing and fixes it in place.
– Avoid applying pressure to the bolt when securing; the adjust‐
er nut of the adjuster must remain free to turn.
– Check headlight adjustment ⇒ page 150 .
Tightening torque
Component Nm
Headlight to lock carrier 6
4.4 Adjusting headlights
♦ The following checking and adjustment procedures apply to
all countries.
♦ However, national legislation and guidelines for individual
countries must be adhered to.
4.4.1 Requirements for checking and adjust‐
ing
♦ Tyre pressure OK
♦ Headlight lenses must be clean and dry.
♦ Headlight lenses must not be damaged.
♦ Reflectors and bulbs OK
♦ Air reservoir for air suspension full, if necessary start engine
and allow to run at idling speed for approx. 2 minutes then
switch off engine.
♦ Release electromechanical parking brake to relieve any load
on suspension.
♦ Make sure steering wheel is at centre position with wheels
pointing straight ahead.
♦ Vehicle and headlight adjustment unit must be on a level sur‐
face.
♦ Headlight adjustment unit must be aligned to vehicle ⇒ Op‐
erating instructions for headlight adjustment unit .
Ensure that headlight adjustment unit is in front of headlight at a
distance of 30 cm.
Audi A8 2003 ➤
Electrical system - Edition 08.2014
150 Rep. gr.94 - Lights, bulbs, switches - exterior