Protected by copyright. Copying for private or commercial purposes, in part or in whole, is not
permitted unless authorised by AUDI AG. AUDI AG does not guarantee or accept any liability
with respect to the correctness of information in this document. Copyright by AUDI AG.
16.2 Removing and installing outer tail light
cluster
Removing
– Switch off ignition and take out ignition key.
– Turn light switch to position “0”.
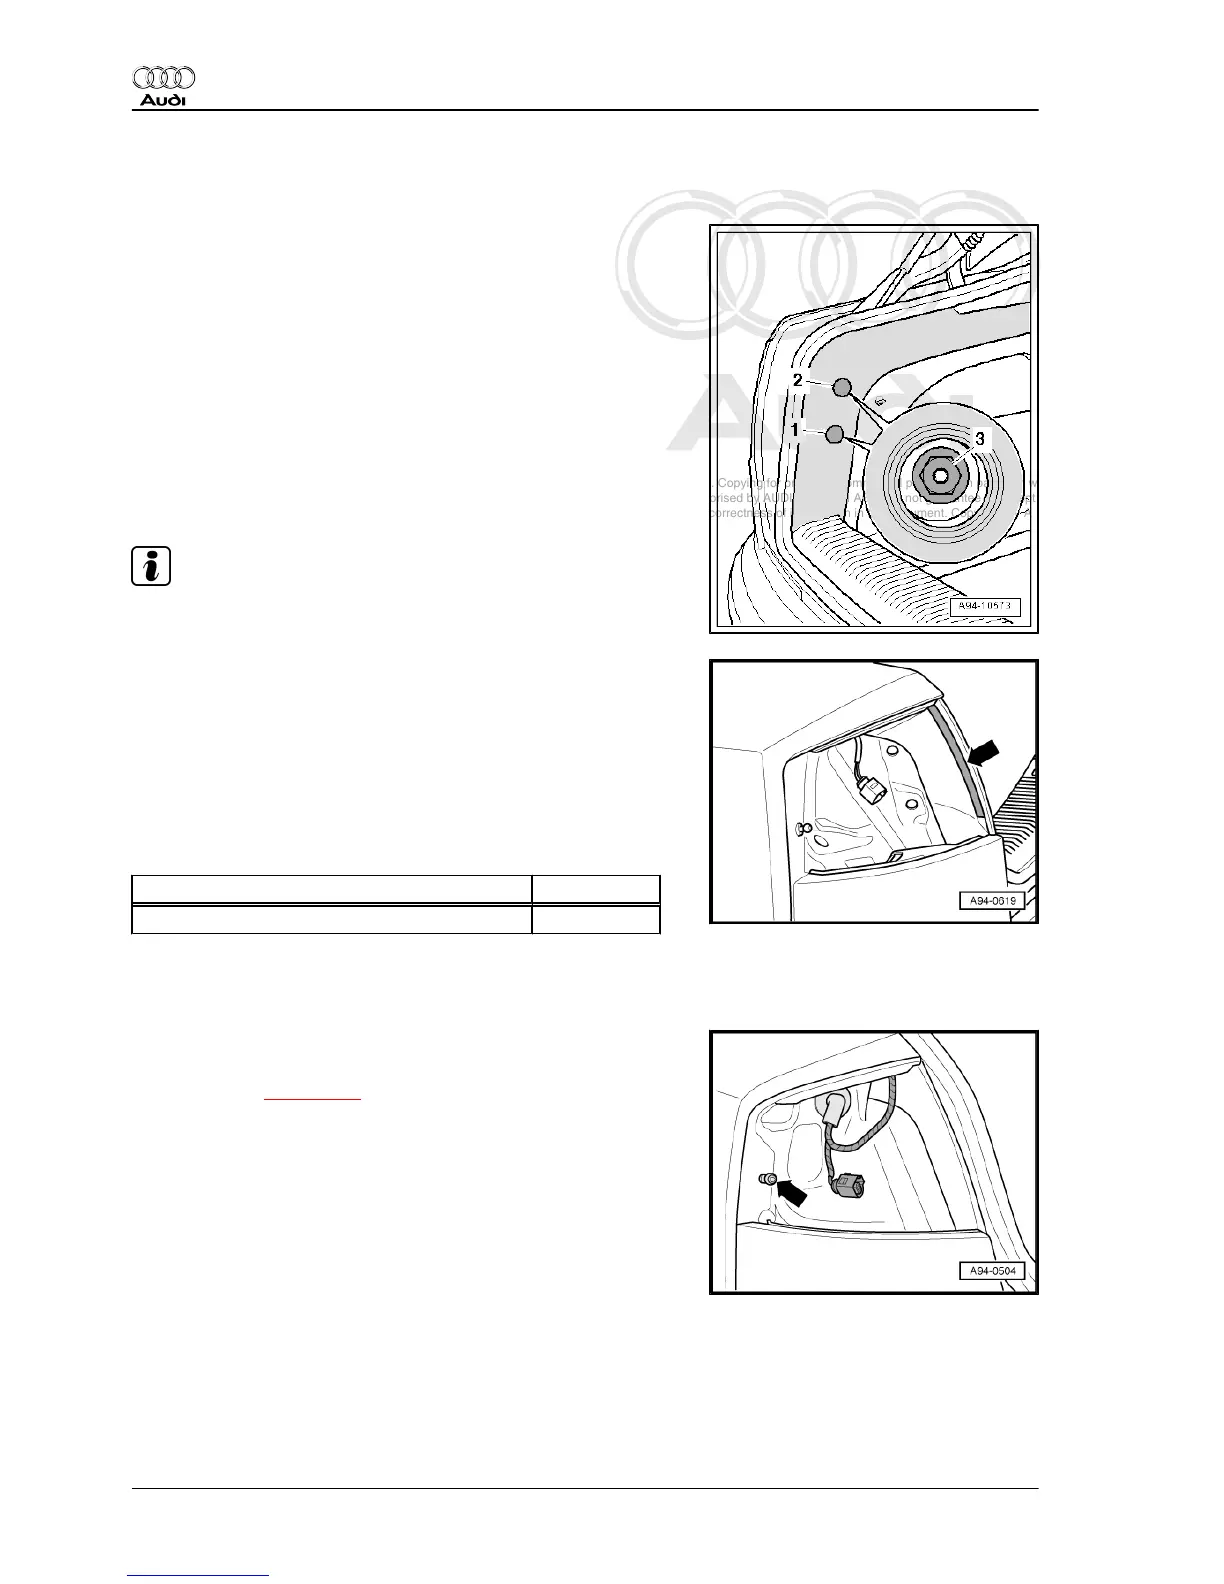
– Unclip plugs -1- and -2- from luggage compartment lining.
– Unscrew nuts -3-.
– Slide tail light cluster outwards and disengage from retaining
pin at body.
– Unplug electrical connector at tail light cluster.
Installing
Installation is carried out in the reverse order; note the following:
Note
Renew centre hex studs if sealing washers are damaged.
– Remove double-sided adhesive tape -arrow- at body cover
panel and tail light cluster.
– Attach new adhesive strip and remove protective film.
– Position tail light cluster on retaining pin from outside and
press towards centre of vehicle until it engages.
– Press body cover panel onto tail light cluster so that double-
sided adhesive tape becomes attached.
Tightening torque
Component Nm
Tail light to body 3
16.3 Aligning tail light cluster with body con‐
tour
Adjustment in direction of travel:
– Gradually screw retaining pin -arrow- in/out with tail light clus‐
ter removed ⇒ page 228 .
Audi A8 2003 ➤
Electrical system - Edition 08.2014
228 Rep. gr.94 - Lights, bulbs, switches - exterior