Protected by copyright. Copying for private or commercial purposes, in part or in whole, is not
permitted unless authorised by AUDI AG. AUDI AG does not guarantee or accept any liability
with respect to the correctness of information in this document. Copyright by AUDI AG.
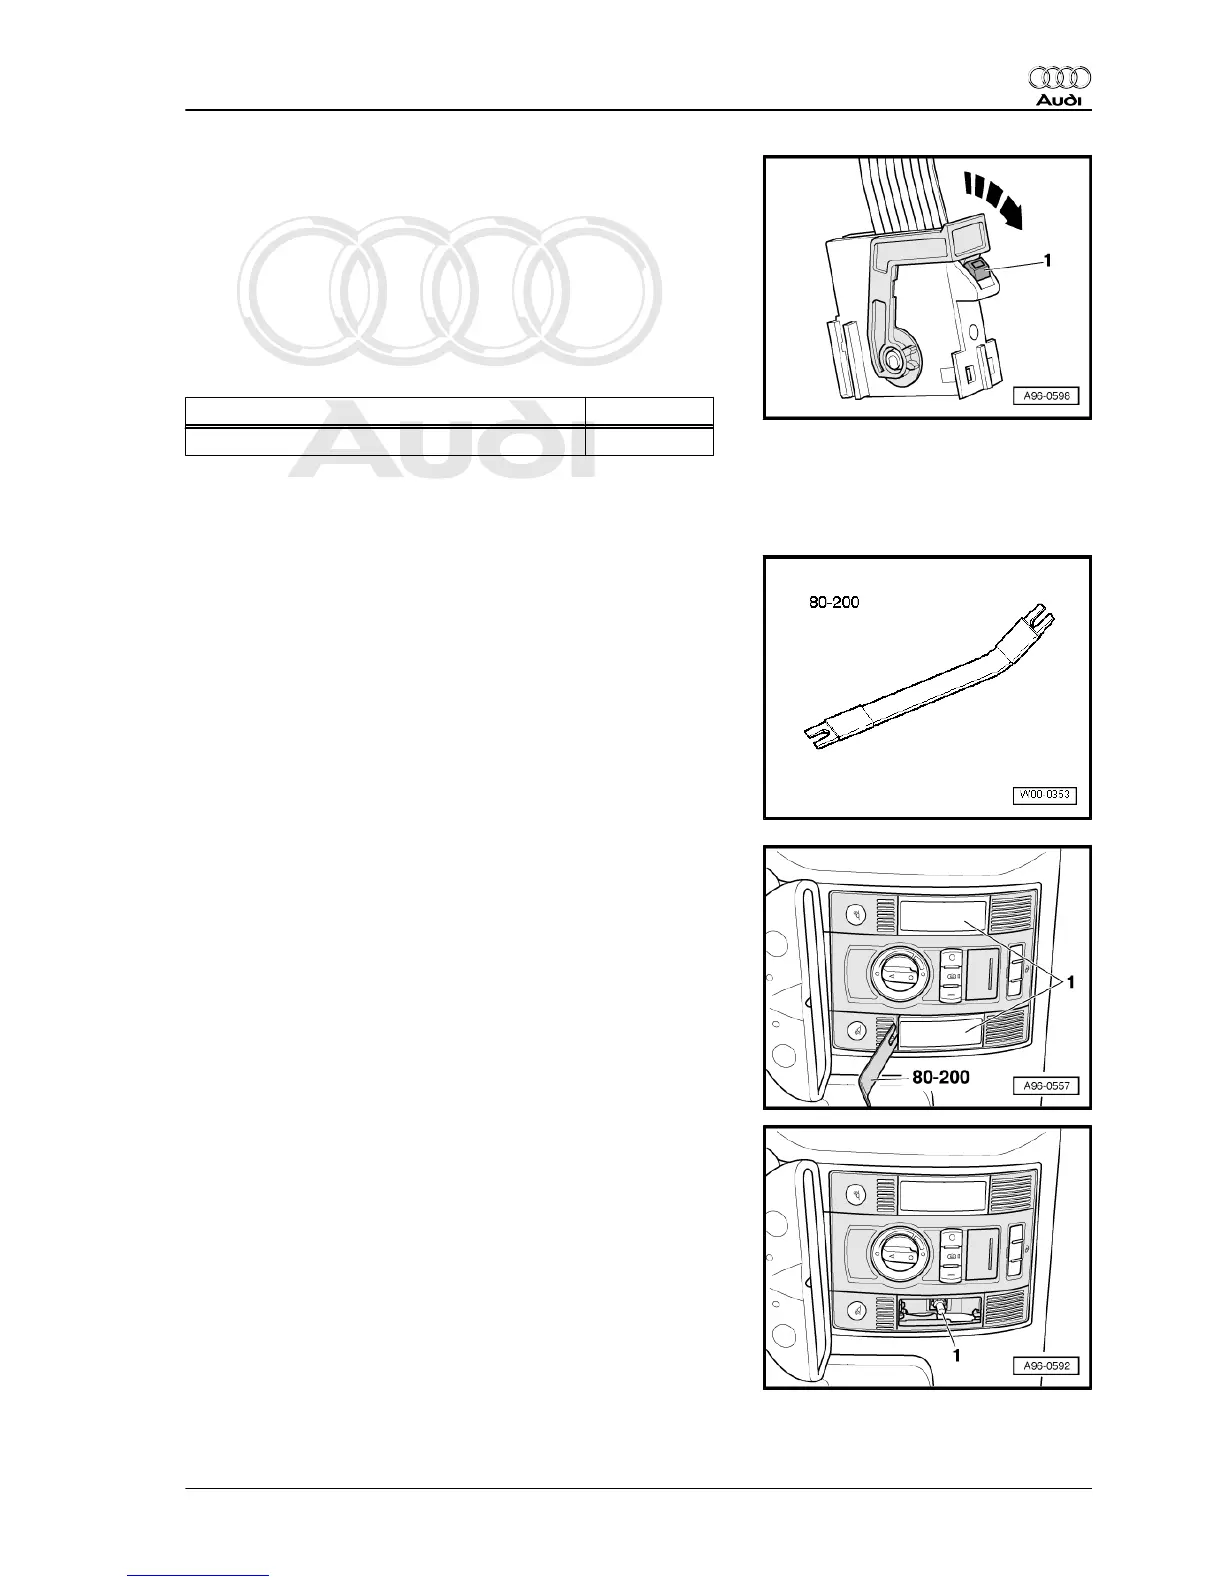
– Press retaining tab -1- at multi-pin connector.
– Release retaining clips of connectors -arrow- and unplug con‐
nectors.
– Unplug remaining electrical connectors.
Installing
Installation is carried out in the reverse order; note the following:
– Fit interior light and secure.
Tightening torque
Component Nm
Interior light to roof trim 4.5
7.4 Renewing bulbs for interior light (front)
Special tools and workshop equipment required
♦ Removal lever - 80 - 200-
Removing
– Carefully prise lenses -1- out of interior light on front edge us‐
ing removal lever - 80 - 200- as shown in illustration.
– Take glass base bulb -1- (12 V, 6 W) out of clamp-type holder.
Installing
Installation is carried out in the reverse order; note the following:
– Press on lens for interior light until it engages.
Audi A8 2003 ➤
Electrical system - Edition 08.2014
7. Lights and switches in roof trim 295