Protected by copyright. Copying for private or commercial purposes, in part or in whole, is not
permitted unless authorised by AUDI AG. AUDI AG does not guarantee or accept any liability
with respect to the correctness of information in this document. Copyright by AUDI AG.
2 Lights and switches in dash panel
Observe notes on contact corrosion ⇒ page 264 .
2.1 Removing and installing buttons in in‐
strument cluster trim
Removing
– Move steering wheel down and to rear as far as possible,
making use of full range of steering column adjuster.
– Switch off ignition and take out ignition key.
– Remove trim panel (left-side) ⇒ Rep. gr. 70 .
– Remove trim panel with switch unit (right-side) ⇒ Rep. gr. 70 .
– Remove dash panel vents ⇒ Rep. gr. 70 .
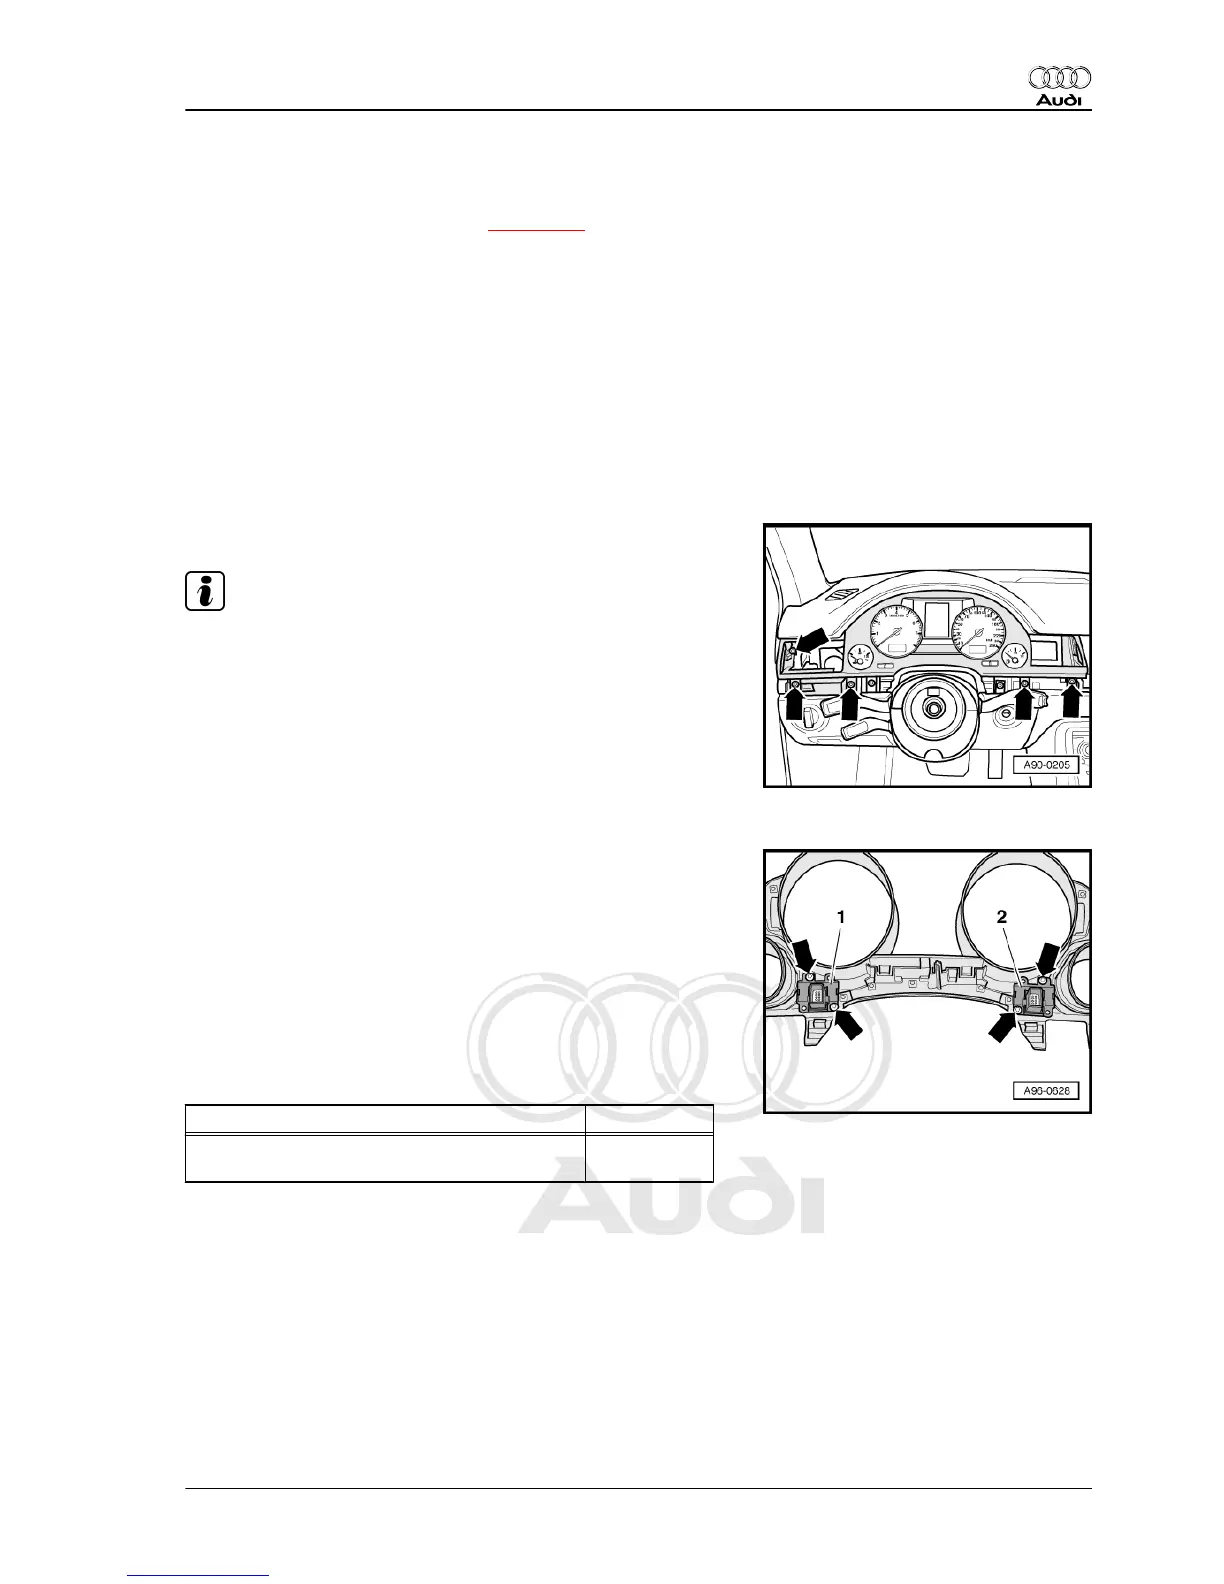
– Unscrew bolts -arrows-.
Note
Attach a cloth with adhesive tape to steering column trim and
steering column levers to protect them from damage.
– Pull trim slightly away from instrument cluster.
– Unplug electrical connectors at instrument cluster trim.
– Engage turn signal switch in bottom switch position.
– Actuate “touch-wipe” function and detach trim for instrument
cluster (maintain wiper switch position).
– Unscrew bolts -arrows-.
– Detach buttons -1- and -2-.
Installing
Installation is carried out in the reverse order; note the following:
– Install dash panel vents ⇒ Rep. gr. 70 .
– Install trim panel with switch unit (right-side) ⇒ Rep. gr. 70 .
– Install trim panel (left-side) ⇒ Rep. gr. 70 .
Tightening torque
Component Nm
Instrument cluster/trim for instrument cluster to
dash panel
3
Audi A8 2003 ➤
Electrical system - Edition 08.2014
2. Lights and switches in dash panel 265