Protected by copyright. Copying for private or commercial purposes, in part or in whole, is not
permitted unless authorised by AUDI AG. AUDI AG does not guarantee or accept any liability
with respect to the correctness of information in this document. Copyright by AUDI AG.
❑ Removing and installing ⇒ page 170
26 - Turn signal bulb
❑ 2x
❑ Orange: 12 V, 16 W
❑ Silver: 12 V, 24 W
❑ Depending on version; Assignment ⇒ Electronic parts catalogue
❑ Renewing bulb ⇒ page 169
27 - 6 Nm
28 - Bracket for headlight housing
4.3 Removing and installing headlights
Removing
WARNING
High voltage! Danger to life!
♦ Ensure that any part of the gas discharge headlights
marked with yellow high-voltage warning symbols are de-
energised when you are working on them.
♦ Switch off ignition and all electrical equipment and remove
ignition key.
♦ Do not flash the headlights.
– Turn light switch to position “0”.
– Switch off ignition and all electrical equipment and remove ig‐
nition key.
– Do not flash the headlights.
– Remove front bumper cover ⇒ Rep. gr. 63 .
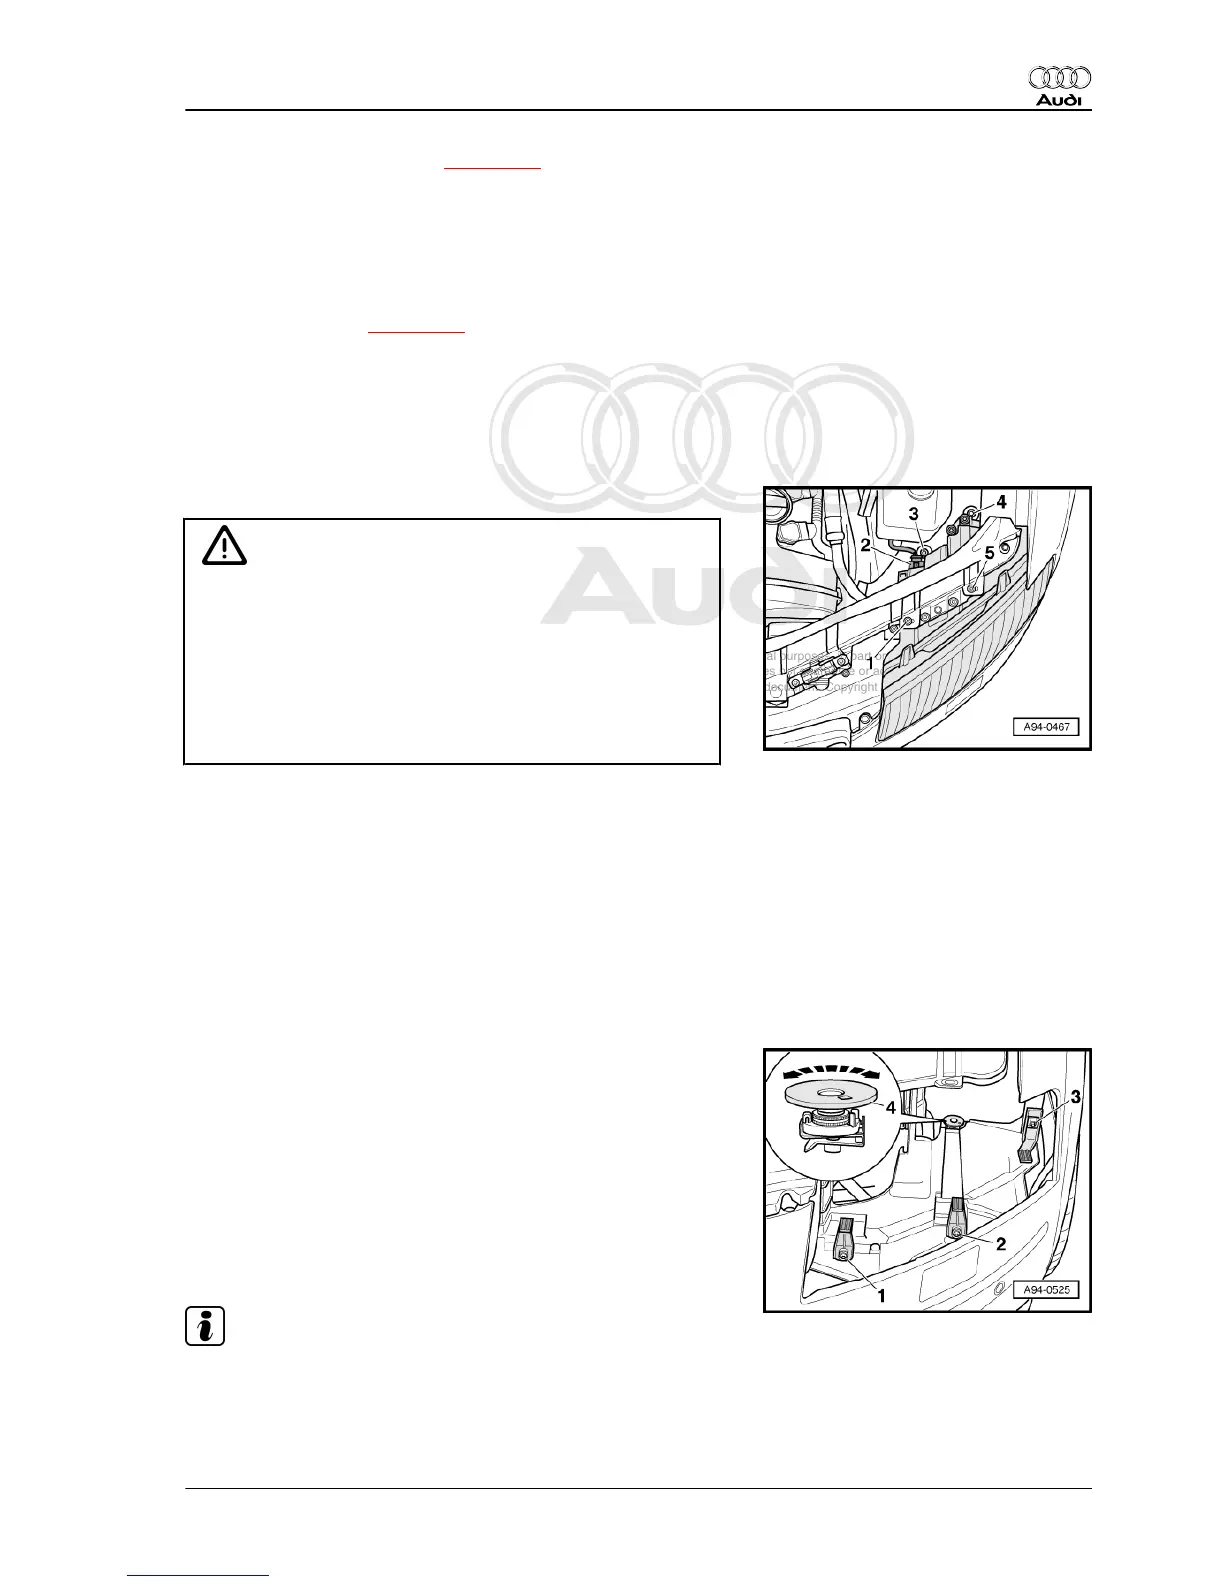
– Unscrew bolts -1- and -3 ... 5-.
– Unplug electrical connector -2-.
– Detach headlight to front.
Installing
Installation is carried out in the reverse order; note the following:
– Check adjuster nut -4- of adjuster for freedom of movement
-arrows-.
– Screw down adjuster nut as far as it will go, but do not tighten.
– Insert headlight.
– Install front bumper cover ⇒ Rep. gr. 63 .
– Align headlight with body contours (gap widths).
Note
Headlight can be aligned by slackening off bolts -1 … 3- and al‐
tering height of holders.
Audi A8 2003 ➤
Electrical system - Edition 08.2014
4. Gas discharge headlights 149