♦ Headlight lenses must be clean and dry.
♦ Headlight lenses must not be damaged.
♦ Reflectors and bulbs OK
♦ Air reservoir for air suspension full, if necessary start engine
and allow to run at idling speed for approx. 2 minutes then
switch off engine.
♦ Release electromechanical parking brake to relieve any load
on suspension.
♦ Make sure steering wheel is at centre position with wheels
pointing straight ahead.
♦ Vehicle and headlight adjustment unit must be on a level sur‐
face.
♦ Headlight adjustment unit must be aligned to vehicle ⇒ Op‐
erating instructions for headlight adjustment unit .
Ensure that headlight adjustment unit is in front of headlight at a
distance of 30 cm.
♦ Dip setting must be adjusted.
Dip settings (in “%”) are marked on the top of the headlight. The
headlights must be adjusted in accordance with these values. The
percentage value is for a range of 10 m. Example: Converting a
dip setting of 1.0 % = 10 cm.
5.4.2 Checking headlight settings
– Start engine.
– Switch on dipped headlights.
– Set vehicle level to normal.
– To do so, press the function selector button “CAR” on the MMI
operating unit. The main menu “adaptive air suspension” will
appear.
– Use the rotary pushbutton to select the “automatic” level.
Further information on the vehicle level can be found in the ⇒
MMI Operating Manual
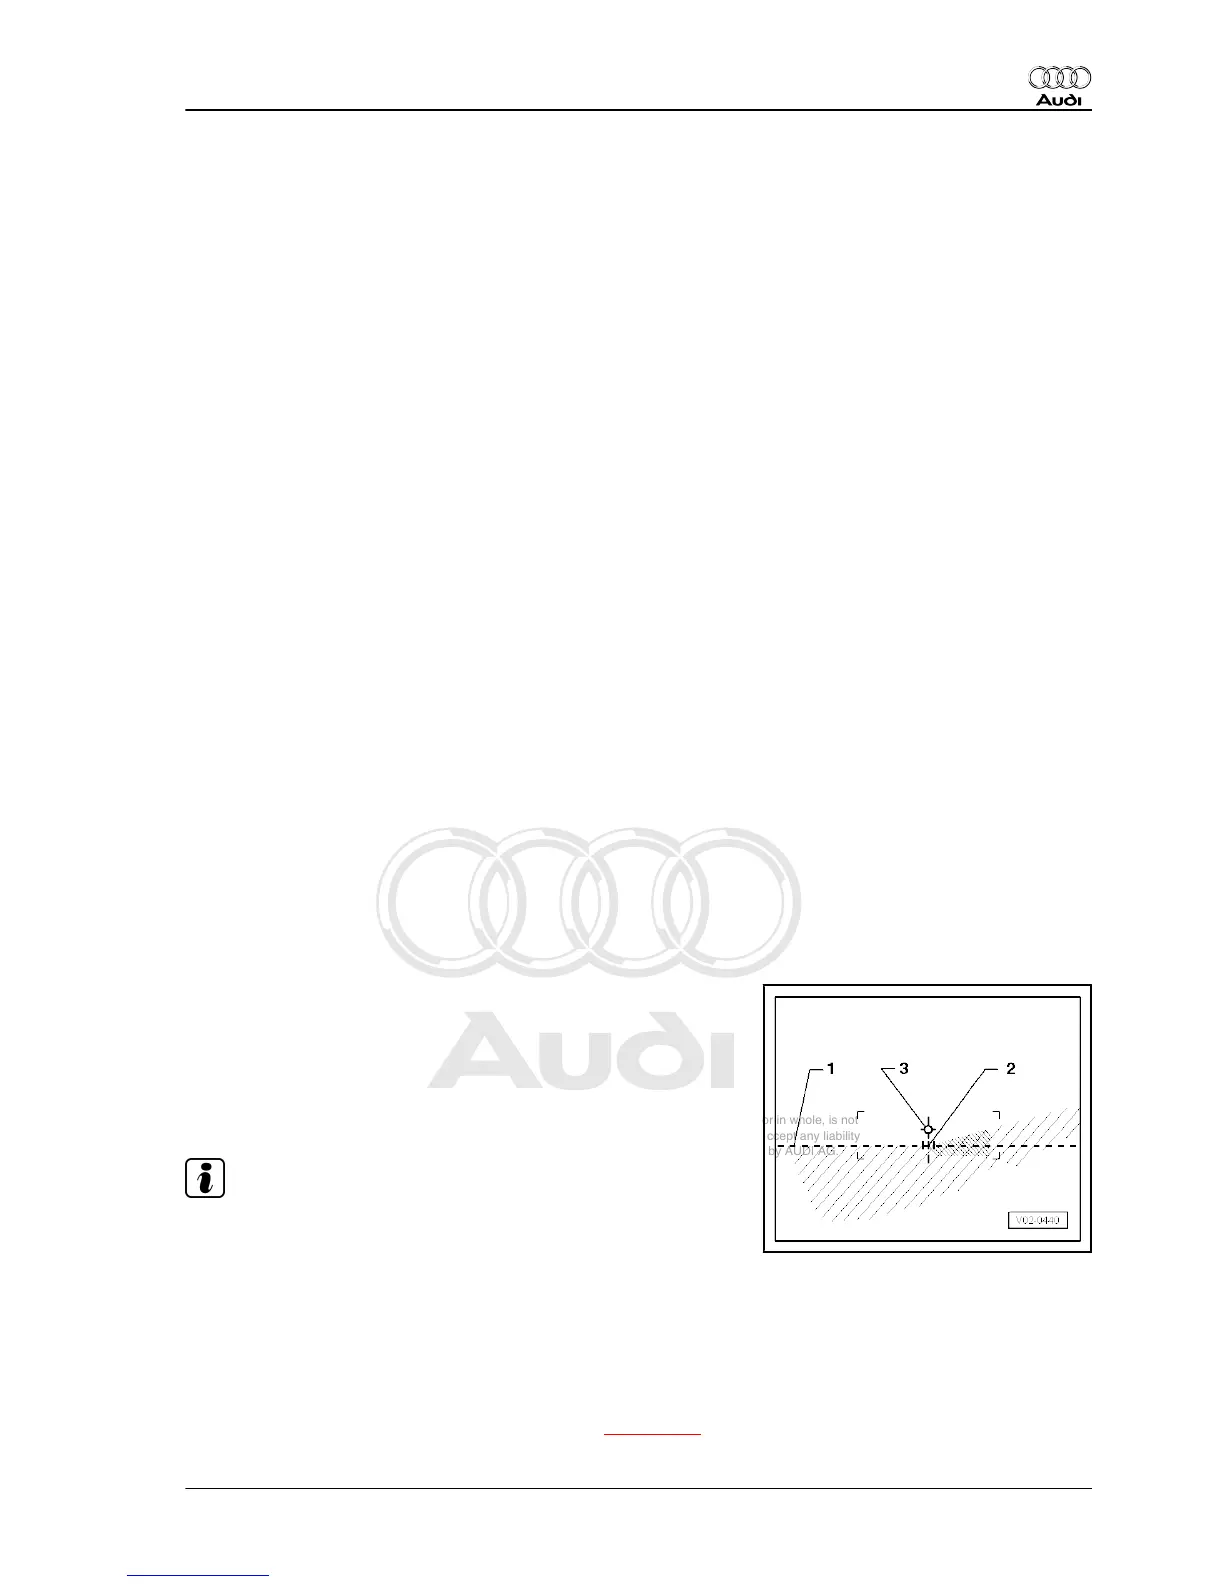
♦ The horizontal light-dark border should coincide with the set‐
ting line -1- of the test surface.
♦ The break-away point -2- between the horizontal section of the
light-dark border on the left and the rising section on the right
should coincide with the vertical line running through the cen‐
tral point -3-. The bright spot in the centre of the beam should
be to the right of the vertical line.
Note
♦
To make it easier to find the break-away point -2-, cover and
uncover the left half of the headlight (as seen in direction of
travel) a few times. Then check the dipped beam again.
♦
If dipped beams have been adjusted correctly the centre point
of the main beam should lie on central point -3-.
♦
If using an old test screen with a 15 ° setting line, the adjust‐
ment procedure is the same as for the new screen. Disregard
the 15° setting line to avoid incorrect settings.
– If headlight setting is not OK, adjust headlights ⇒ page 182 .
Audi A8 2003 ➤
Electrical system - Edition 08.2014
5. Gas discharge headlights - USA vehicles 181