Commissioning
8
CCD CAM 100 – Installation and Operating Manual 109/198
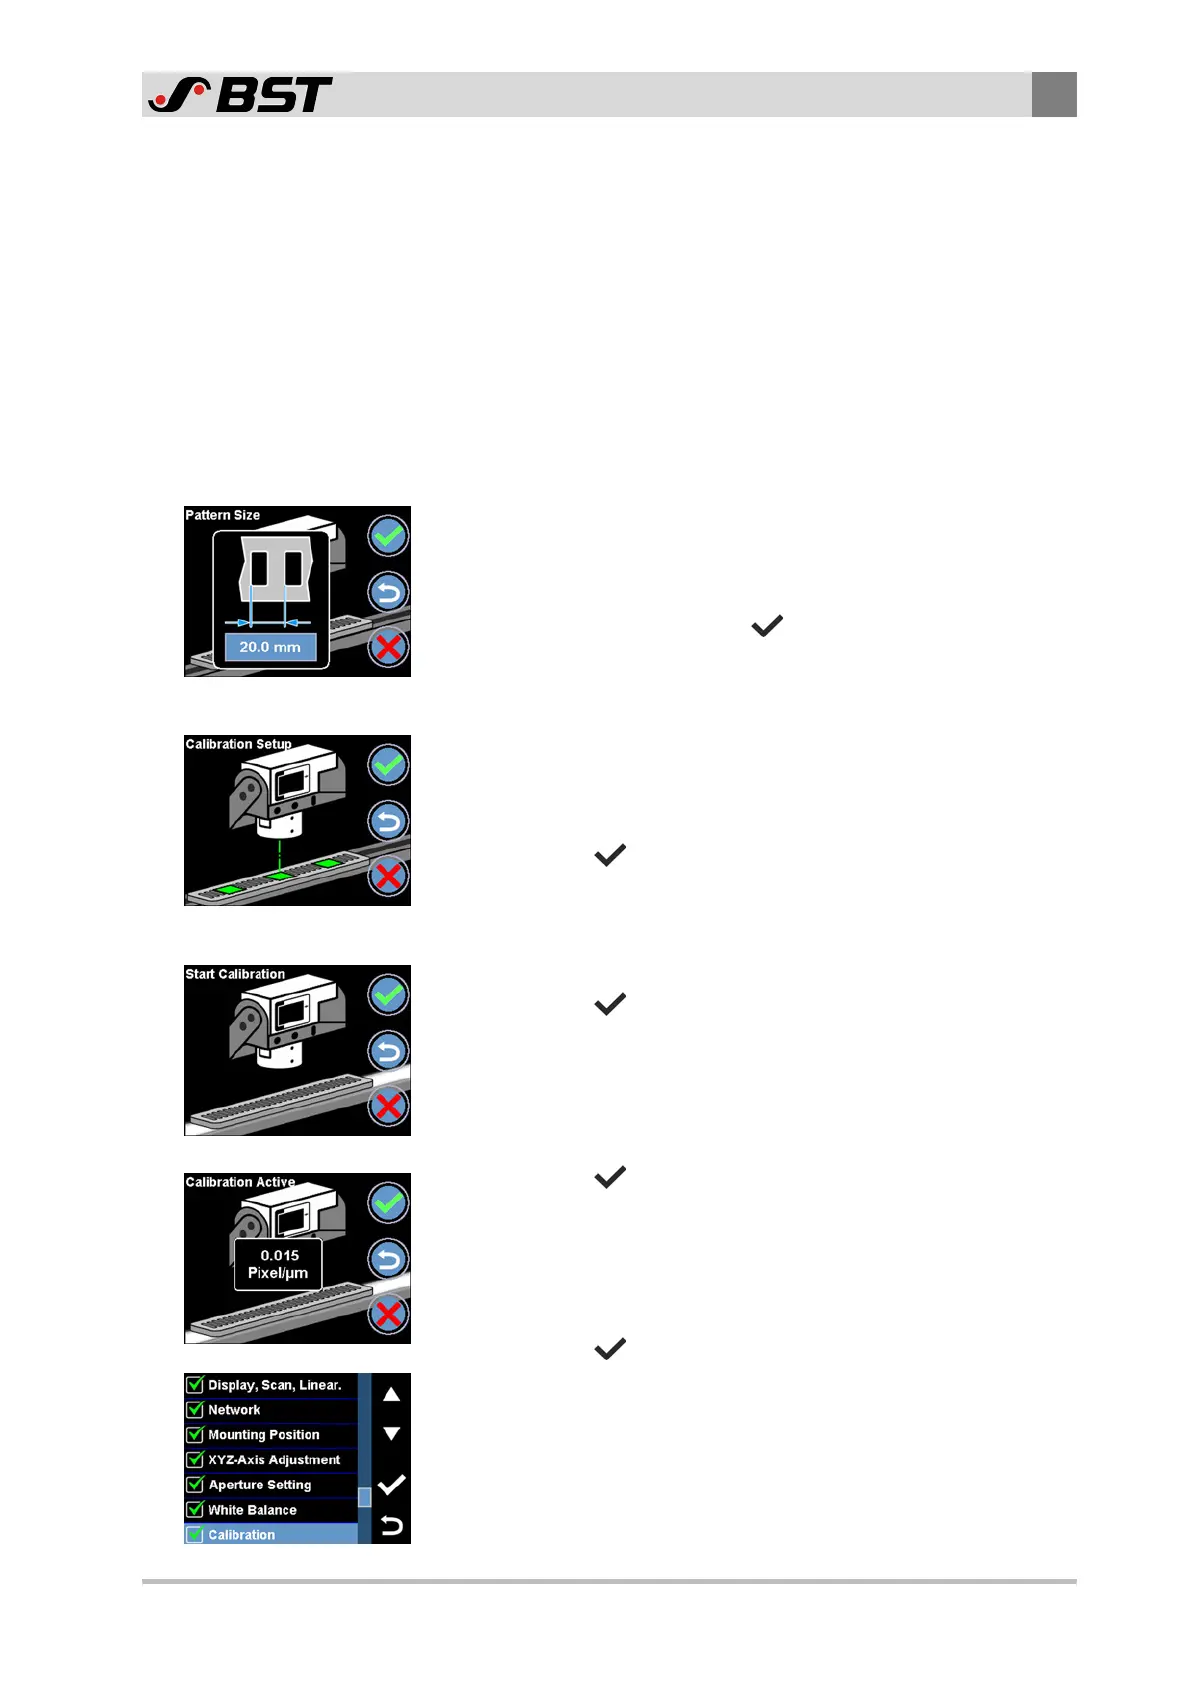
8.13.3 Calibrating the CCD Camera
The calibration of the CCD camera is carried out in four steps.
Requirement
■ The CCD camera is aligned precisely mechanically (see CCD
Camera Alignment, page 87).
■ The High Res. calibration method is selected in the Display,
Scan, Linear. menu (see Selecting the Calibration Method, page
156).
■ The Calibration menu is opened.
Step 1: Enter hole distance of the calibration template
1. Enter the hole distance of the calibration template used into
the edit field.
Note: The hole distance of the standard calibration template is
20.0 mm (see Calibration Template, page 107).
2. Confirm the entry with the
button.
The display changes to the next step.
Step 2: Insert calibration template
1. Insert the calibration template in the middle of the field of
vision of the CCD camera, align it and secure it in place (see
Inserting the Calibration Template, page 108). The active LED
projection points make it easy to align the calibration template.
2. Press the
button to complete the calibration step.
The display changes to the next step.
Step 3: Switch on LED lighting of the light box
1. Switch on the LED lighting of the light box.
2. Press the
button to complete the calibration step.
The display changes to the next step.
Step 4: Start calibration
1. Press the button.
The calibration starts.
After a few seconds, the calibration constant determined is
displayed (for example 0.015 Pixel/µm).
2. Press the
button to complete the calibration.
The Normal Setup menu appears in the display.
A green checkmark appears in front of the Calibration menu
item. It indicates that the calibration has been carried out
successfully.
 Loading...