Commissioning
8
CCD CAM 100 – Installation and Operating Manual 111/198
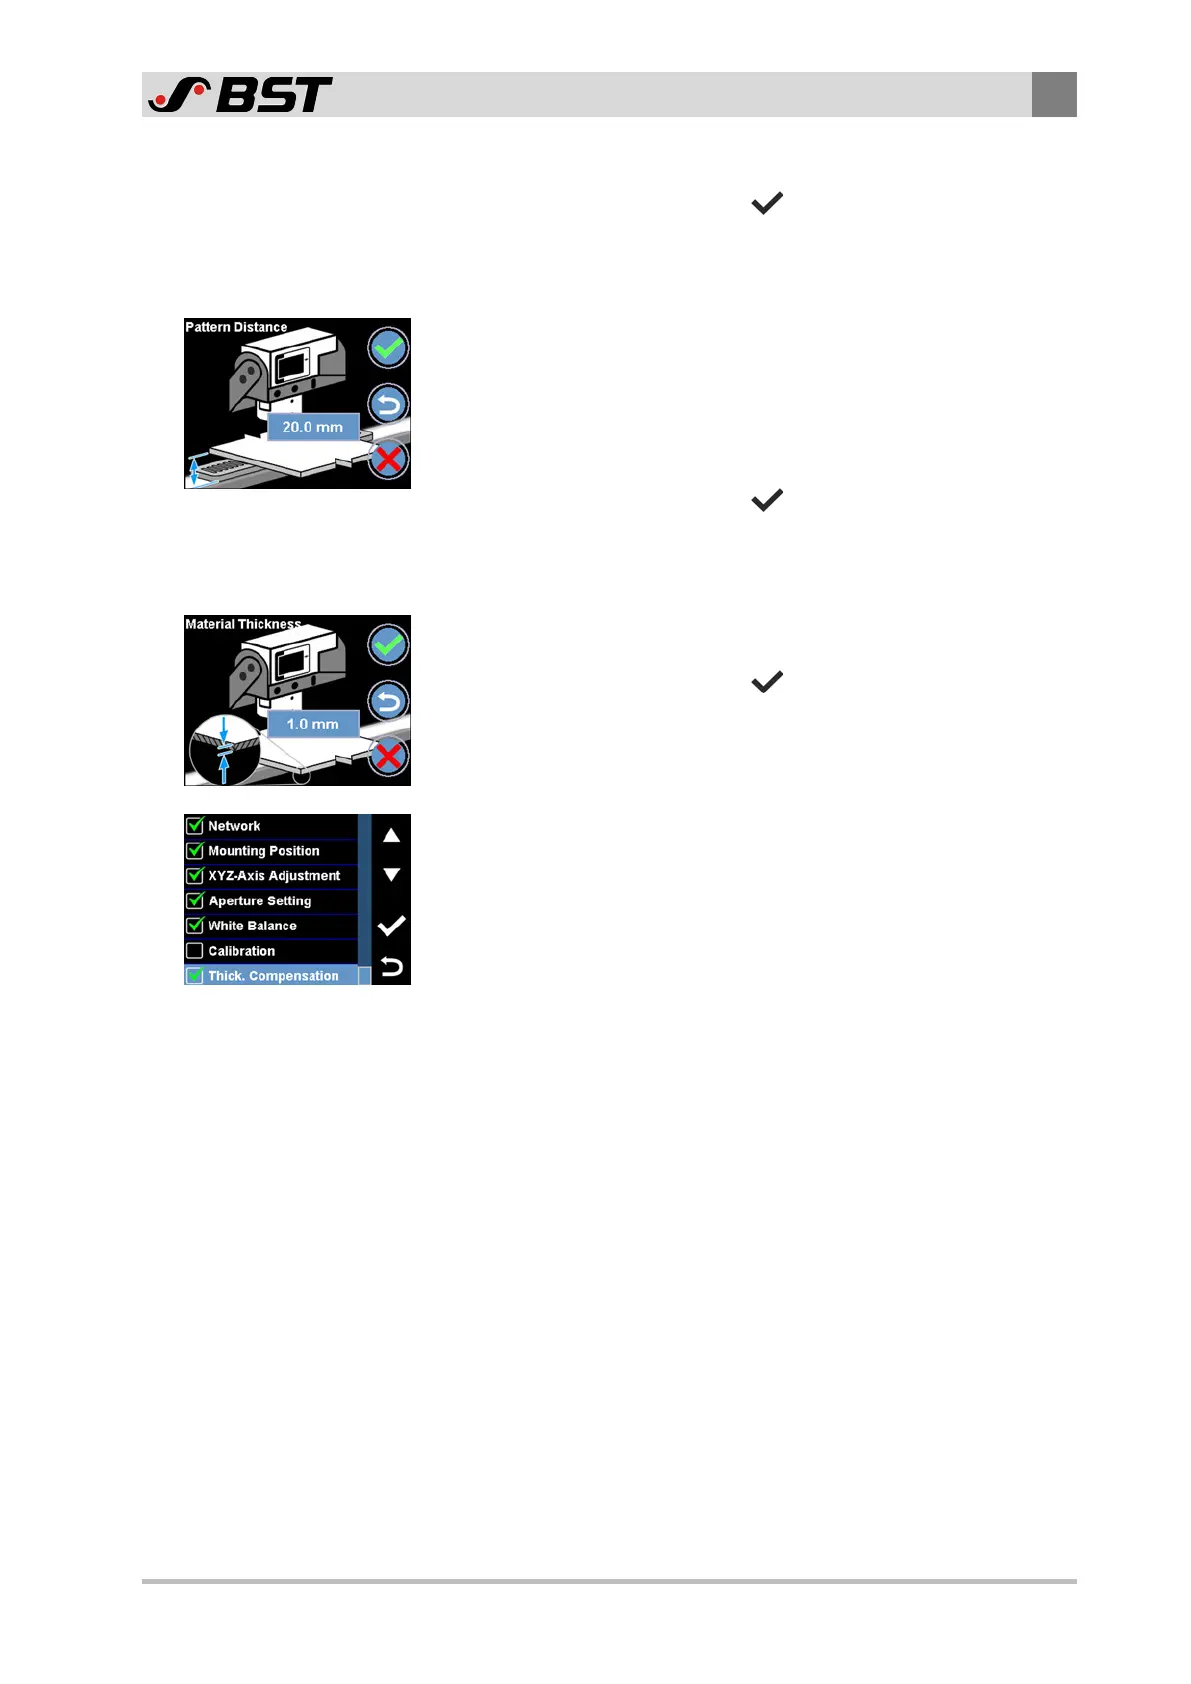
2. Enter the distance value A determined into the edit field.
3. Confirm the entry with the
button.
The display changes to the next step.
Step 2: Enter distance from the material to the calibration template
1. Determine the distance B from the bottom side of the web of
material to the bottom side of the calibration template
(scanning level).
Note: If the web of material is threaded in at the scanning
level, the distance value B is equal to zero.
2. Enter the distance value B determined into the edit field.
3. Confirm the entry with the
button.
The display changes to the next step.
Step 3: Enter material thickness
1. Determine the thickness of the material and enter it into the
edit field.
2. Confirm the entry with the
button.
The material thickness compensation is complete.
The Normal Setup menu appears in the display.
A green checkmark appears in front of the Thick. Compensation
menu item. It indicates that the material thickness compensa-
tion has been carried out successfully.
 Loading...