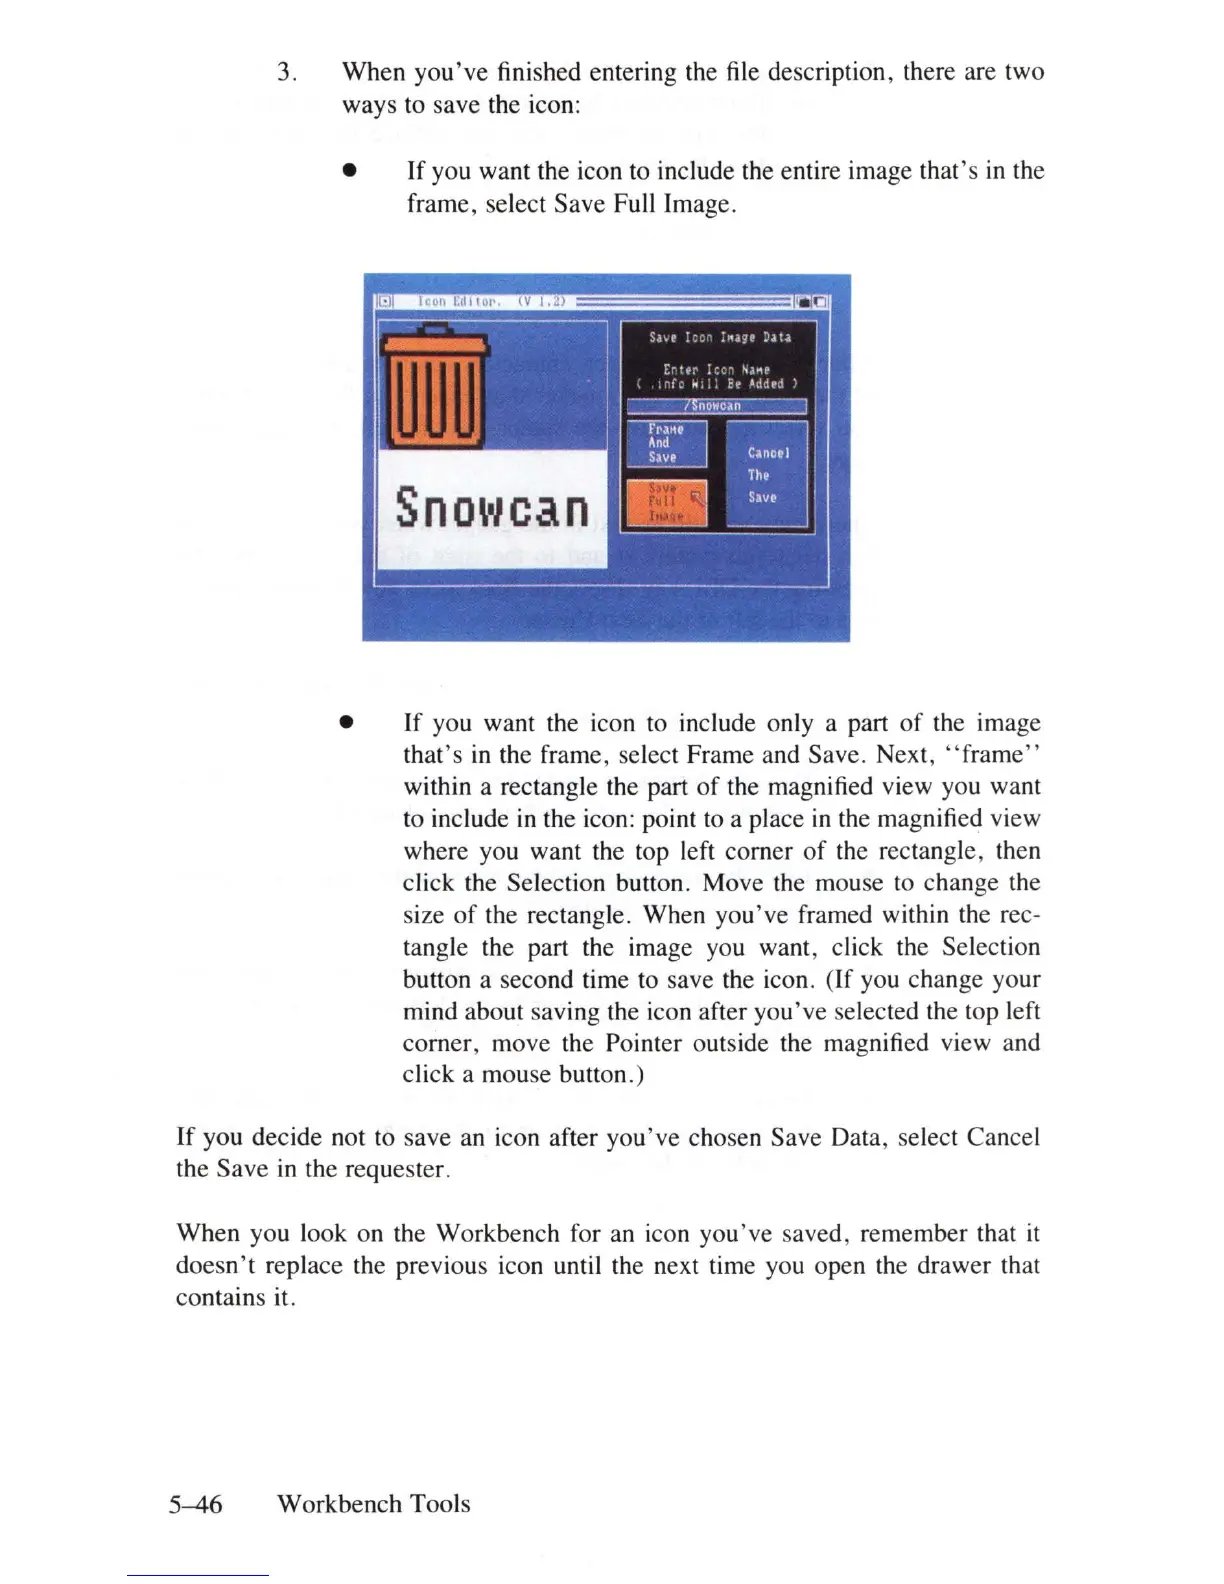
3.
When
you've
finished entering the file description, there are two
ways to save the icon:
•
If
you want the icon to include the entire image
that's
in the
frame, select Save Full Image.
•
If
you want the icon to include only a part
of
the image
that's
in
the frame, select Frame and Save. Next,
"frame"
within a rectangle the part
of
the magnified view you want
to include
in
the icon: point to a place
in
the magnified view
where you want the top left corner
of
the rectangle, then
click the Selection button. Move the mouse to change the
size
of
the rectangle.
When
you've
framed within the rec-
tangle the part the image you want, click the Selection
button a second time to save the icon.
(If
you change your
mind about saving the icon after
you've
selected the top left
corner,
move the Pointer outside the magnified view and
click a mouse button.)
If
you
decide not to save an icon after
you've
chosen Save Data, select Cancel
the
Save
in the requester.
When
you look on the
Workbench
for an icon
you've
saved, remember that
it
doesn
't replace the previous icon until the next time you open the drawer that
contains it.
5-46
Workbench
Tools