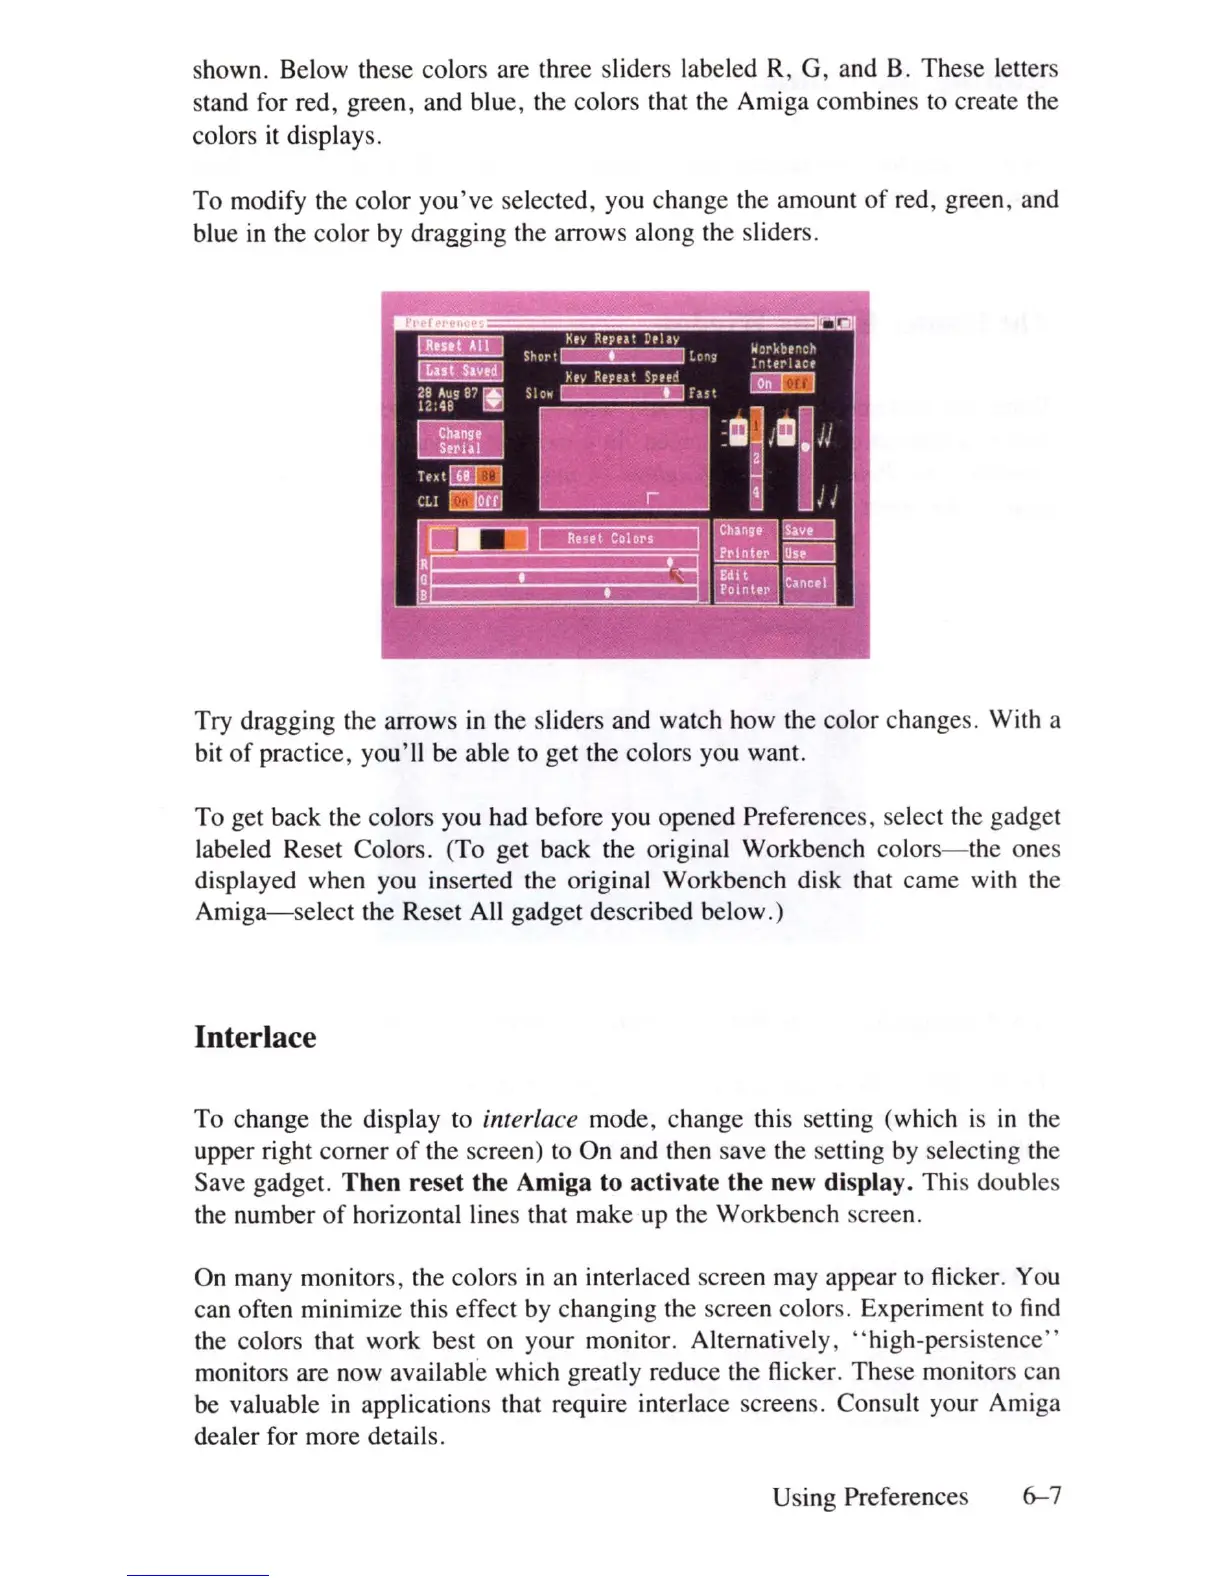
shown. Below these colors are three sliders labeled R, G, and B. These letters
stand for red, green, and blue, the colors that the Amiga combines
to
create the
colors
it
displays.
To modify the color you've selected, you change the amount
of
red, green, and
blue
in
the color
by
dragging the arrows along the sliders.
Try dragging the arrows
in
the sliders and watch how the color change
s.
With a
bit
of
practice, you'll be able to get the colors you want.
To get back the colors you had before you opened Preferences, select the gadget
labeled Reset Colors. (To get back the original Workbench color
s-the
ones
displayed when you inserted the original Workbench
di
sk
that came with
th
e
Amiga-select
the Reset All gadget described below.)
Interlace
To change the display to interlace mode, change this setting (which
is
in
th
e
upper right comer
of
the screen) to On and then save the setting
by
selecting
th
e
Save gadget.
Then
reset
the
Amiga
to
activate
the
new display. This doubles
the number
of
horizontal lines that make up the Workbench screen.
On many monitors, the colors
in
an interlaced screen may appear to flicker. You
can often minimize this effect by changing the screen color
s.
Experiment
to
find
the colors that work best on your monitor. Alternatively, " high-persiste
nc
e"
monitors are now available which greatly reduce the flicker. These monitors can
be valuable
in
applications that require interlace screens. Consult your Amiga
dealer for more details.
Using Preferences
6-7