If you want to start from scratch, select Clear to make all the pixels transparent.
(If, after you make changes, you'd rather have the old Pointer back, select
Restore.)
Changing the Point
Every Pointer has a single pixel called the point. To point to something on the
di
splay, position the Pointer so that this pixel
is
over it.
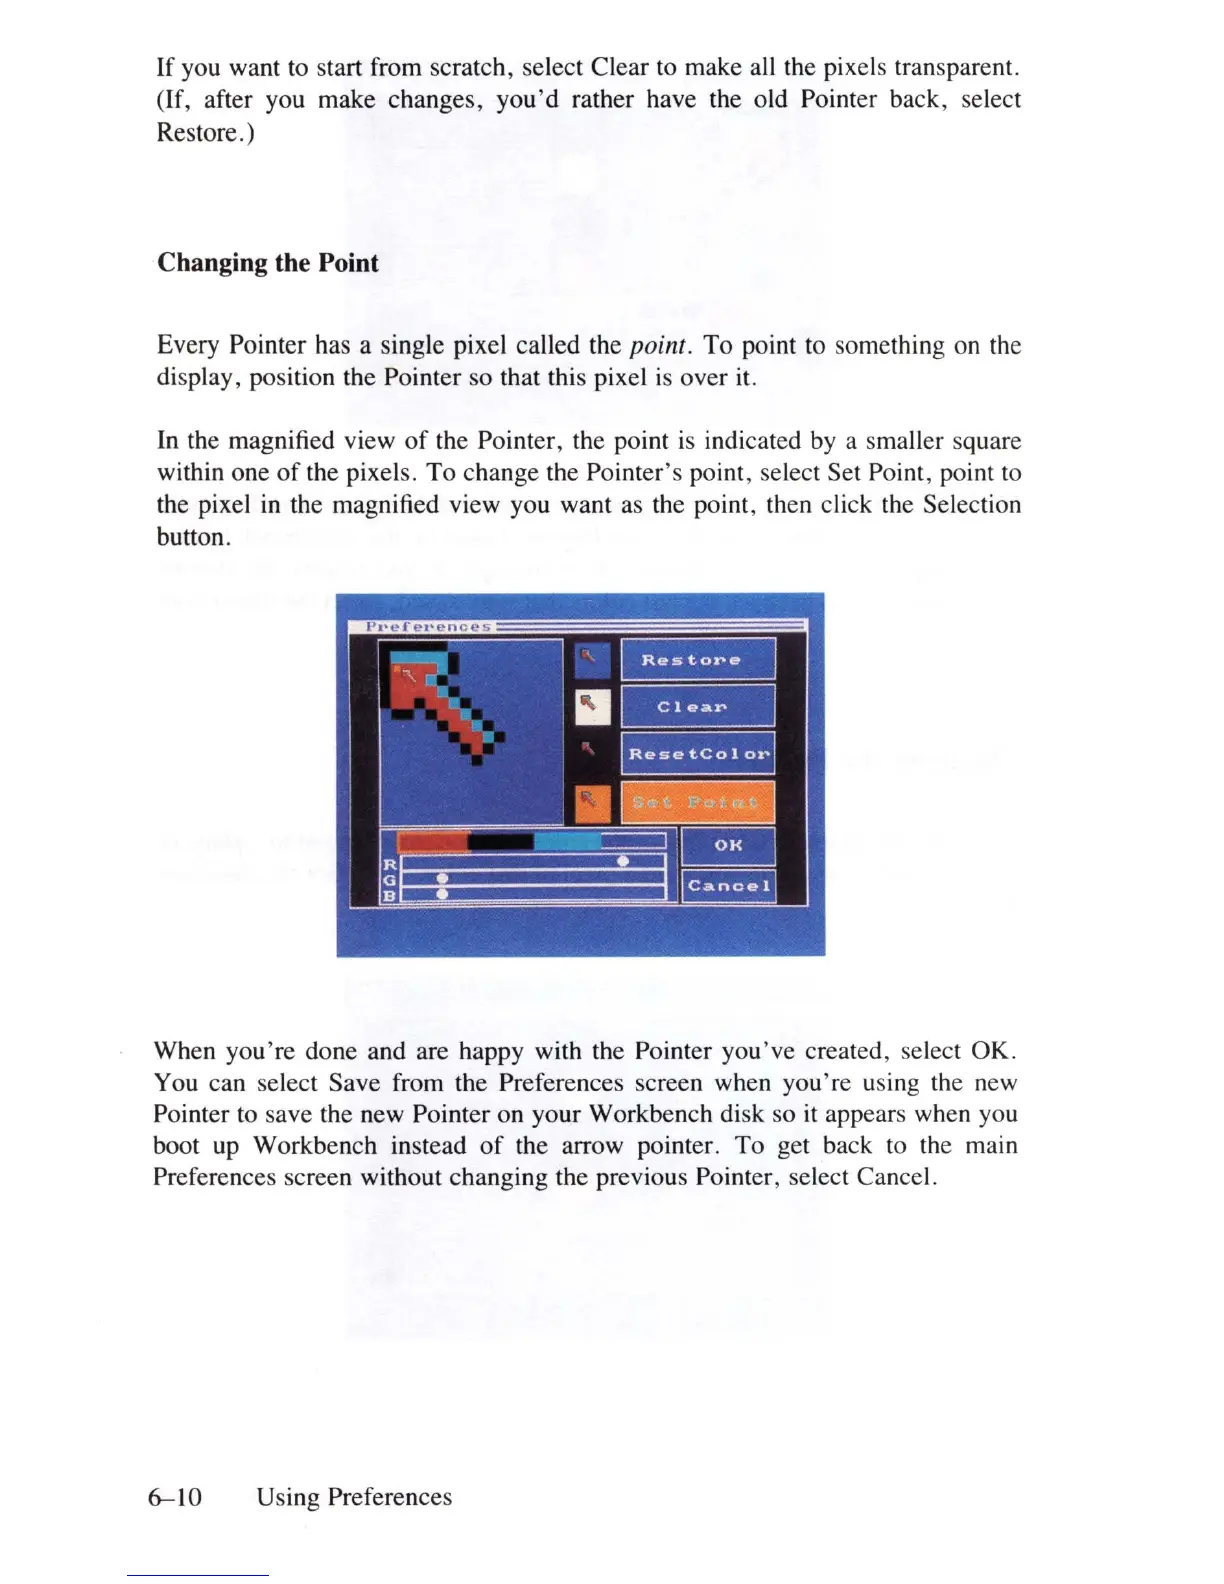
In
the magnified view
of
the Pointer, the point
is
indicated
by
a smaller square
within one
of
the pixels. To change the Pointer's point, select Set Point, point
to
the pixel in the magnified view you want
as
the point, then click the Selection
button.
When you're done and are happy with the Pointer you 've created, select OK.
You can select Save from the Preferences screen when you're using
th
e new
Pointer
to
save the new Pointer on your Workbench disk so it appears when you
boot
up
Workbench instead
of
the arrow pointer. To get back
to
the main
Preferences screen without changing the previous Pointer, select Cancel.
6-10
Using Preferences