EasyManuals Logo

GE LOGIQ P9 Service Manual

GE LOGIQ P9
602 pages
To Next Page IconTo Next Page
To Previous Page IconTo Previous Page
Page #528 background imageLoading...
Page #528 background image
GERAFT LOGIQ P9/P7
D
IRECTION 5604324, REVISION 11 DRAFT (JANUARY 24, 2019) SERVICE MANUAL
8-202 Section 8-50 - Replacement of LOGIQ P9 ROTATION MODULE KIT
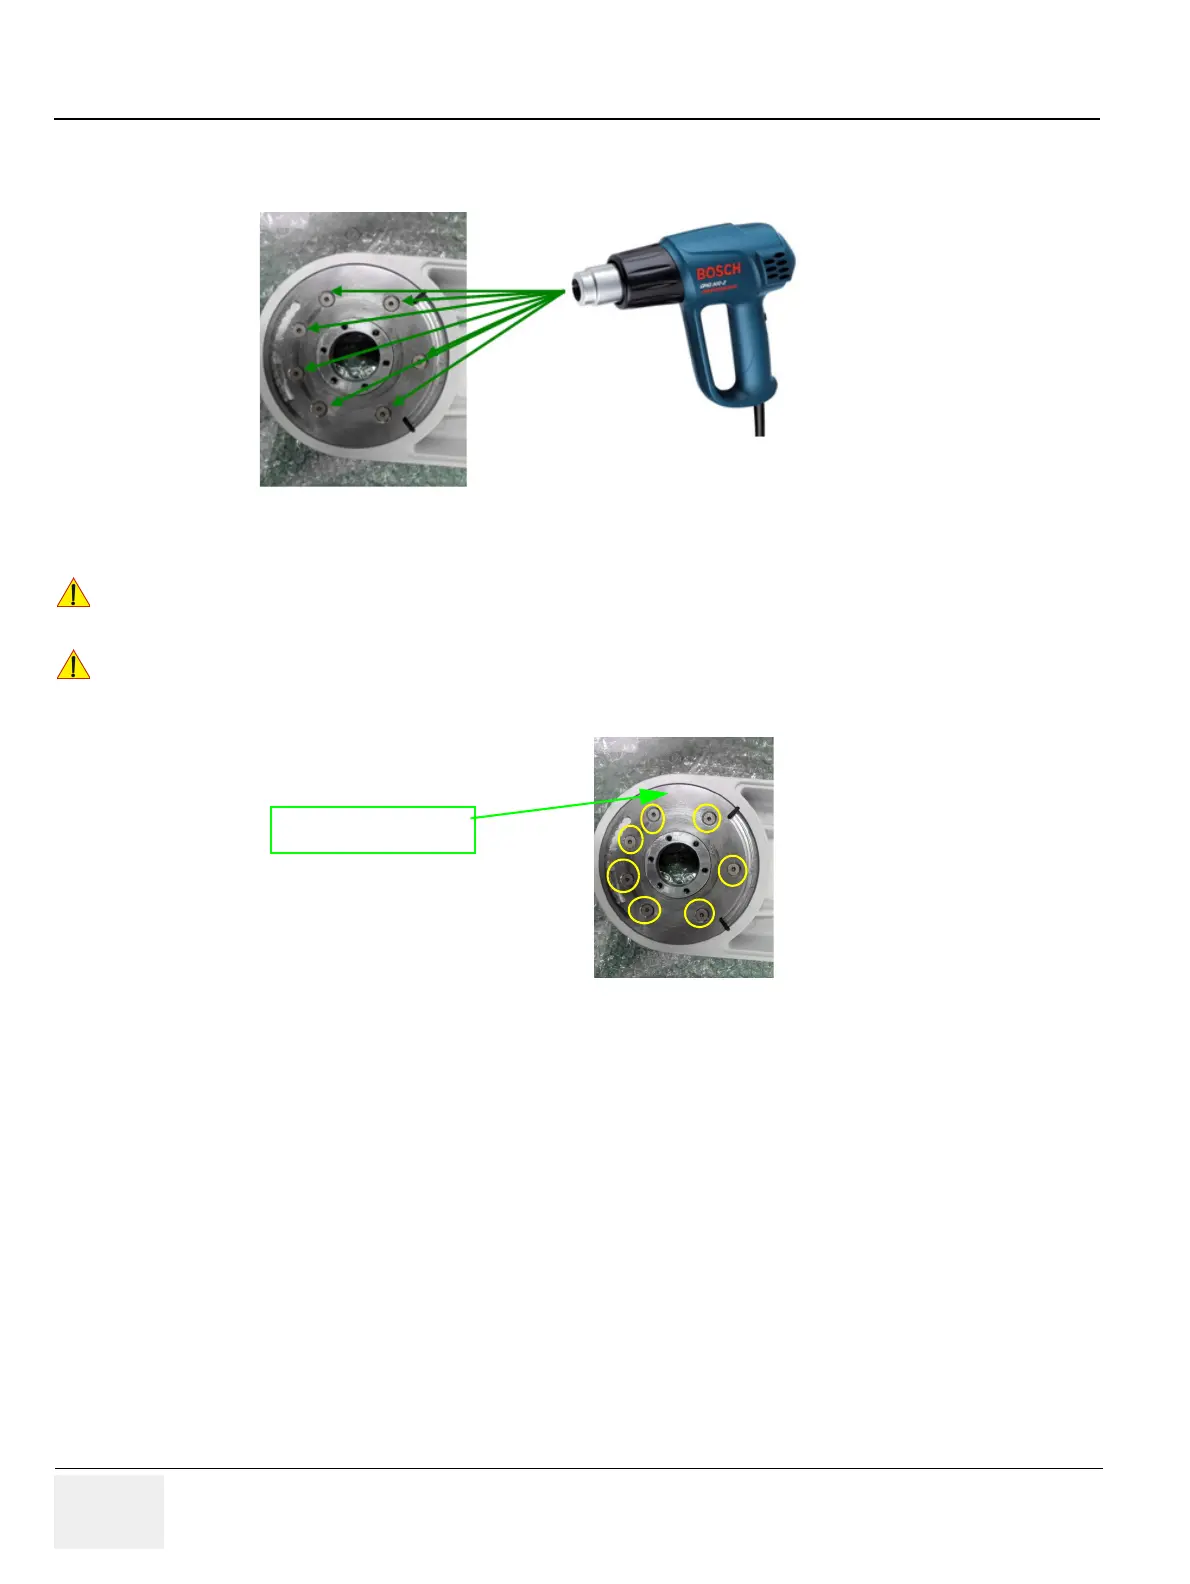
14.) Each screws should be heated for 5 minutes by HOT AIR BLOWER or ELECTRIC HAIR DRYER
to melt LOCTITE on screw before unscrew the screw. ( Caution hot surfaces )
15.) Unscrew 7 screws and then remove the ROTATION PLATE.
CAUTION
When reassemble the ROTATION MODULE ASSY, HSH screw should be tightened proper
torque (60kgf-cm). When reassemble the screws, please use SCREW FSH M5X16
NYLOK(5729014).
CAUTION
Carefully unscrew the each screw to prevent wear of screw head.
ROTATION PLATE

Table of Contents

Other manuals for GE LOGIQ P9

Questions and Answers:

Question and Answer IconNeed help?

Do you have a question about the GE LOGIQ P9 and is the answer not in the manual?

GE LOGIQ P9 Specifications

General IconGeneral
TypeUltrasound System
3D/4D ImagingYes
ElastographyYes
ConnectivityDICOM, USB, Ethernet, HDMI
Doppler ModesColor Doppler, Power Doppler
Probesconvex, linear, phased array
Imaging ModesM-Mode, Color Doppler, Power Doppler
PortabilityCart-based
ApplicationsVascular, Cardiac, OB/GYN, Musculoskeletal
WeightApprox. 80 kg
Touch Panel10.1-in touchscreen

Related product manuals