Commissioning
33
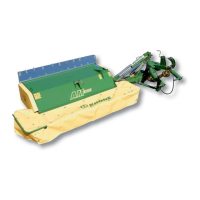
5.2 Installation of the fittings
Advance preparation:
• Secure the machine against the possibility of rolling back.
• Park the machine horizontally onto the stand base.
• In case the tractor is coupled and connected, switch off the engine, apply the brake and
remove the ignition key.
• The interior of the machine must only be entered through the side entry hole.
Note
Installation of the upper walls:
At least 2 persons must be deployed for the installation!
• Install the stacks (1) loosely on the side walls (right and left side of the machine) with
M12x90 screws, A13 washers, and M12 nuts.
• Mount the end wall (2) onto the front wall with M12x150 screws, A13 washers, 13/35x8
washers and M12 nuts. Place the washers 13/35x8 between the end wall and the front
wall.
• Place the baffle plate (3) on the end wall (2) and fasten them with a 5x30 clamping sleeve
and a 17/30x3 washer.
• Screw the side boards (4) (right and left sides of machine) loosely onto the stacks (1) with
M10x100 screws, 10.5/21x2 washers and M10 nuts.
• Screw together the platform gates (4) and side walls with bracket (5) and screw
connection (M10x30 screw, M10x50 square coach bolt, 10.5/21x2 washers and M10
nuts).
• Screw together the end wall (2) and platform gate (4) with M12x150 screws, A13
washers, 13/35x8 washers and M12 nuts. Place the 13/35x8 washers between the end
wall and the track (1).
• Place the guide link (6) on the baffle plate (3) and secure with 21/37x3 washer and 5x32
linch pin.
• Screw the bolt guide (7) onto the platform gates (4) (right and left sides of the machine)
with M10x30 countersunk screws, 10.5/21x2 washers and M10 nuts.
• Connect the guide link (3) to the bolt guide (7) and secure with washer 21/37x3 and
clamping sleeve 6x30.
Note
Installation of the upper walls:
Tighten all screw connections.
• Attach end caps (11)
Side walls rear
• Screw on hood plate centre (8) with M10x25 coach bolts, 10.5/21x2 washers, and M10
nuts on the rear wall.
• Screw on side plates right/left (9) with coach bolts, washers and nuts as shown in the
drawing.
• Screw on hood plate top (10) as shown in drawing.
Pos: 12.8 /BA/---- -Seitenumbruch-- ---- @ 0\ mod_1196175311 226_0.doc @ 4165