SLIDING SUNROOF
S–81
S
End Of Sie
SUNROOF SWITCH REMOVAL/INSTALLATION
A6E774066560W01
Note
• The sunroof switch is together with the map light.
1. Disconnect the negative battery cable.
2. Remove the map light from the headliner.
3. Install in the reverse order of removal.
End Of Sie
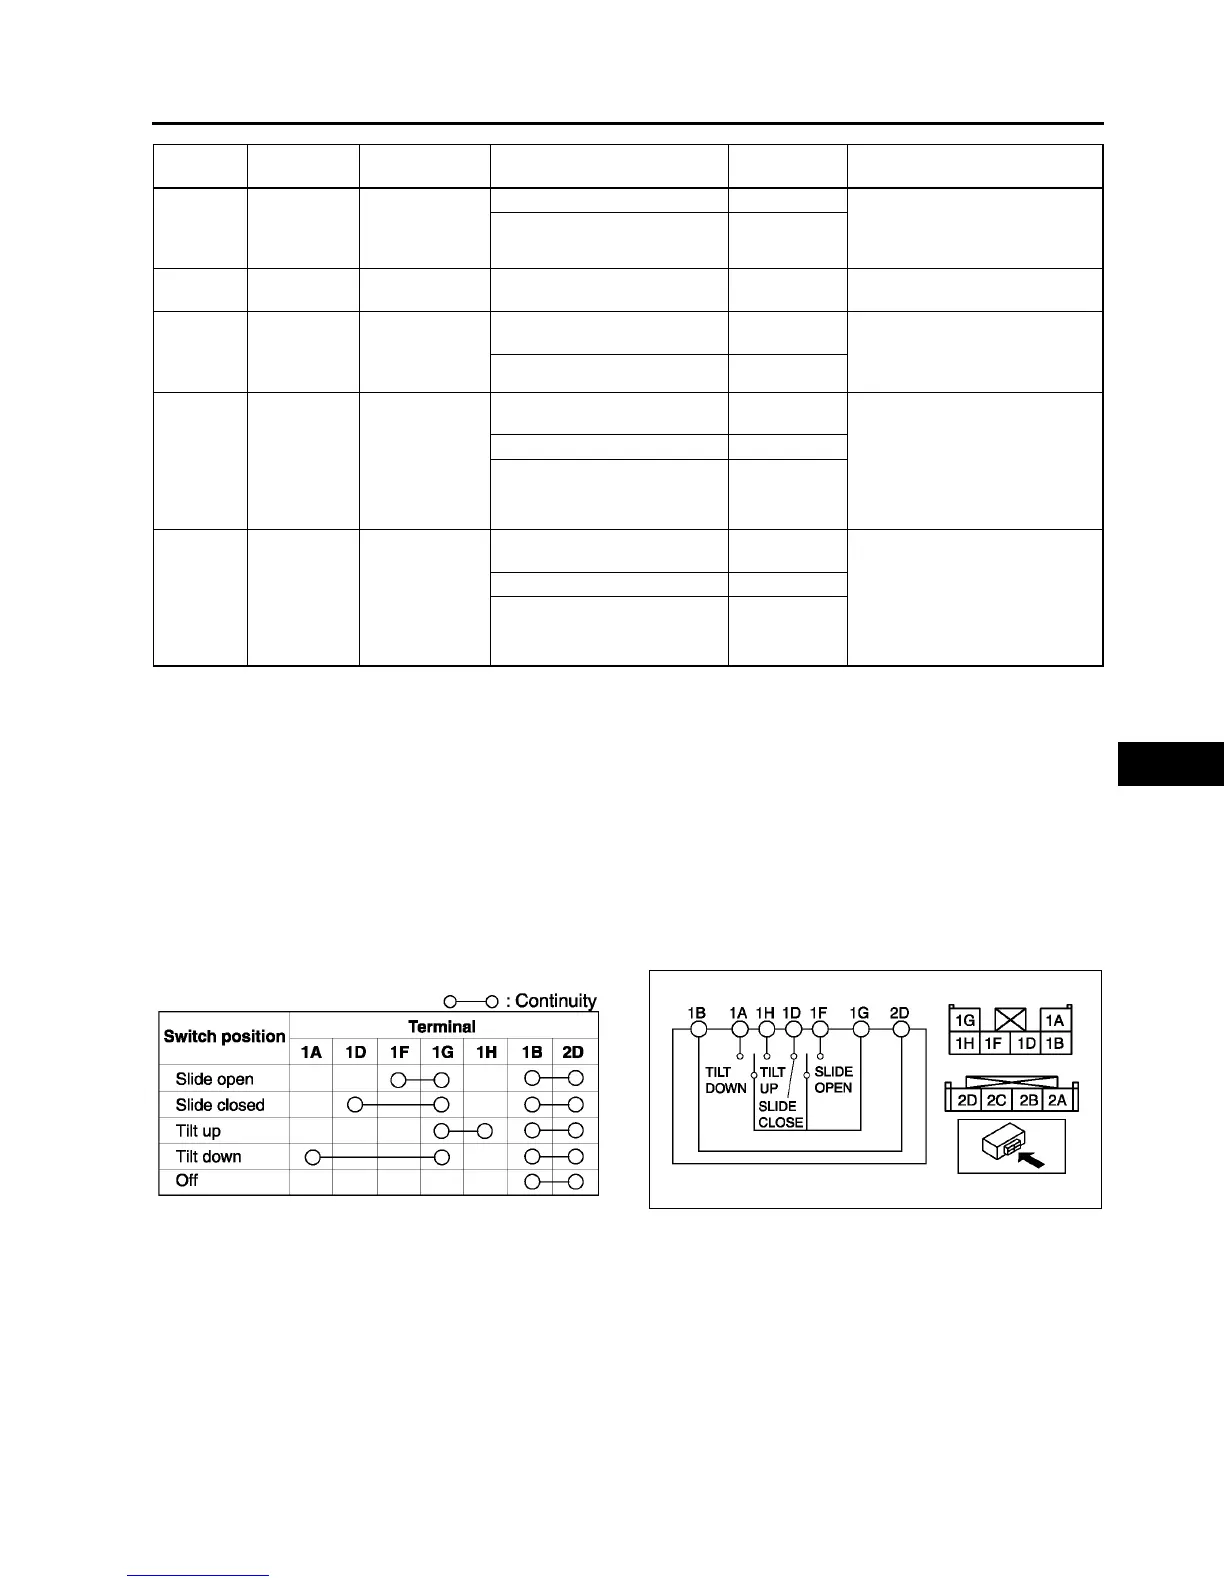
SUNROOF SWITCH INSPECTION
A6E774066560W02
1. Remove the sunroof switch.
2. Inspect for continuity between the sunroof switch terminals using an ohmmeter.
• If not as specified, replace the sunroof switch.
End Of Sie
1F Slide open Sunroof switch
Sunroof is fully opening. 0 • Inspect sunroof switch
(See S–81 SUNROOF
SWITCH INSPECTION)
• Inspect related harness
Other B+
1G
Sunroof relay
ground
GND
Under any condition: inspect
for continuity to ground.
Yes • Inspect related harness
1H Tilt up Sunroof switch
Sunroof is tilting up. (Including
position when fully closed)
0
• Inspect sunroof switch
(See S–81 SUNROOF
SWITCH INSPECTION)
• Inspect related harness
Other B+
2A
Slide close/
tilt up
Sunroof motor
Sunroof is opening/tilting
down.
0
• Inspect sunroof switch
(See S–81 SUNROOF
SWITCH INSPECTION)
• Inspect sunroof motor
(See S–79 SUNROOF
MOTOR INSPECTION)
• Inspect related harness
Sunroof is closing/tilting up. B+
Other 0
2B
Slide open/tilt
down
Sunroof motor
Sunroof is opening/tilting
down.
B+
• Inspect sunroof switch
(See S–81 SUNROOF
SWITCH INSPECTION)
• Inspect sunroof motor
(See S–79 SUNROOF
MOTOR INSPECTION)
• Inspect related harness
Sunroof is closing/tilting up. 0
Other 0
Terminal Signal Connected to Test condition
Voltage (V)/
Continuity
Action
A6E7740W022
A6E7740W023