F–12
INTAKE-AIR SYSTEM
Resonance Chamber Removal Note
1. Remove the front mudguard (LH) before removing the resonance chamber.
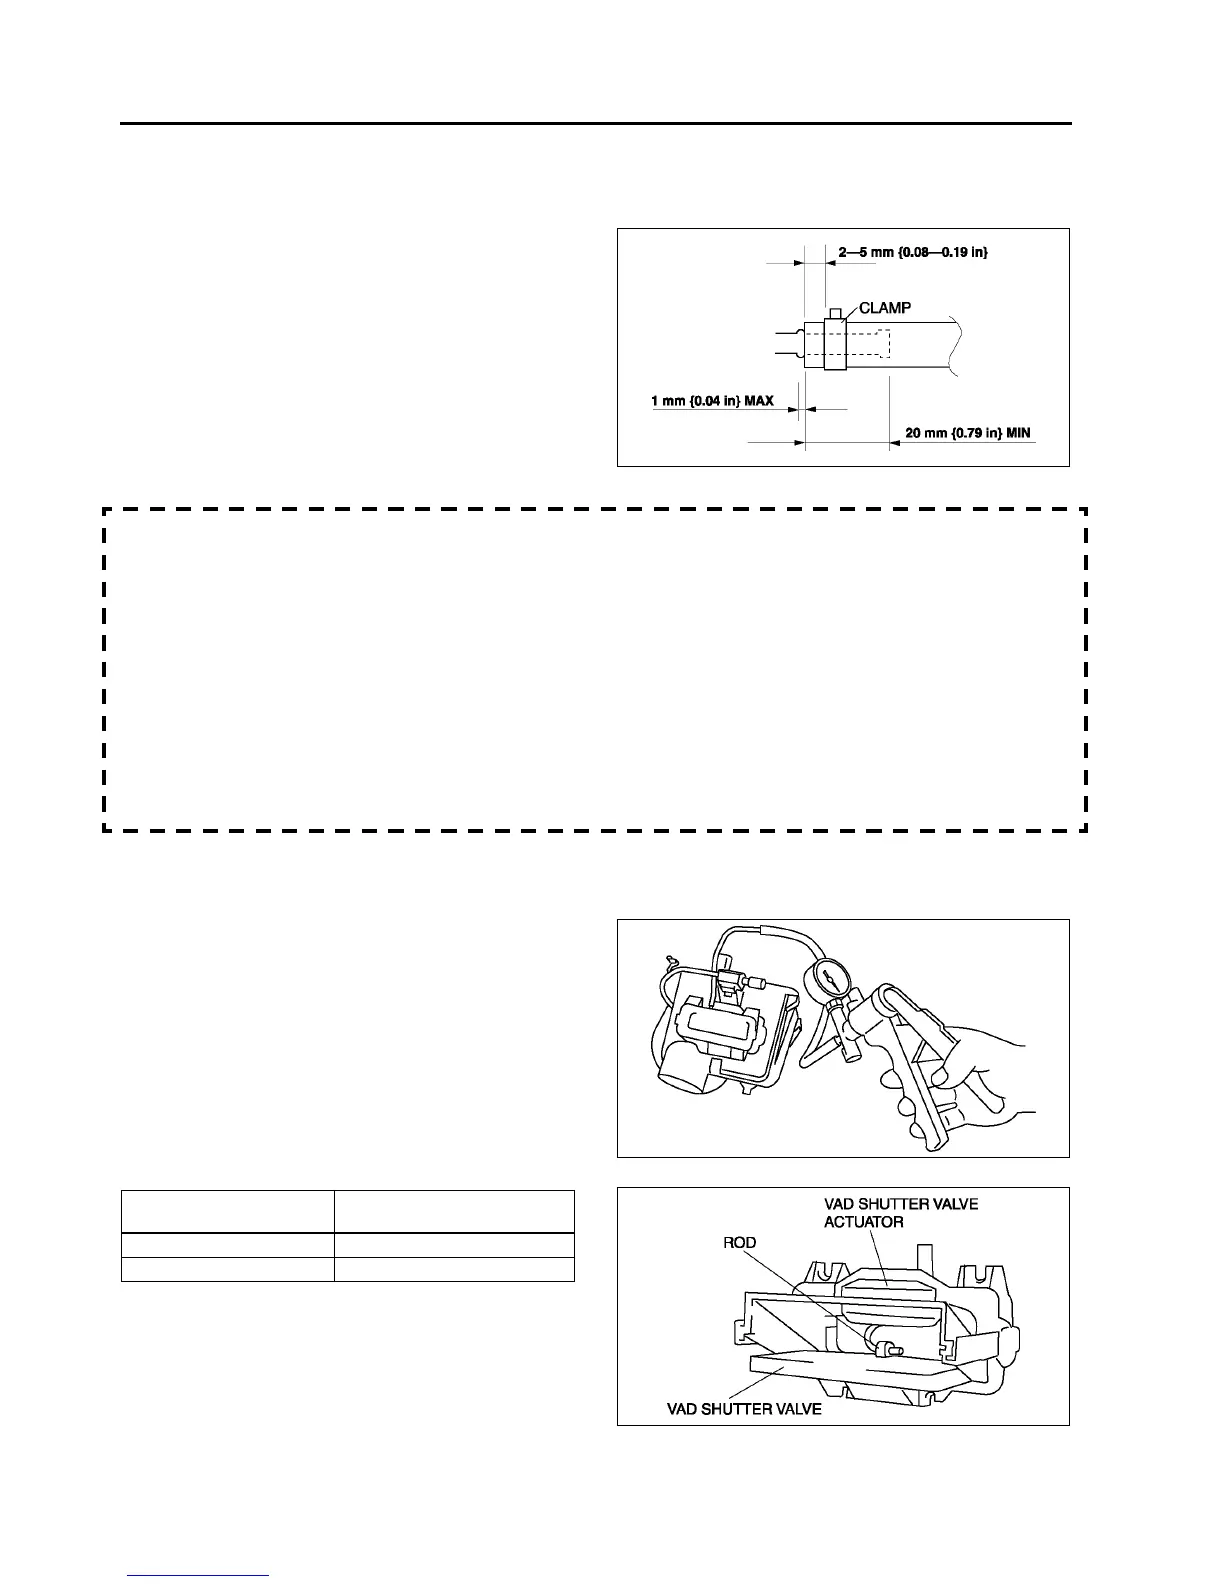
Vacuum Hose (Purge Solenoid Valve) Installation Note
1. Fit the vacuum hose (purge solenoid valve) onto
the respective fittings, and install clamps as
shown.
Air Cleaner Case Installation Note
Caution
• Before assembling the air cleaner, verify that the rubber mounts have not fallen off from the air
cleaner bracket (3 locations).
• Always install the air cleaner case using the following procedure.
Note
• When inserting the rubber mounts into the air cleaner case, soapy water can be applied.
1. Verify that the rubber mounts are set in the air cleaner bracket (3 locations).
2. Install the projections on the frame side (2 locations).
3. Verify that the projections on the frame side are installed securely.
4. Install the projection on the engine side (remaining location).
5. Verify that the projection on the engine side installed securely.
End Of Sie
VARIABLE AIR DUCT (VAD) SHUTTER VALVE INSPECTION (L3)
A6E391013000W02
1. Remove the air cleaner case. (See F–10 INTAKE-AIR SYSTEM REMOVAL/INSTALLATION.)
2. Disconnect the vacuum hose from the VAD shutter valve actuator.
3. Connect a vacuum pump to the VAD shutter valve
actuator.
4. Apply vacuum and verify that the rod moves.
• If the rod dose not move, replace the air
cleaner.
End Of Sie
A6E3910W021
Vacuum
kPa {mmHg, inHg}
Rod movement
Below –10 {–75, –3.0} Starts to move
Above –35 {–263, –10.4} Fully pulled
A6E3910W031
A6E3910W032