4. Press or to select Adjust Printer, and then press the OK button.
5. Press or to select Head Inc. Adj., and then press the OK button.
After the Carriage is moved, a message is displayed requesting you to open the Top Cover.
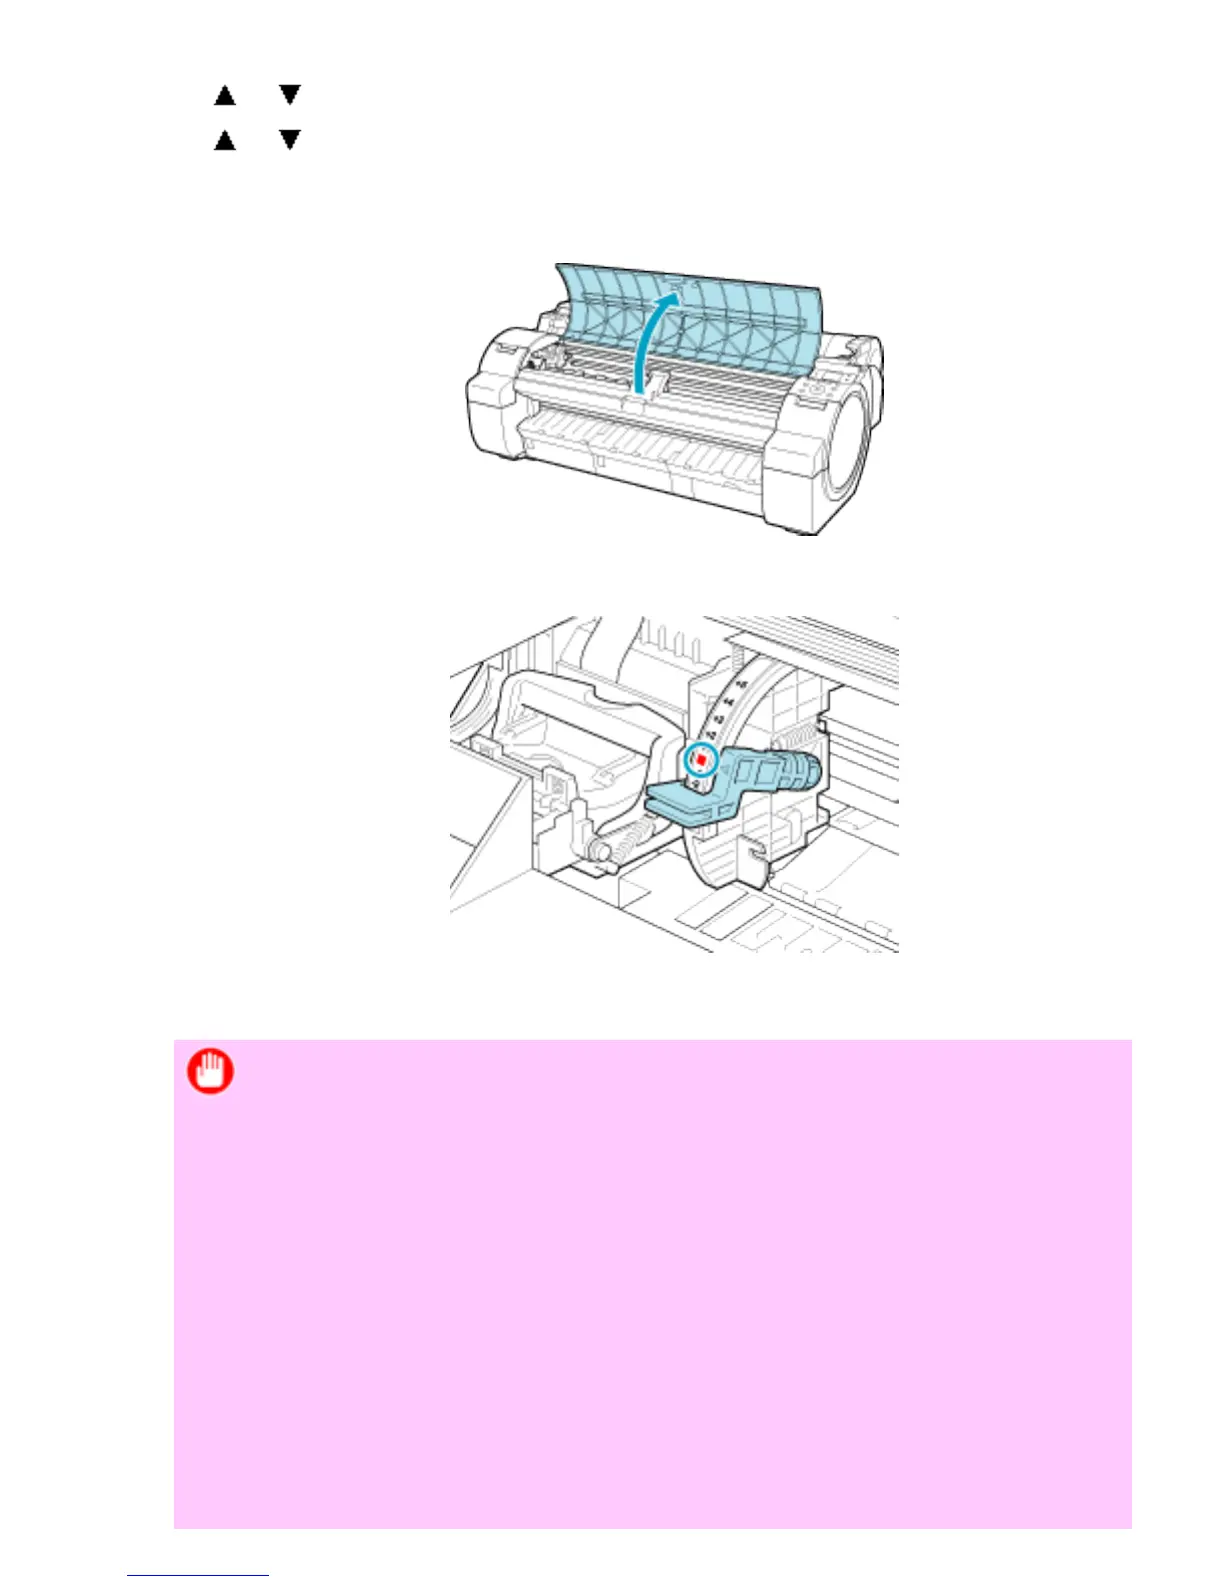
6. Open the Top Cover.
7. Align the Angle Adjustment Lever with the red square and close the Top Cover.
A test pattern is printed for adjustment.
Important
・ Do not touch the Linear Scale (a) or Carriage Shaft (b). Touching
these parts may damage them.