Section 05 ENGINE (4-TEC)
Subsection 08 (ENGINE BLOCK)
NOTE: It is recommended to apply this specific
sealant as described here to get an uniform appli-
cation without lumps. If you do not use the roller
method, you may use your finger to uniformly dis-
tribute the sealant (unlike the Drei Bond sealing
compound, using a finger will not affect the adhe-
sion).
Use the silicone-based Loctite 5910 (P/N 293 800
081) on mating surfaces.
CAUTION: Do not use Loctite 515 or 518 to seal
crankcase. Do not use Loctite Primer N with
the Loctite 5910. Using these products or non
silicone-based sealant over a previously sealed
crankcase with Loctite 5910 will lead to poor
adhesion and possibly a leaking crankcase.
These products are chemically incompatibles.
Even after cleaning, the Loctite 5910 would
leave incompatible microscopic particles.
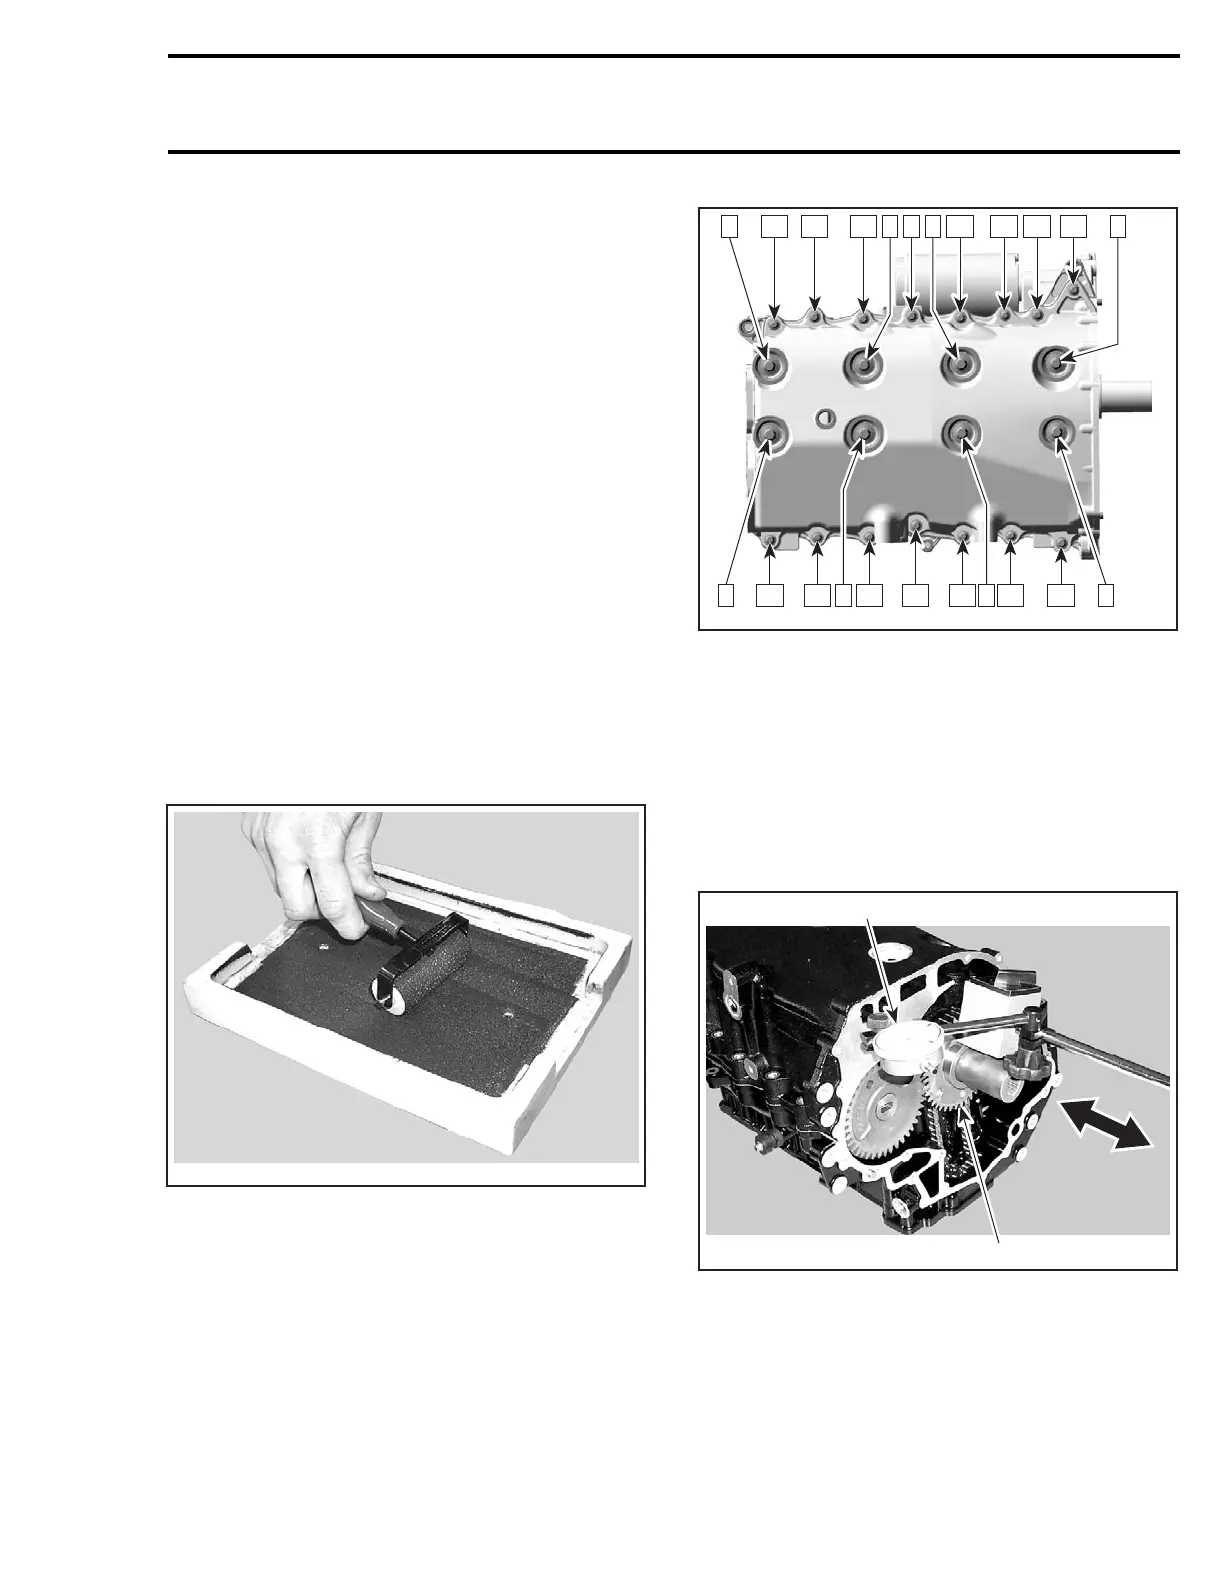
Use a plexiglass plate and apply some sealant on
it. Use a soft rubber roller (50 - 75 mm (2 - 3 in))
(available in arts products suppliers for printmak-
ing) and roll the sealant to get a thin uniform coat
on the plate (spread as necessary). When ready,
apply the sealant on crankcase mating surfaces.
F12R17A
Do not apply in excess as it will spread out inside
crankcase.
NOTE: Do not use Loctite Primer N with this
sealant. The sealant curing time is similar to the
Loctite 518 without using the Primer N, which is
4to24hours.
Tighten engine block screws as per following se-
quence.
3 1 7
R1503motr06B
235 21 17 18 19 2022
16 15 14 9 2 10 11 12 136 84
Apply Loctite 243 (blue) on threads. Torque
engine block screws no. 3 at first to 40 N•m
(29 lbf•ft) and in a second sequence to 55 N•m
(41 lbf•ft).
Torque engine block screws no. 7 to 22 N•m
(17 lbf•ft).
Before continuing the installation process, the ax-
ial clearance of balancer shaft and crankshaft has
to be checked.
1
R1503motr41A
2
1. Dial gauge
2. Crankshaft
smr2004-Complete Line Up 287

 Loading...


