Section 05 ENGINE (4-TEC)
Subsection 08 (ENGINE BLOCK)
Check if ball inside moves freely in the banjo
screw. Clean Nozzle and banjo screw from dirt
and debris.
Installation
For installation, reverse the removal procedure.
Pay attention to the following details.
Torque oil spray nozzle to 18 N•m(160lbf•in).
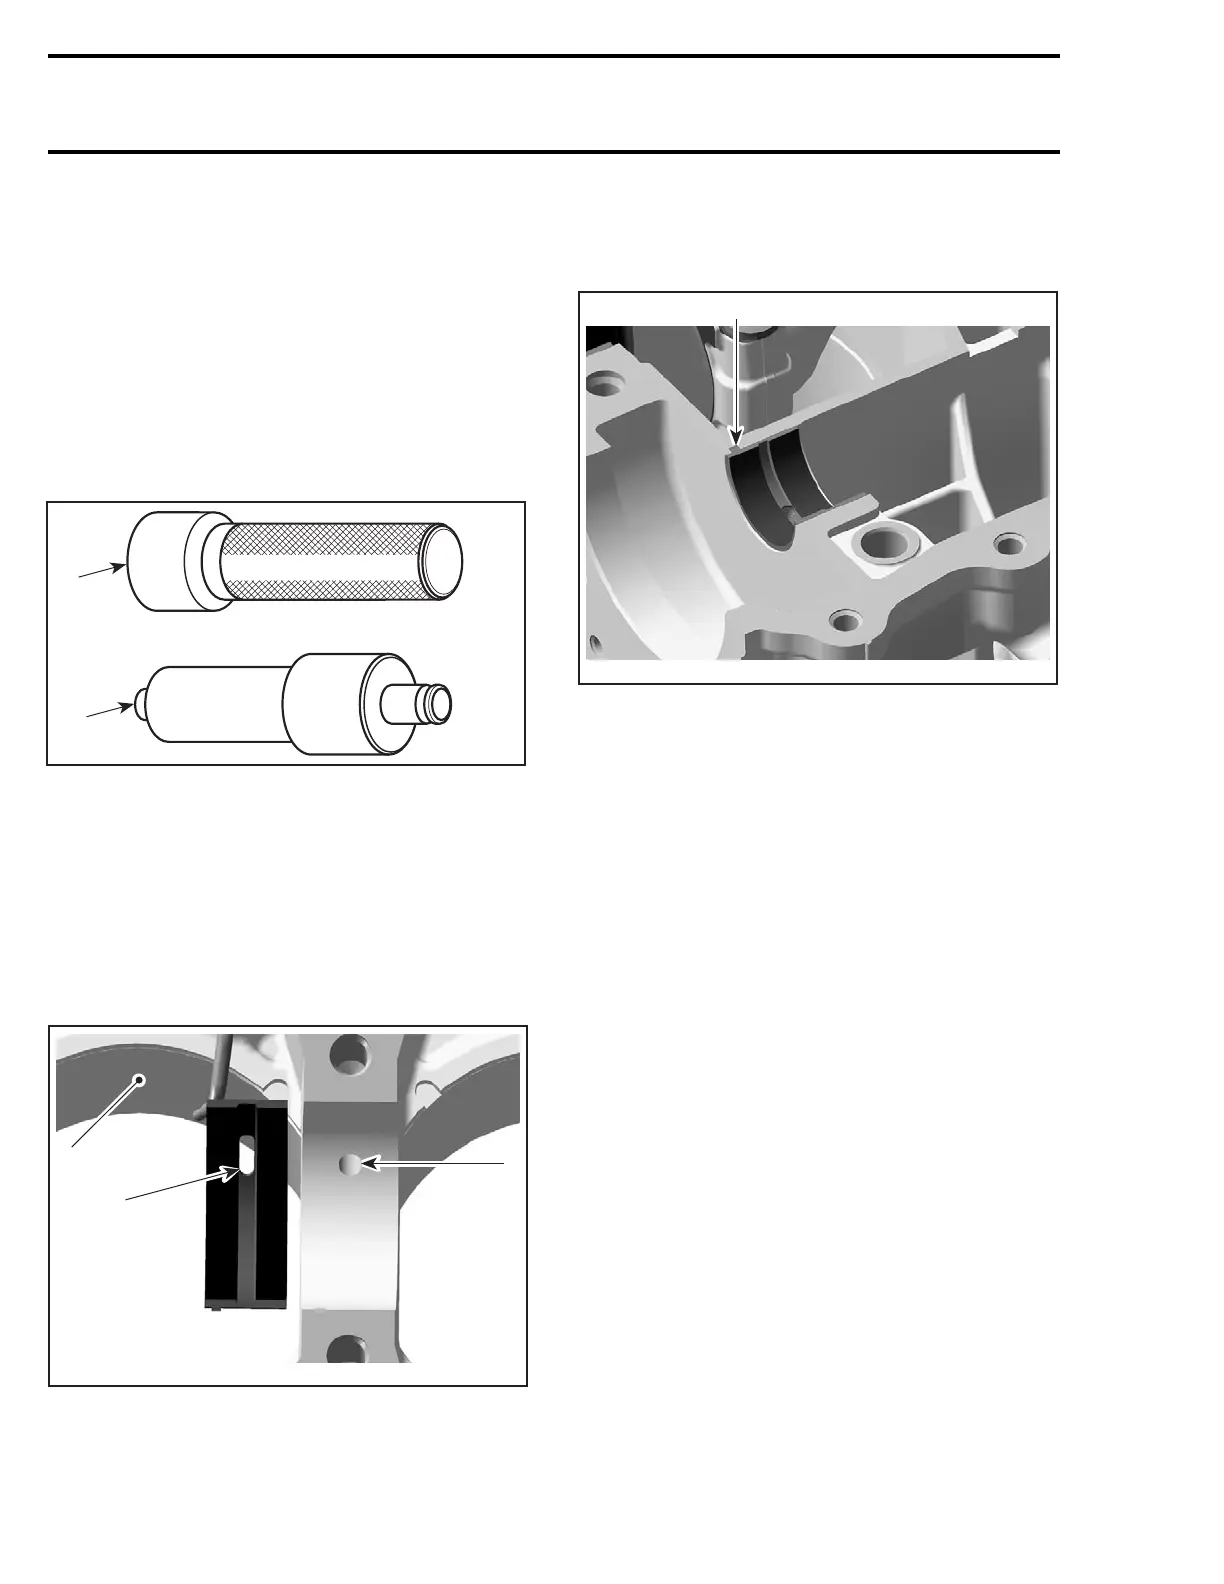
To install starter drive bearing no. 21 of starter
drive assembly, use pusher (P/N 290 876 502) and
handle (P/N 420 877 650).
F06D32A
1
2
1. Handle
2. Pusher
Use NEW bushings when diameters are out of
specification.
If OLD bushings can be used again, make sure
they are at the same position as they were before.
Correctly install bushings. Top crankshaft bushing
halves have a bore which has to be placed in the
upper engine block.
R1503motr35A
3
2
1
1. Upper engine block half
2. Oil bore in engine block
3. Oil bore in bushing
Bushings have to be flush with the engine block
split surface and their protrusions have to fit in the
notched areas in the engine block seat.
1
R1503motr36A
1. Bushing protrusion in engine block notch
Apply engine oil on all bushings, in the bottom area
of the cylinder bore and also on the band of the
piston ring compressor tool.
For proper installation of pistons, refer to Piston
Installation elsewhere in this section.
NOTE: Before installing the crankshaft, make sure
that the timing chain is on the crankshaft and the
chain guide has been installed first. Those parts
cannot be installed after as the crankshaft is in
place.
Clean oil passages and make sure they are not
clogged.
Clean all metal components in a solvent.
Engine block mating surfaces are best cleaned us-
ing a combination of the chisel gasket remover
(P/N 413 708 500) and a brass brush. Brush a first
pass in one direction then make the final brushing
perpendicularly (90°) to the first pass (cross hatch).
CAUTION: Do not wipe with rags. Use a new
clean hand towel only.
IMPORTANT: When beginning the application of
the crankcase sealant, the assembly and the first
torquing should be done within 10 minutes. It is
suggested to have all you need on hand to save
time.
286 smr2004-Complete Line Up

 Loading...


