Introduction Configuring Port Authentication
Software Reference for SwitchBlade x3100 Series Switches (Access and Security)
6-100
• Once Port Authentication is enabled on an interface, the user cannot change the DIRECTION of the inter-
face (from CUSTOMER to NETWORK).
• Once Port Authentication is enabled on an interface, the VLAN/interface association cannot be changed;
the user must disable Port Authentication before changing the association.
6.9.2.4 Configuration Procedure
The following procedure shows the commands used to set up Port Authentication.
Following are the prerequisites, and these are included in this procedure:
• A VLAN has been selected for subscriber services (such as data), and it will be associated with selected cus-
tomer interfaces.
• For access to the RADIUS server, the inband interface has been chosen.
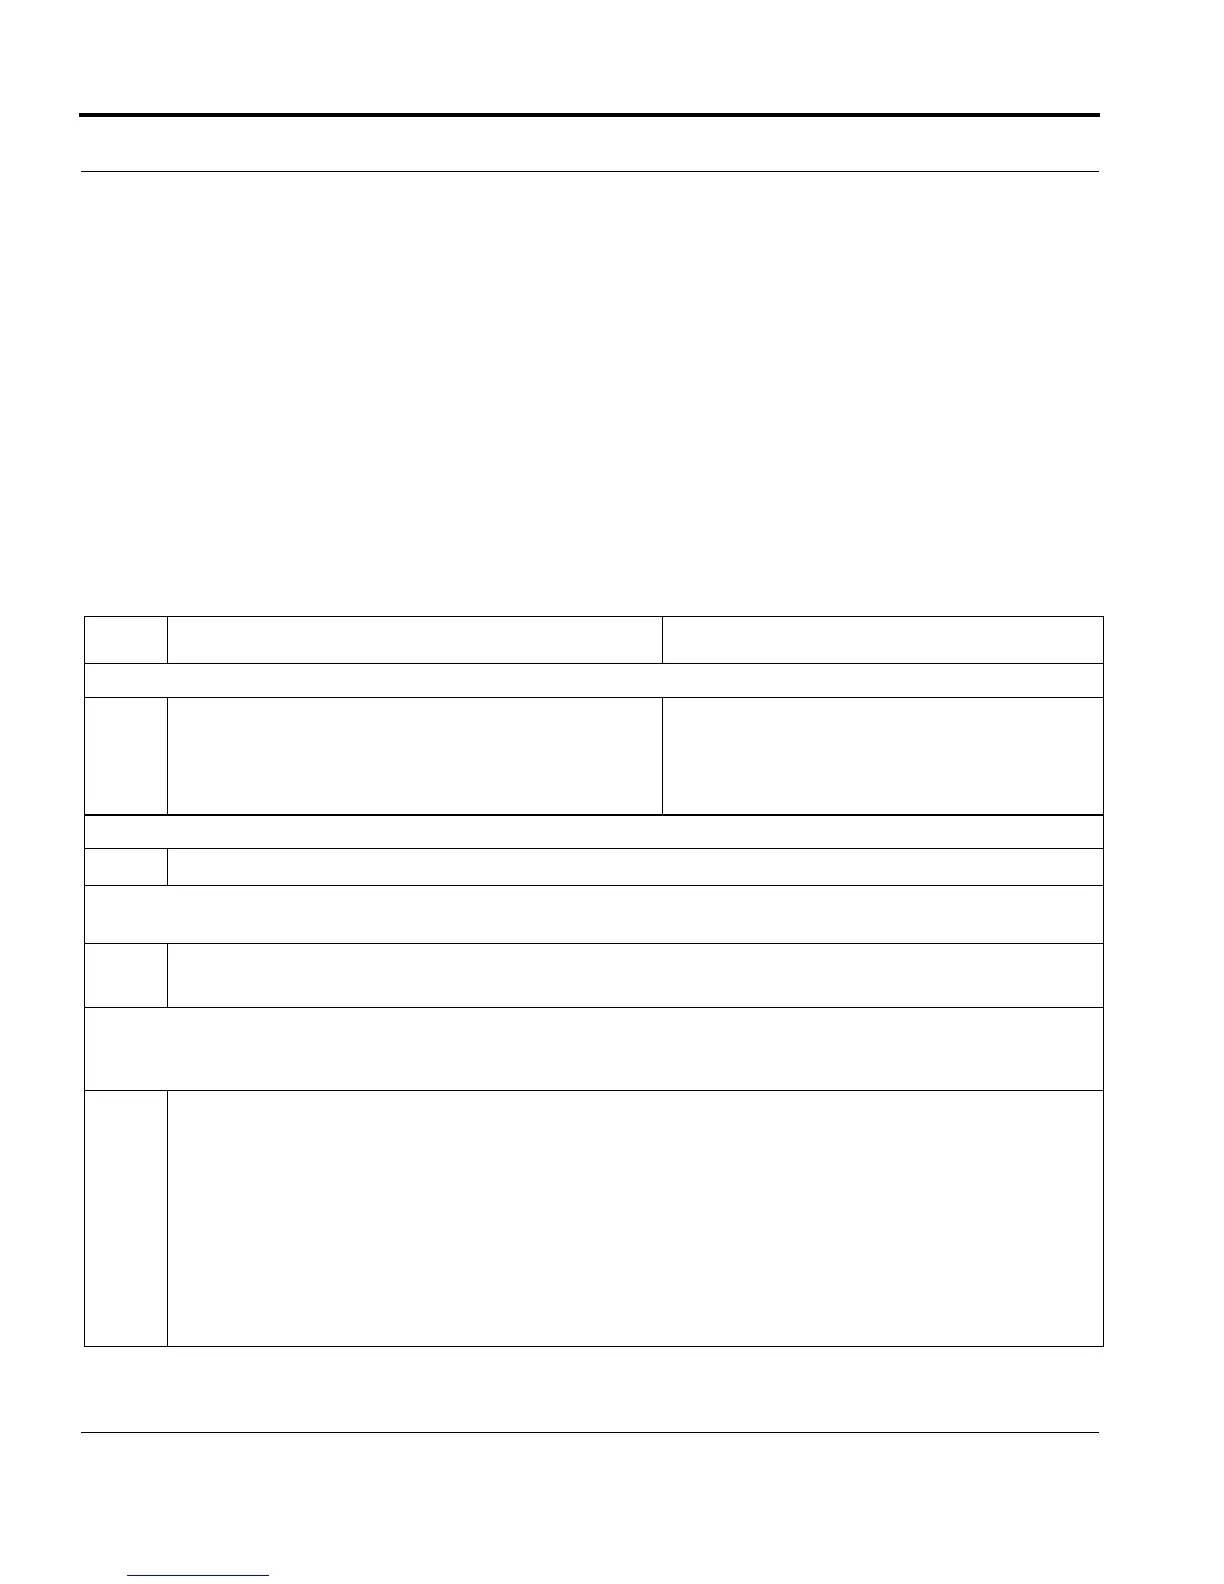
TABLE 6-19 Configuration procedure for Port Authentication
Step Command Description
Create the VLANs and add them to the appropriate interfaces.
1
CREATE VLAN VID=4,301
ADD VLAN=VLAN4 INTERFACE=1.0
ADD VLAN=VLAN301 INTERFACE=1.1,6.22-
6.23
VLAN 4 is for the inband VLAN.
VLAN 301 is for data.
Exclude from STP the interfaces that will be part of Port Authentication.
2
DISABLE STP INTERFACE=6.22-6.23
Configure the inband management VLAN (4).In this example the IP address and subnet mask include the IP address of the
RADIUS server. However, the RADIUS server can be anywhere in the L3 network as long as it is configured correctly.
3
ADD IP INTERFACE=VLAN:4.0 IPADDRESS=192.168.10.1 SUBNETMASK=255.255.255.0
ENABLE IP INTERFACE=VLAN4.0
Add the RADIUS server(s) to the configuration. Note that the PRIORITY parameter is being used to ensure that the
servers are tried in the specified order. (When the specified number of RETRIES has occurred, with the specified TIME-
OUT period between each RETRY, the next server is contacted.)
4
ADD RADIUS SERVER=192.168.10.205 SECRET=naspass1 TYPE=LOGIN,DOT1X AUTHENTI-
CATION=ON RETRIES=2 PRIORITY=1 ACCOUNTING=ON //default for RETRIES is 3
ADD RADIUS SERVER=192.168.10.206 SECRET=naspass2 TYPE=LOGIN,DOT1X AUTHENTI-
CATION=ON RETRIES=2 PRIORITY=2 ACCOUNTING=ON
ADD RADIUS SERVER=192.168.10.207 SECRET=naspass3 TYPE=LOGIN,DOT1X AUTHENTI-
CATION=ON PRIORITY=3 ACCOUNTING=ON // RETRIES is set at the default (3)

 Loading...


