DEQX User Manual
6.1 SPEAKER AND MICROPHONE POSITIONING
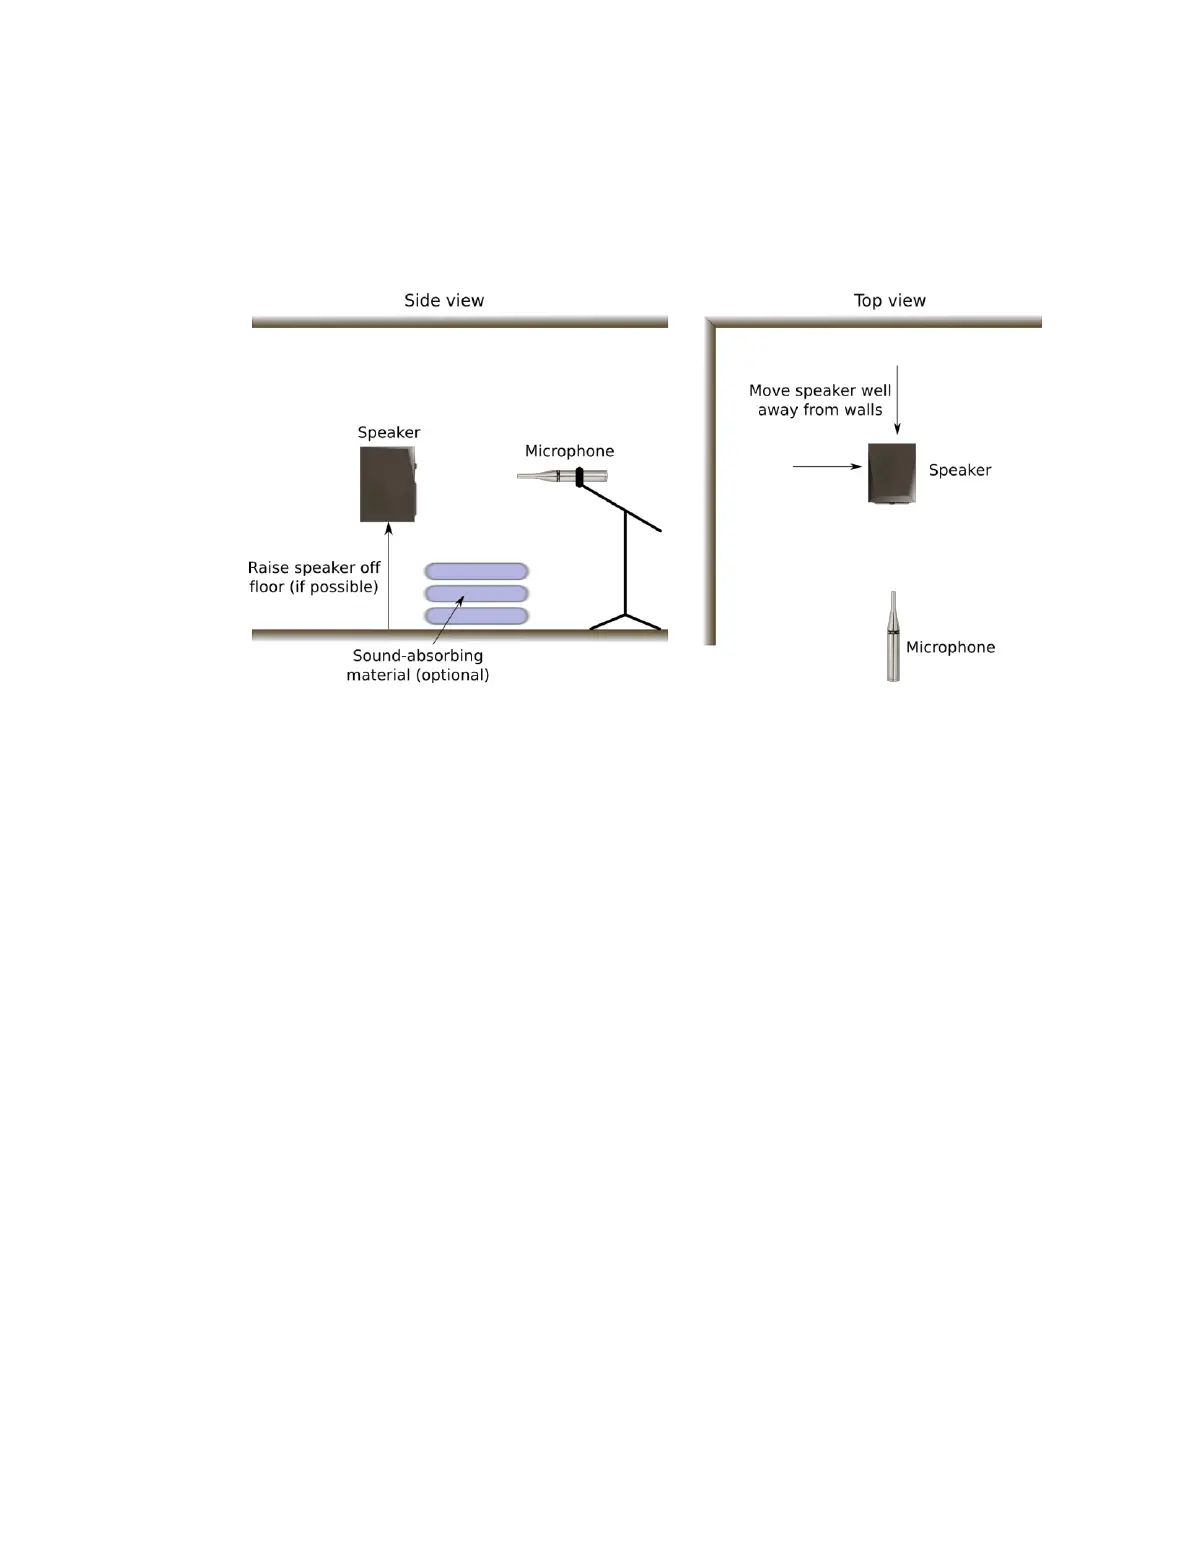
Figure 1 illustrates a typical indoor speaker measurement setup. A microphone stand
with a boom arm is recommended for placement flexibility.
x Move the speaker well away from the walls or other large objects such as furniture.
(They should be at least as far from the walls as the tweeter is from the floor,
otherwise those reflections will reduce the reflection-free time window.)
x If possible, raise the speaker so the tweeter is about halfway between the floor and
ceiling. This ensures that reflections from the floor and ceiling are as delayed as
possible.
x If it is not possible to obtain a sufficiently long reflection-free time window (see
Chapter 7), place thick absorbing material (e.g. cushions and pillows) on the floor
between the speaker and microphone to reduce the level of the floor reflection.
x Position the microphone 600 mm (two feet) away from the speaker. Larger
speakers may need the microphone positioned further away so the drivers integrate
properly for the measurement. (Moving the microphone further away will reduce
the length of the reflection-free time window.)
x Position the microphone at a height midway between the centers of the midrange
(or midwoofer) and tweeter drivers. In cases where the tweeter has limited vertical
dispersion (some types of ribbon tweeters, for example), positioning the
microphone at the same height as the tweeter center may be more accurate.
x While the microphone is typically positioned horizontally on the speaker’s axis, in
some cases a better measurement can be obtained if the microphone is slightly off
the horizontal axis (such as inline with the edge of the speaker cabinet).
Figure 1. Speaker measurement setup