Chapter 7. Speaker Calibration
Screen 5. Enter the name of the calibration template.
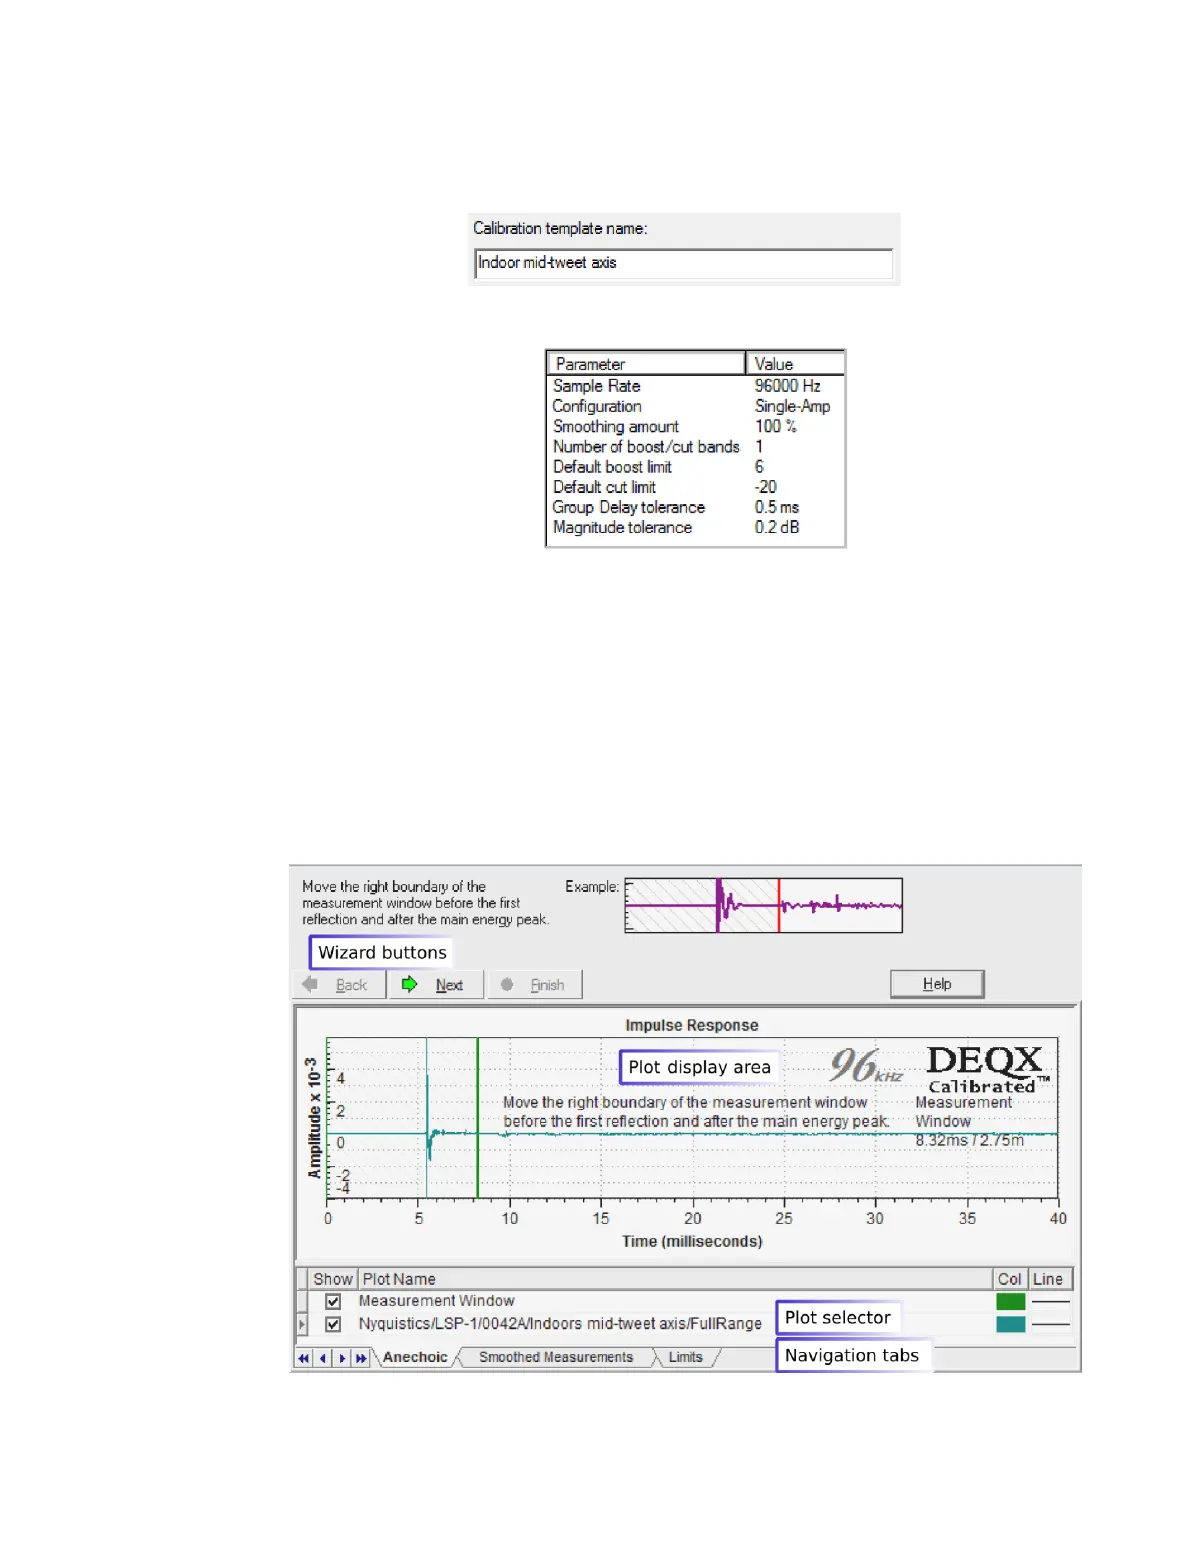
Screen 6. You will be presented with a summary of the template parameters:
Click Finish to proceed.
On completing the wizard, a new calibration template opens, as shown in the
annotated screenshot below. Above the plot is a wizard-like set of buttons used to
proceed through the steps of creating a correction set. Note also the row of navigation
tabs along the bottom – these can be used as an alternate navigation method to the
wizard-like Back/Next buttons.
The plot selector at the bottom lists the various plots shown in the plot display area and
enables them to be turned off and on. (For more operations on plots, such as zooming,
refer to Chapter 16.)