System 3505 Installation & Operation Manual
Digitize, Inc. 700248-0002 Rev. C 02/16
Specification Subject to Change Without Notice
8-3
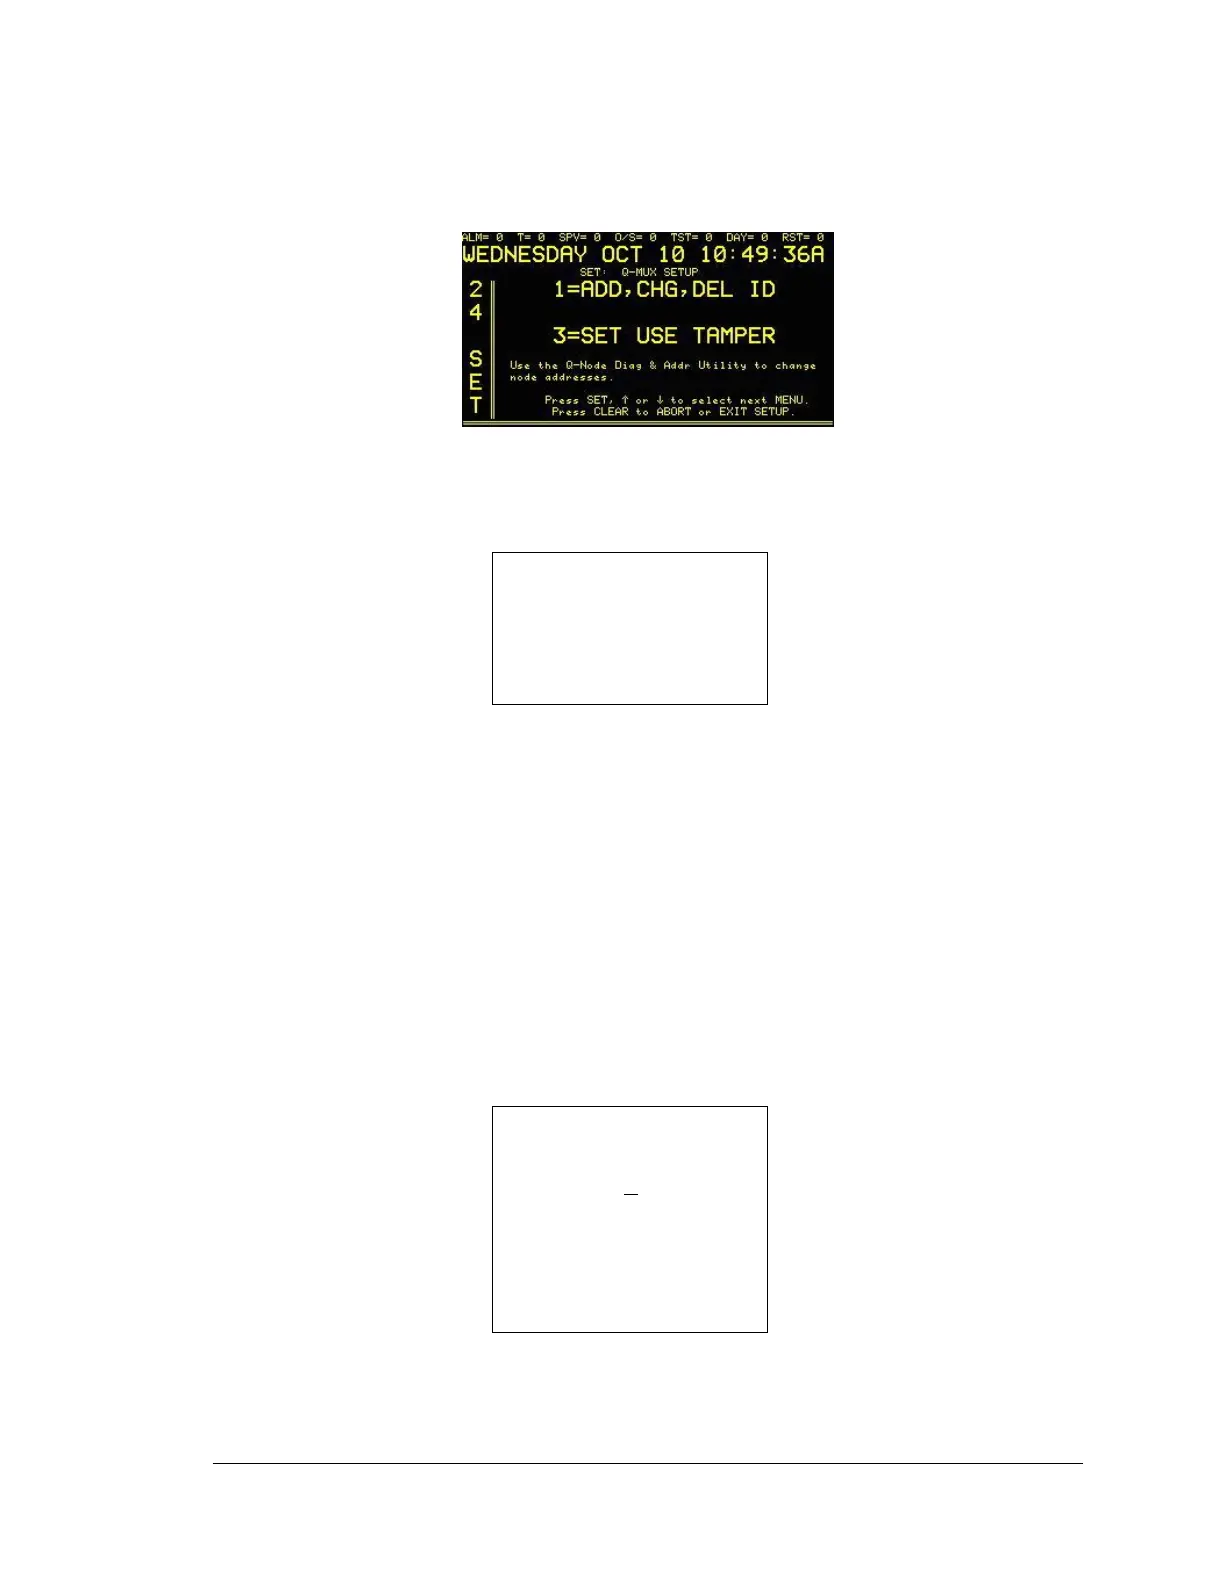
Press the FUNC button to edit this menu. Enter password if prompted (factory default is
2222; Password can be changed via the keyboard. If the password for this level has already
been changed, enter the new password). The next display, Q-Mux Setup, will appear:
The operator must enter ‘1’ to add or change ID module or ‘3’ to set tamper, details to follow.
8.2.1
1=ADD/CHG/DEL ID
At the SETUP screen, enter 1 (ADD/CHG/DEL) and the display will read:
1= DRVR# NONE
NODE # 9001= NONE
ID # 1 NONE
Press SET, ↑ or ↓ to select next
MENU.
Press CLEAR to ABORT or EXIT
SETUP
Use ↑ ↓ keys to select NONE or ACTIV for node. Use ↑ ↓ keys to select module type for
each ID #. Select one of the following:
NONE
Q-1C (select NO or NC)
Q-1CL
Q-I/O (select NO or NC)
Q-1R (select DISP, ACK or HIDE)
Q-EOL
ARM/DISRM * (Available as special order only.)
C/INTELGNC * (Available as special order only.)
8.2.2
3= SET USE TAMPER
At the SETUP screen, enter 2 (SET USE TAMPER) and the display will read:
SET: Q-MUX SETUP
USE TAMPER SW.
CONNECTEDTO
NODE
#9001 =NO
Use the Q-Node Diag & Addr Utility to change
node addresses
Press SET, ↑ or ↓ to select next
MENU.
Press CLEAR to ABORT or EXIT
SETUP
Press SET, or use ↑ ↓ keys to select node(s) by ID #. Press FUNC to move between
fields. Use ↑ ↓ keys to change value from YES to NO. Press SET to save changes and
select the next menu.