System 3505 Installation & Operation Manual
Digitize, Inc. 700248-0002 Rev. C 02/16
Specification Subject to Change Without Notice
7-5
7.2.6
Parallel Printer
A parallel printer may be attached directly to the DDI-9/10E. This printer will
operate independently from the SYSTEM 3505. The parallel printer can be
supervised by selecting this feature via the SET 16, selection #5.
7.3 DDI-9/10E Dialer Set-Up
For proper operation of the DDI-9/10E with the SYSTEM 3505, the user MUST have a
working knowledge of how Digital Dialers operate. Each individual Digital Dialer subscriber
must be added to the SYSTEM 3505 (via the 16 SET menu). After installation of the DDI-
9/10E, the user will access the Set Up Mode through the front panel keypad. By pressing the
SET button, the user may step through all available menus. If pressed for over one second, the
SET button will auto repeat. Direct access to the DDI-9/10E menu is possible by entering the
menu number (16) and then pressing the SET button. Please refer to Appendix B of this
manual for step-by-step procedures.
When using the DDI-9/10E with Contact ID format, the only information that must be set up
using the 16 SET menus is the customer number and whether the DDI-9/10E reports in 24
hours or less often. Refer to Section 7.2.2, Contact
ID
, for details.
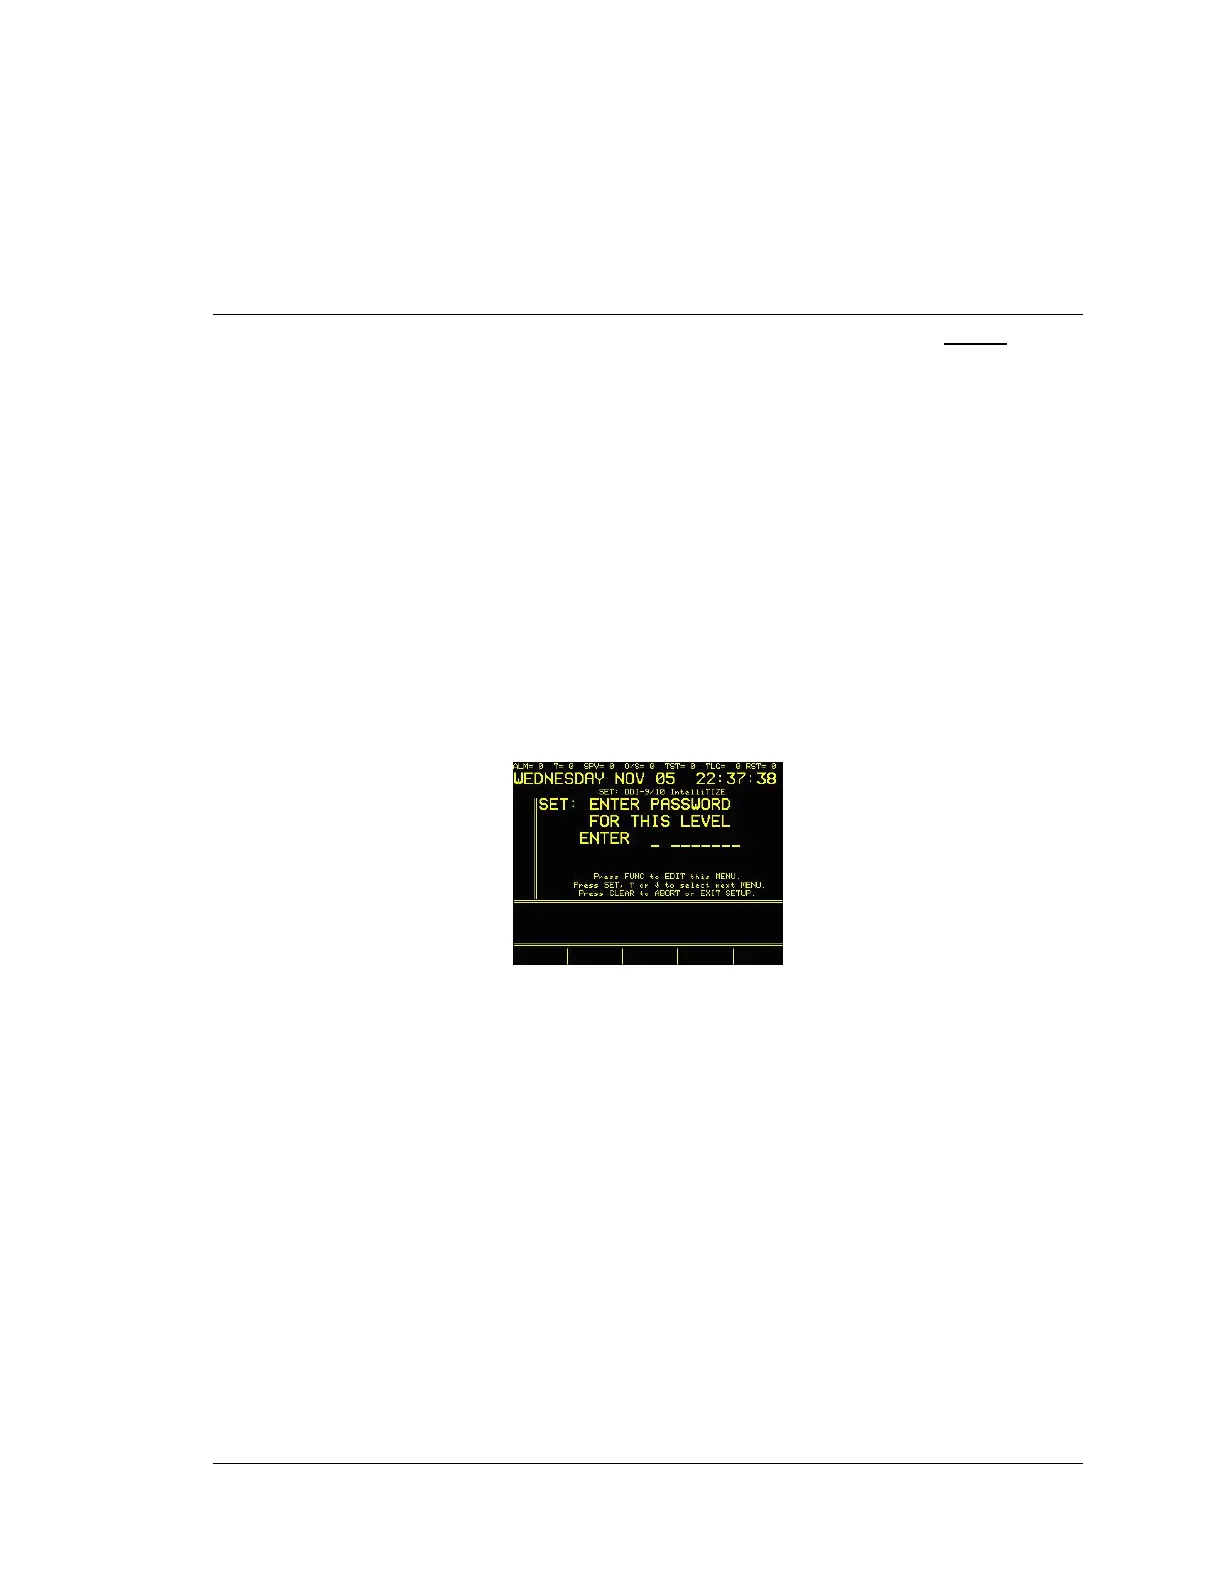
7.3.1
Password
After pressing 16 SET and FUNC, the display will read:
Enter password, if prompted. The factory default password is 2222. Password
can be changed via the keyboard. Refer to Section 4.3.10, Password Menu, in
the SYSTEM 3505 Installation and Operation Manual. If the password for this
level has already been changed, enter the new password. Once the password has
been entered at this level the operator can move between screens without
reentering the password.
7.3.2
Configuration Menu
After the password has been entered and the SET button has been pressed, the
DDI-9/10 or Intellitize Configuration menu screen will appear and the display
will read: