240 Upgrade and Maintenance Manual RX1330 M3
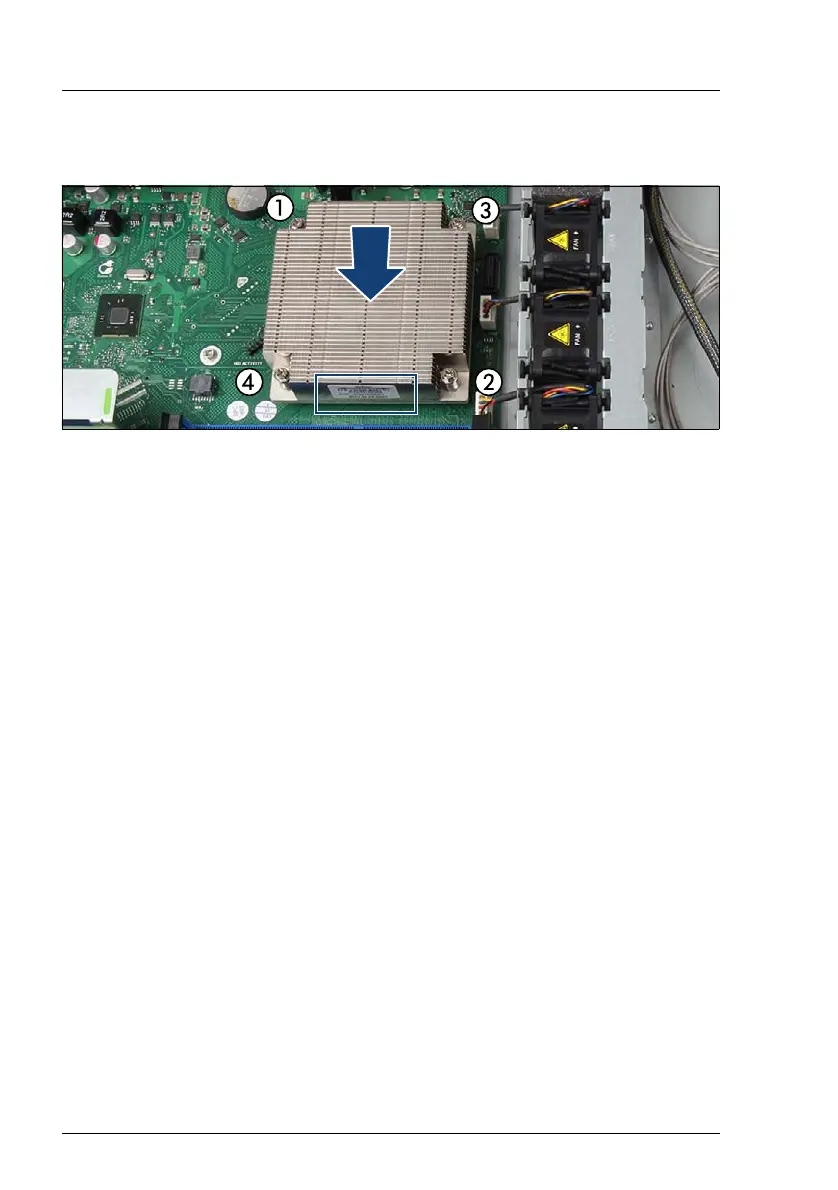
11.2.6 Installing the heat sink
Figure 154: Installing the heat sink
Ê Ensure that the heat sink cooling fins match the direction of the airflow!
Ê Carefully seat the heat sink on the four threaded holes as shown.
V CAUTION!
– Ensure that the screws on the heat sink are properly seated on the
threaded holes.
Ê Fasten it in a crossover pattern with four screws according to the numbering
(torque 6.0 Nm, the description of this torque value doesn't apply for Japan.)
Notice the position of the air flow label.

 Loading...