RX200 S8
Upgrade and Maintenance Manual 223
Processors
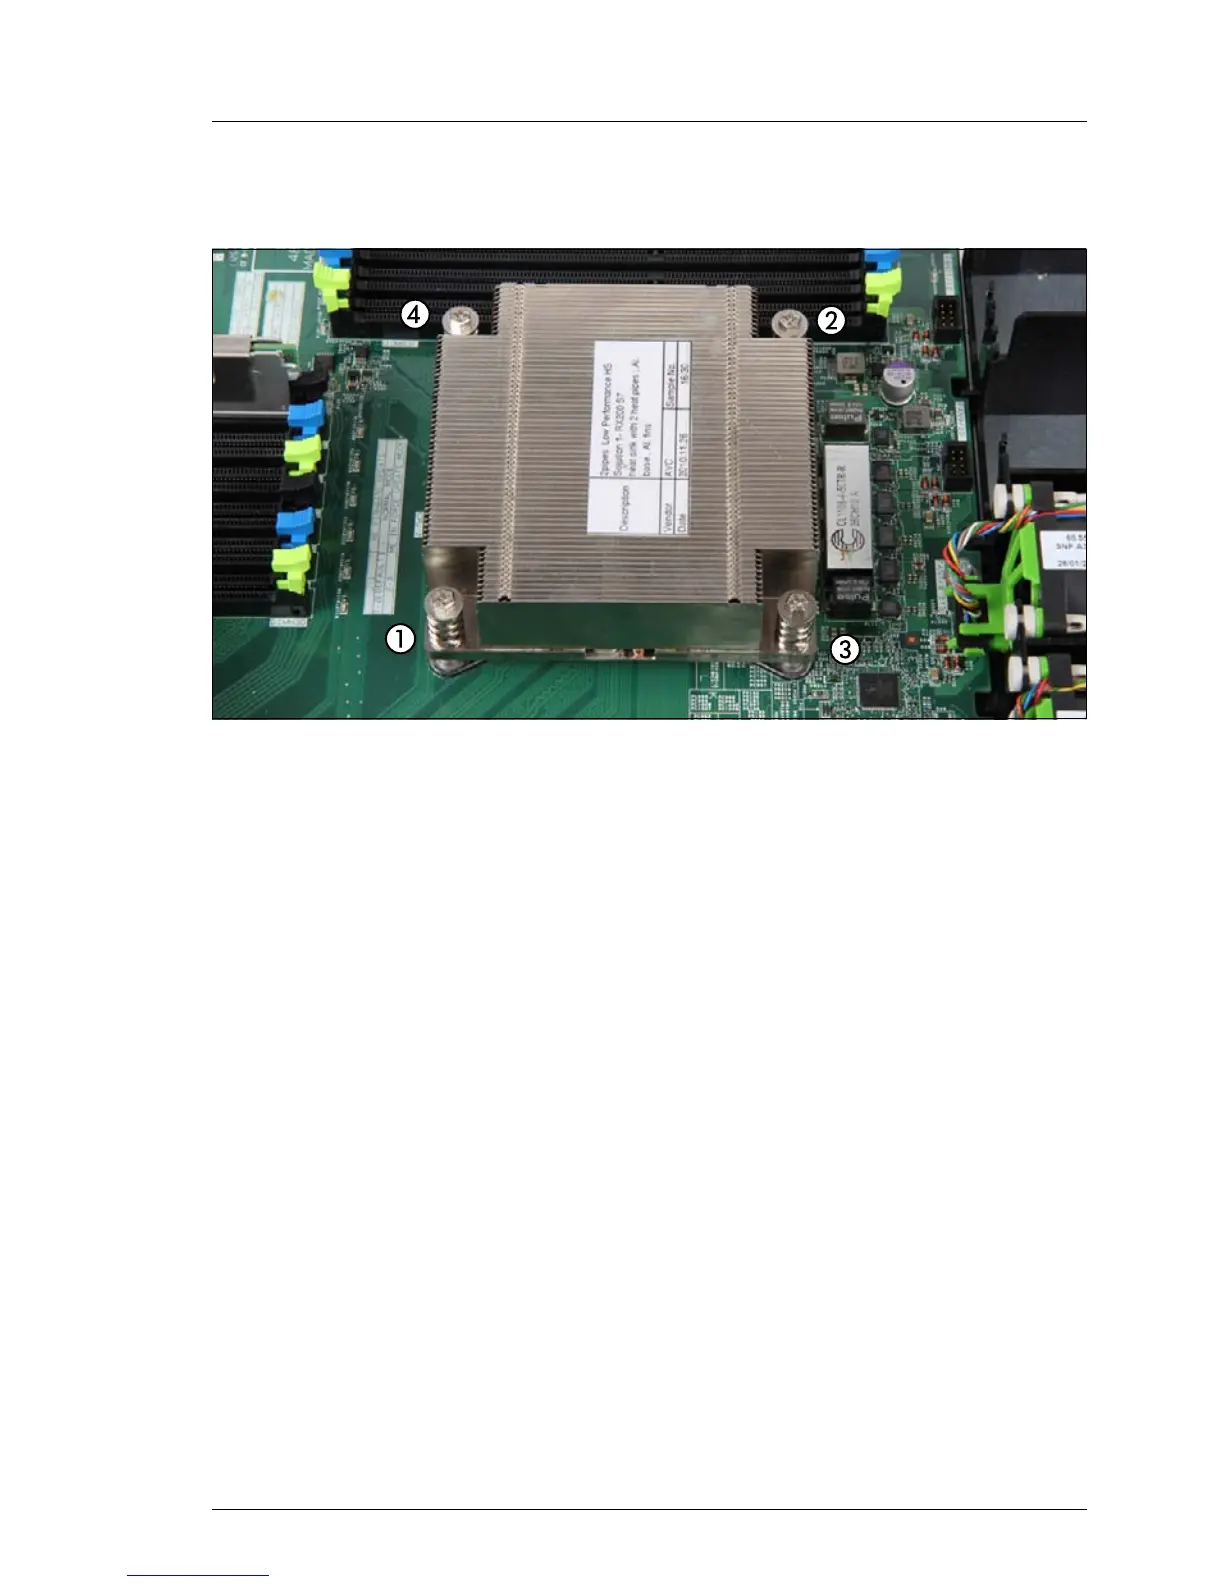
11.3.2 Removing the heat sink
Figure 151: Removing the heat sink
Ê Loosen the four screws of the heat sink in a crossover pattern according to
the numbering.
Ê Carefully turn the heat sink back and forth to detach it from the processor.
I This may be necessary due to the adhesive quality of the thermal
paste located between the heat sink and the processor.
V CAUTION!
Pay special attention not to damage any system board components
surrounding the processor socket.
Ê Lift the heat sink out of the chassis.
Ê Remove the residual thermal paste from the underside of the heat sink and
the surface of the processor.
Ê Clean the underside of the heat sink and the surface of the processor using
a lint-free cloth.

 Loading...