▶
Pinch the green locking clips (1) and open the locking lever (2).
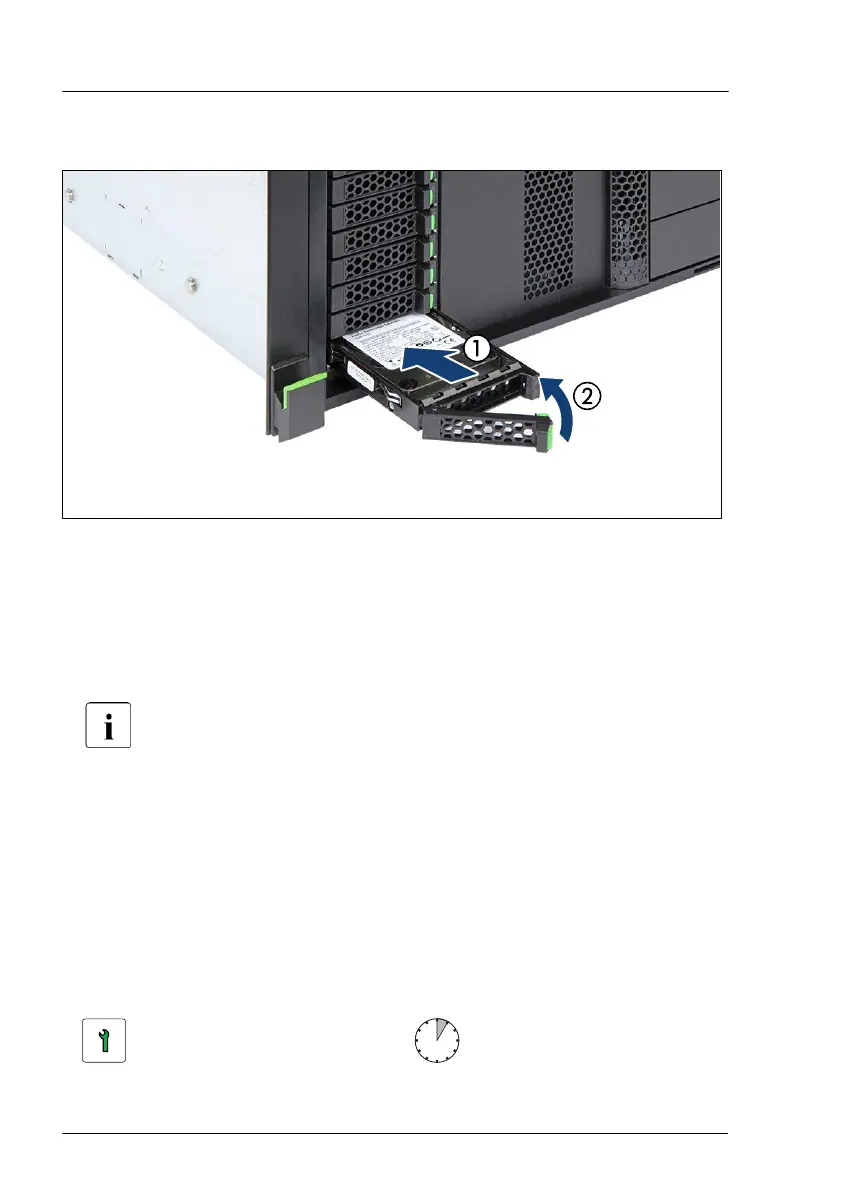
Figure 124: Installing the 2.5-inch HDD/SSD module
▶
Insert the HDD/SSD module into a drive bay and carefully push back as far
as it will go (1).
▶
Close the locking lever to lock the HDD/SSD module in place (2).
▶
When using a RAID array, add the additional HDD/SSD to the RAID array
.
Configuring the RAID array, see the documentation of the RAID
controller, used in your configuration, see "Documentation overview"
on page
30.
Concluding steps
▶
When working on a floorstand model, close the HDD bay cover
, see
"Installing the accessible drive bay cover" on page
78.
7.5.4 Removing 2.5-inch HDD/SSD modules
Customer Replaceable
Unit (CRU)
Hardware: 5 minutes
Hard disk drive (HDD) / solid state disk (SSD)
220 Upgrade and Maintenance Manual TX2550 M5

 Loading...


