EasyManuals Logo

GE LOGIQ P9 Service Manual

GE LOGIQ P9
602 pages
To Next Page IconTo Next Page
To Previous Page IconTo Previous Page
Page #279 background imageLoading...
Page #279 background image
GEDRAFT LOGIQ P9/P7
D
IRECTION 5604324, REVISION 11 DRAFT (JANUARY 24, 2019) SERVICE MANUAL
Chapter 5 - Components and Functions (Theory) 5-95
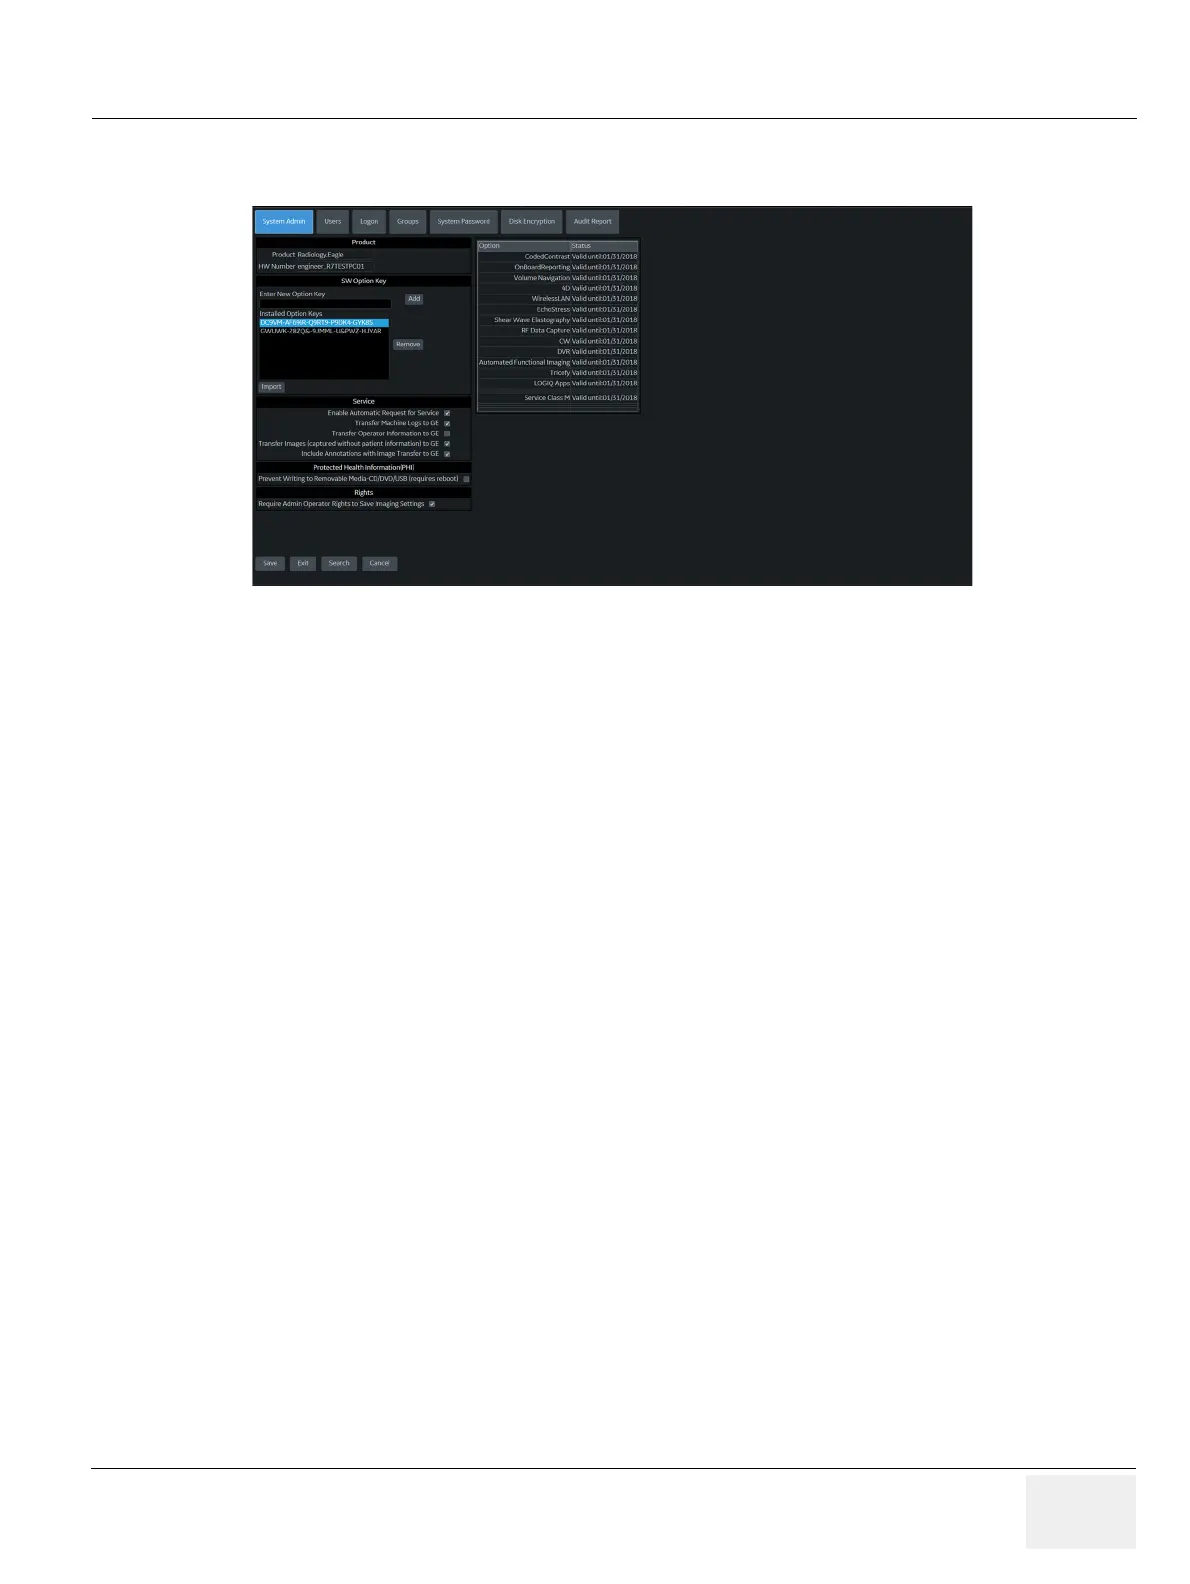
To configure automatic data transfers:
1.) Navigate to ADMIN > System Admin.
2.) On System Admin, configure these settings:
- Transfer Machine Logs to GE – Default is checked
- Transfer Operator Information to GE
- Transfer Images (captured without patient information) to GE – Default is checked.
3.) Click Save.
4.) Navigate to Utility (second page) > Service > Utilities > Data Transfer.
5.) On Data Transfer, select Scheduler, and then select the days to perform the data transfer.
6.) Click Save Settings.
7.) To manually perform a data transfer, click Send All.
For more information:
Utilities on page 5-73

Table of Contents

Other manuals for GE LOGIQ P9

Questions and Answers:

Question and Answer IconNeed help?

Do you have a question about the GE LOGIQ P9 and is the answer not in the manual?

GE LOGIQ P9 Specifications

General IconGeneral
TypeUltrasound System
3D/4D ImagingYes
ElastographyYes
ConnectivityDICOM, USB, Ethernet, HDMI
Doppler ModesColor Doppler, Power Doppler
Probesconvex, linear, phased array
Imaging ModesM-Mode, Color Doppler, Power Doppler
PortabilityCart-based
ApplicationsVascular, Cardiac, OB/GYN, Musculoskeletal
WeightApprox. 80 kg
Touch Panel10.1-in touchscreen

Related product manuals