EasyManuals Logo

GE LOGIQ P9 Service Manual

GE LOGIQ P9
602 pages
To Next Page IconTo Next Page
To Previous Page IconTo Previous Page
Page #366 background imageLoading...
Page #366 background image
GERAFT LOGIQ P9/P7
D
IRECTION 5604324, REVISION 11 DRAFT (JANUARY 24, 2019) SERVICE MANUAL
8-40 Section 8-3 - System Software - Installation/Upgrade Procedure
8-3-7-3-2 Base and Application Software installation
Base Image Software Load Procedure
1.) Power ON the scanner.
2.) Wait few moments for USB drive to read USB contents.
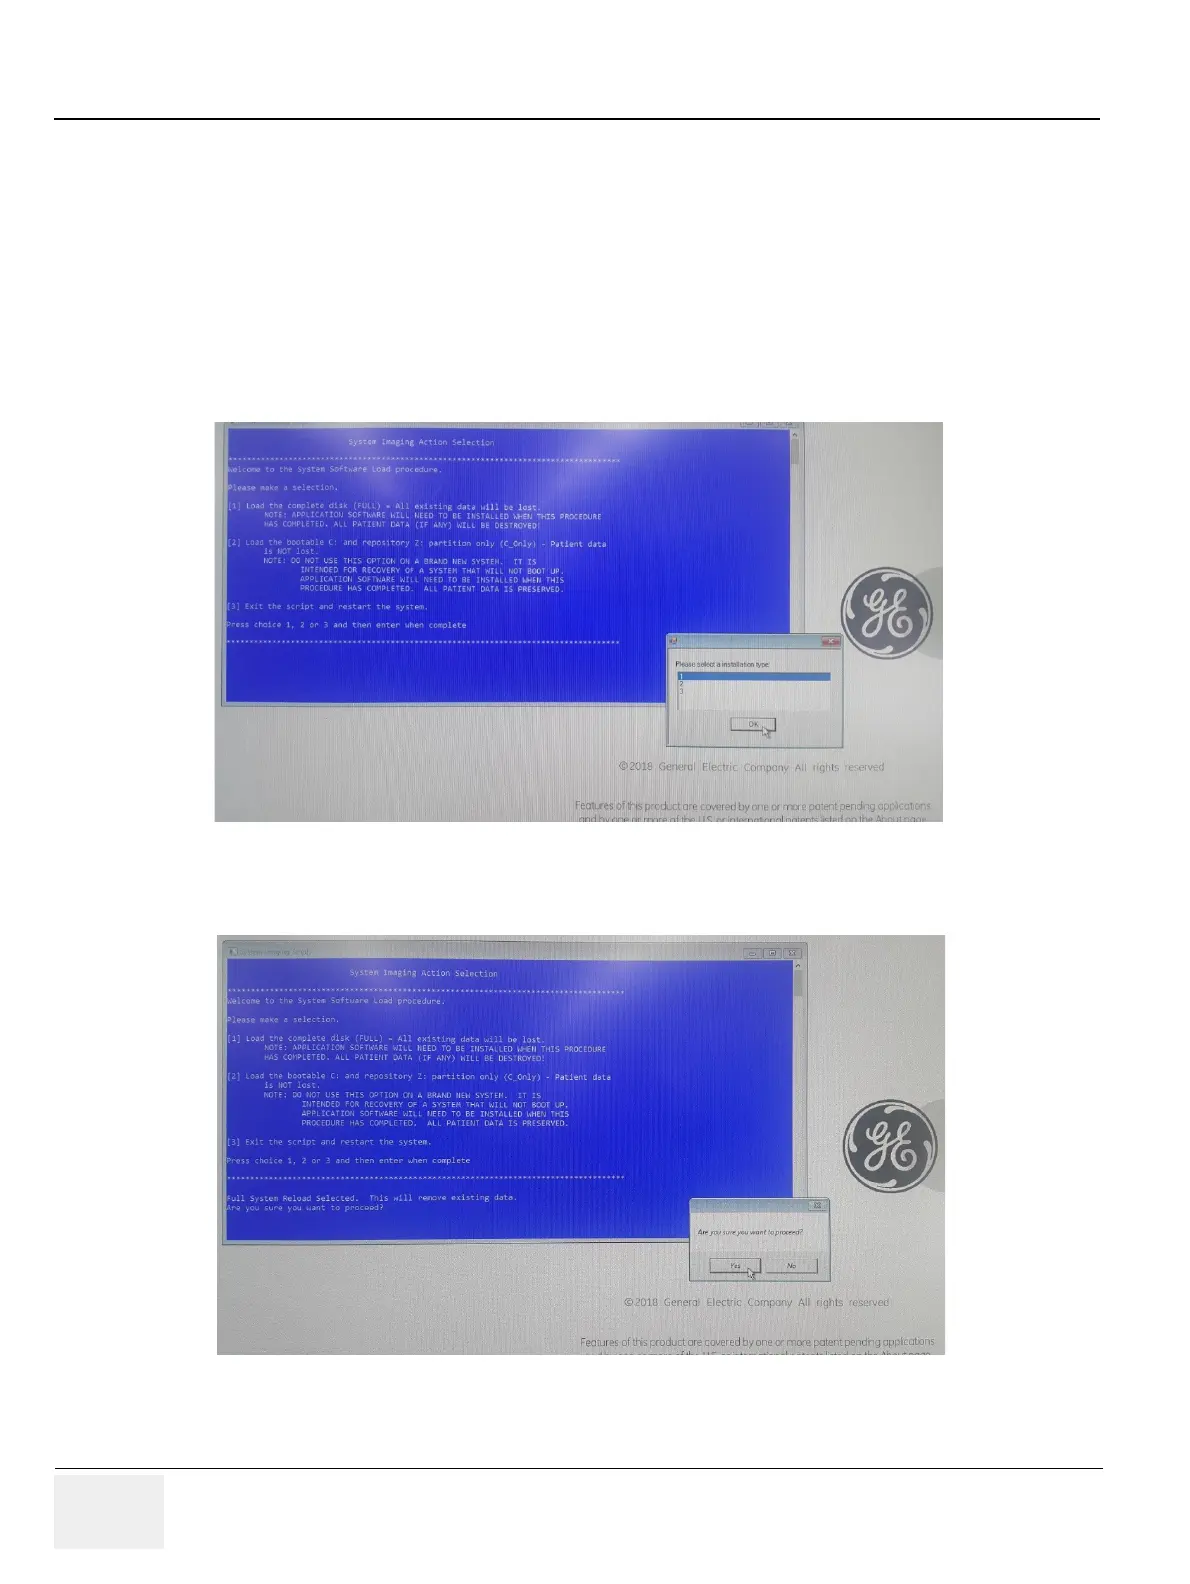
3.) The notification screen appears like below.
4) Select [1] Load the complete disk (FULL), and Press [OK] button using the trackball key.
NOTE: If there is no physical keyboard option, use the external keyboard or on-screen menu.
5.) A confirmation window appears, and then Press [Yes] button using the trackball key.
Figure 8-23 The notification screen 1
Figure 8-24 The notification screen 2

Table of Contents

Other manuals for GE LOGIQ P9

Questions and Answers:

Question and Answer IconNeed help?

Do you have a question about the GE LOGIQ P9 and is the answer not in the manual?

GE LOGIQ P9 Specifications

General IconGeneral
TypeUltrasound System
3D/4D ImagingYes
ElastographyYes
ConnectivityDICOM, USB, Ethernet, HDMI
Doppler ModesColor Doppler, Power Doppler
Probesconvex, linear, phased array
Imaging ModesM-Mode, Color Doppler, Power Doppler
PortabilityCart-based
ApplicationsVascular, Cardiac, OB/GYN, Musculoskeletal
WeightApprox. 80 kg
Touch Panel10.1-in touchscreen

Related product manuals