12.1 Recording Settings
203
12
Chapter 12 Memory Division Function
12.1 Recording Settings
Procedure
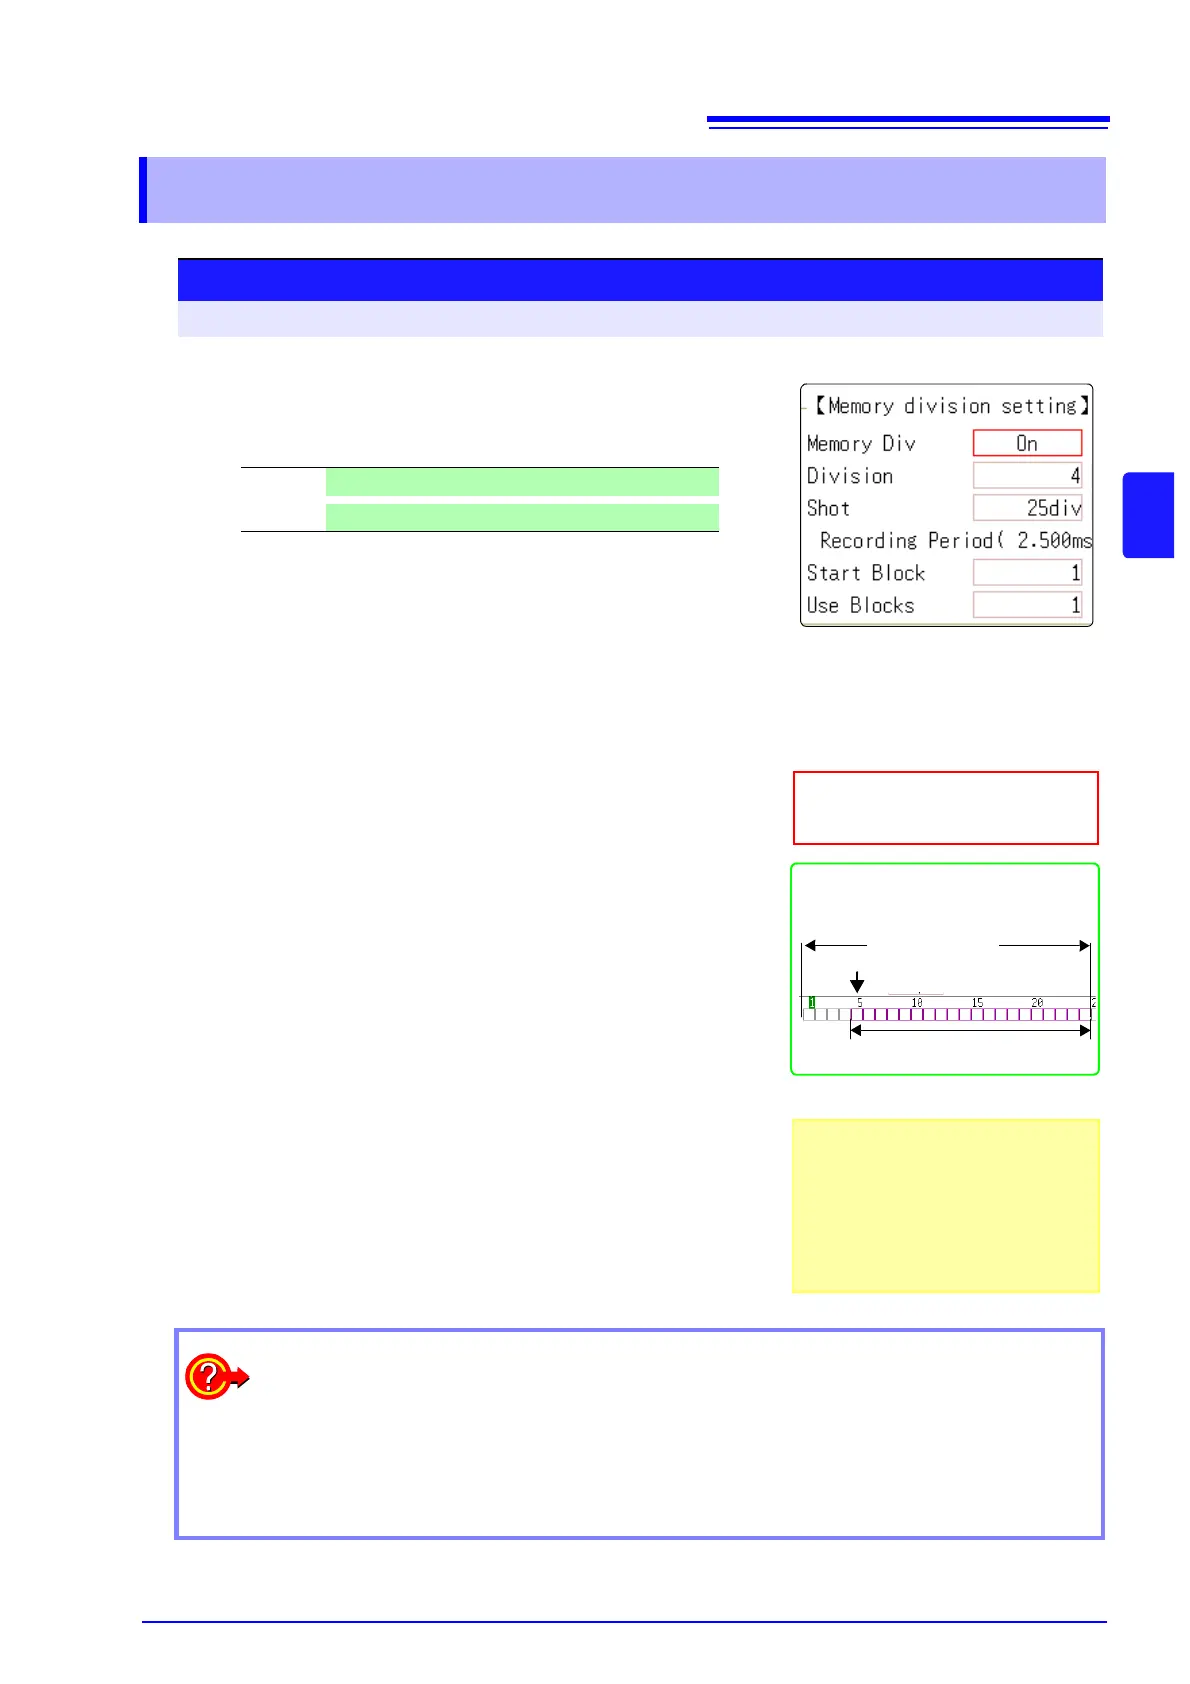
To open the screen: Press the STATUS key → [Memory Div] sheet
1
Enable the Memory Division function.
Move the cursor to the
[Memory Div] item.
Select [On].
2
Set the number of divisions.
Move the cursor to the [Division] item.
Set the number of blocks for division.
Default setting: 4
3
Set the recording length.
(This is linked to the recording length setting on the [Status]
sheet.)
Move the cursor to the [Shot] item.
Set the recording length.
The maximum recording length and number of divisions are determined
automatically according to memory capacity and the number of chan-
nels used.
Setting range: "Appendix 2.4 Maximum record length and number of di-
visions (Memory division function)"(
p.A8)
4
Set the start block.
Move the cursor to the [Start Block] item.
Set the block number at which to start recording.
Default setting: 1
5
Set the Used Block number.
Move the cursor to the [Use Blocks] item.
Set the number of blocks to use.
Default setting: 1
Off
Memory Division is disabled.(default setting)
On
Memory Division is enabled.
About Recording
When a fast timebase is selected, display-
ing, printing and saving operation are not
available while measuring.
Selecting the display screen for auto sav-
ing lengthens dead time.
Use Blocks (Purple)
Memory Division, Waveform Calcula-
tion, and Roll Mode cannot be enabled
at the same time.
When the number of divisions is 32, the
Start Block is 5 and the Used Block num-
ber (number of blocks to use) is 20
No. of Divisions
Start Block
3
1
2
4
5
To display any block on the waveform screen when finished measuring:
Set the number of blocks to display ( p.204).
(This can also be set on the Waveform screen ( p.115).)
To display overlaid waveforms:
Set the number of blocks for reference ( p.204).