15.6 USB Settings and Connection (Before Command Communications)
278
Use the USB cable supplied with the instrument to connect the instrument to the PC. The instrument
can then be controlled from the PC. Before command communication is possible, certain USB set-
tings must be made and the connection must be established.
Install the USB driver before you use the instrument with a USB connection.
1. Connect the AC adapter to the instrument and turn the power on.
2. Using the enclosed USB cable, connect the instrument to the PC to which the
driver will be installed.
15.6 USB Settings and Connection (Before Com-
mand Communications)
15.6.1 Making USB Settings at the Instrument
Procedure
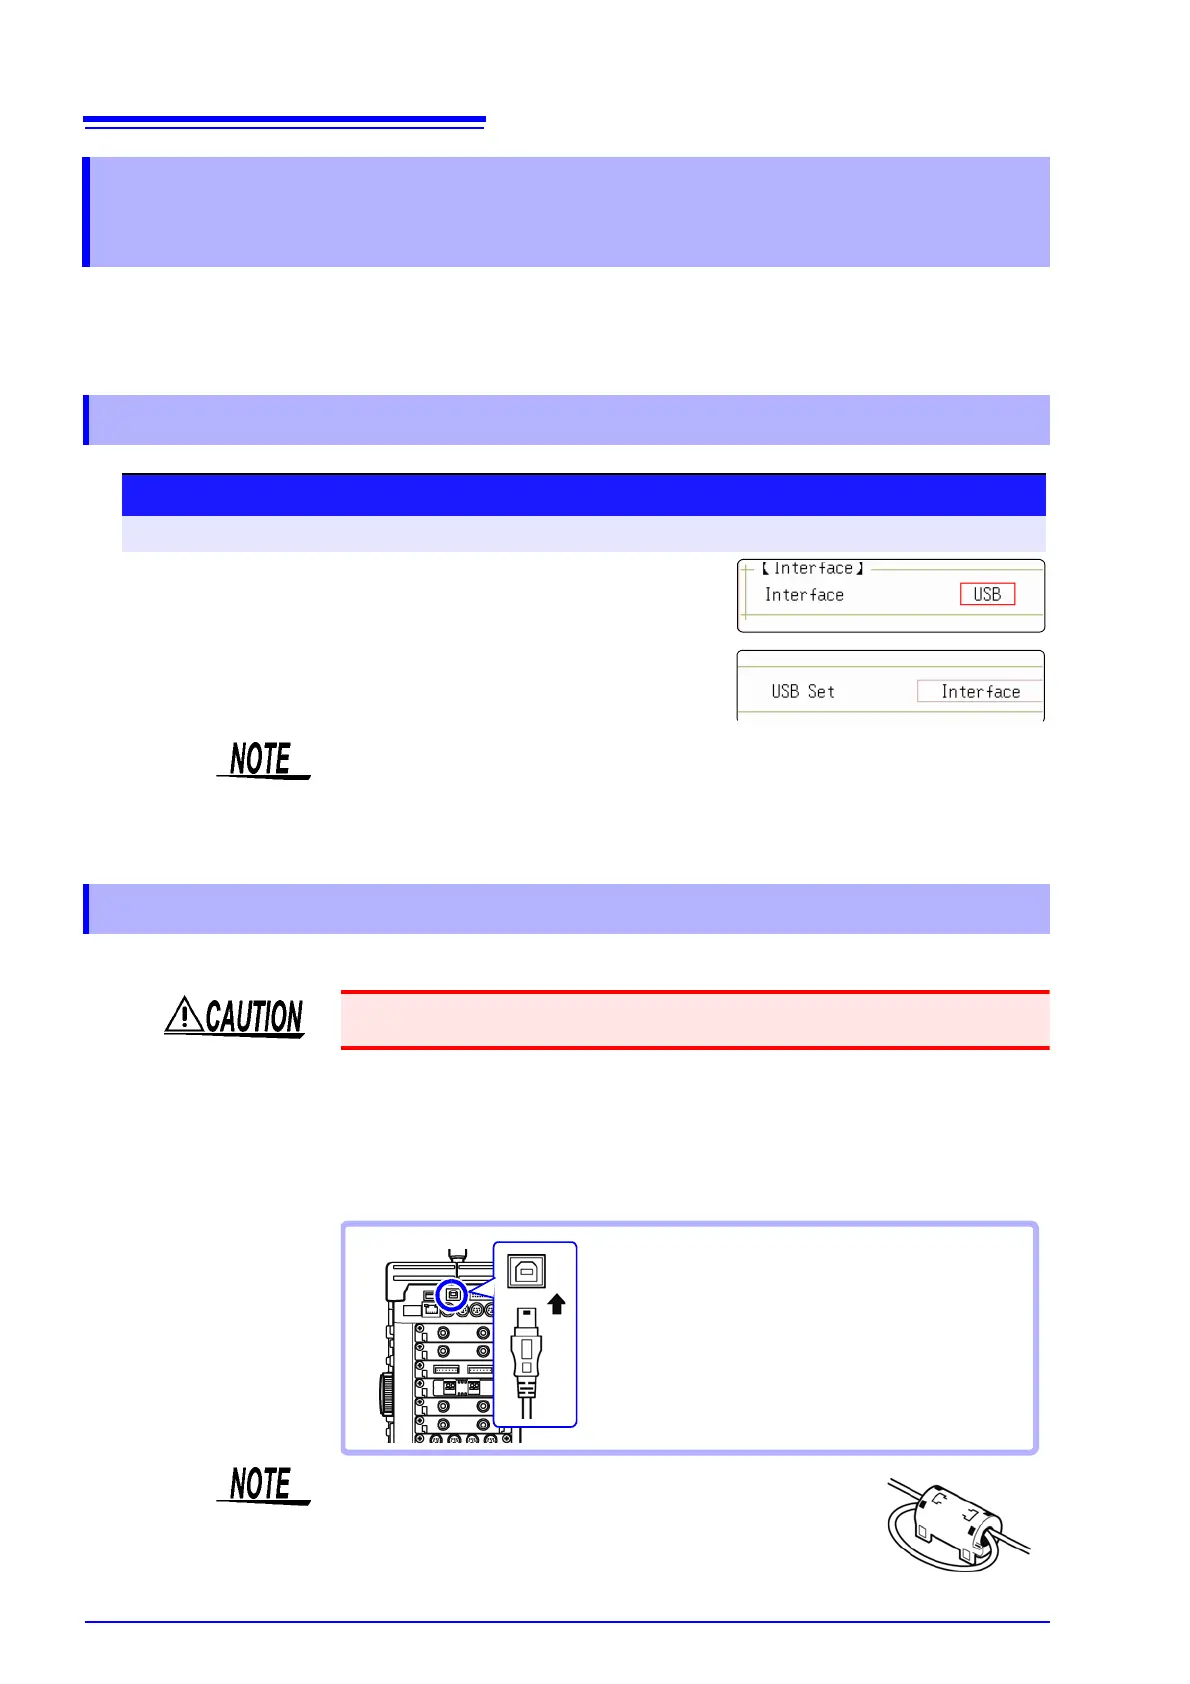
To open the screen: Press the SYSTEM key → [Interface] sheet
Move the cursor to the [Interface], and select [USB].
The [USB Set] item is automatically set to [Interface].
When the interface has been set to [USB], the following functions are not avail-
able.
• Using a USB memory stick
• Viewing data of the instrument on a PC
15.6.2 Installing the USB Driver
Do not plug in or unplug the USB cable while the instrument is operating.
1. Plug the USB cable supplied with the instru-
ment into the USB connector (Type B) on
the right side of the instrument.
2. Connect the other end of the cable to the
USB port on the PC.
If there is a possibility of noise interference to other equip-
ment in the vicinity, wind the USB cable once around the
supplied ferrite clamp-on choke (for LAN/USB cable), as
shown in the illustration at right.