5.2 Saving Data
68
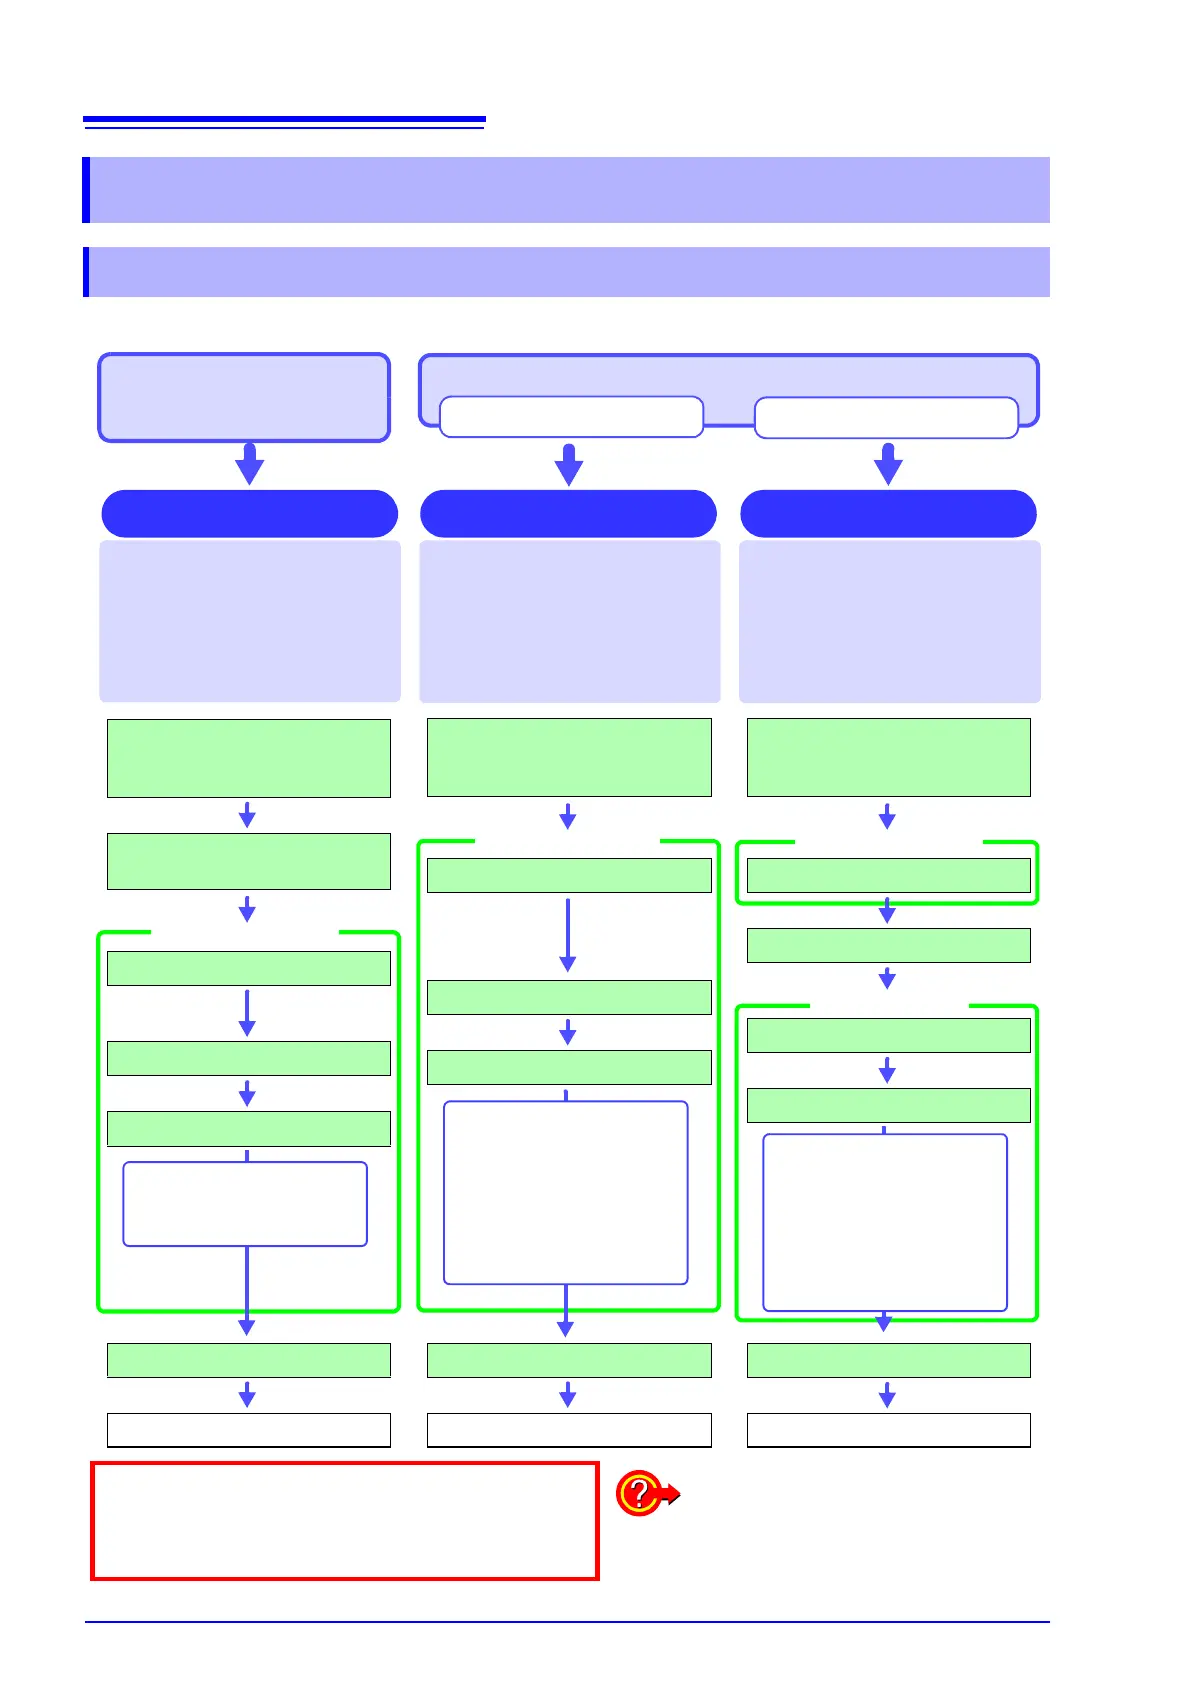
There are basically three types of save operations.
5.2 Saving Data
5.2.1 Save Types and Workflow
To save data automatically
during measurement
( p.69)
To save data manually with the SAVE key ( p.74)
Auto Save
This is convenient for saving multi-
ple times and for quick saving of
data during monitoring. Before
pressing the SAVE key, the data
content is specified. (
p.74)
(default setting)
Press the SAVE key and then speci-
fy the data content for saving. Be-
cause no settings on the [File Save]
sheet are necessary, save settings
can be made from any screen. (
p.74)
Quick Save Selection Save
Measurement data are acquired for
the recording length and then saved
automatically each time. Save loca-
tion and data type are selected be-
fore the measurement. (
p.69)
Data are saved on HDD or CF Card.
Save data straight away
Select data and save
After installation and connection,
turn the power on.
Insert the storage media.
Set the measurement configura-
tion.
Set [Auto Save] to [On].
Select the save destination.
Select the data to save.
Measure
Auto Save
• Waveform data
• Numerical calculation
results*
After installation and connection,
turn the power on.
Insert the storage media.
Set [Select at save] to [No].
Select the save destination.
Select the data to save.
Press the SAVE key
Save
Any of the following can be
saved:
• Setting data
• Waveform data
• Display screen
• Waveform screen
• Numerical calculation
results
After installation and connection,
turn the power on.
Insert the storage media.
Set [Select at save] to [Yes].
Press the SAVE key
Select the save destination.
Select the data to save.
Select [Exec]
Save
Any of the following can be
saved:
• Setting data
• Waveform data
• Display screen
• Waveform screen
• Numerical calculation
results
Check points before saving:
• Media inserted and initialized? ( p.28), ( p.30)
• Save target specified correctly?
• Auto Save set to [On]? (For auto-saving)
*: To save numerical calculation results
See: "10.4 Saving Numerical Calculation
Results" (
p.183)