215
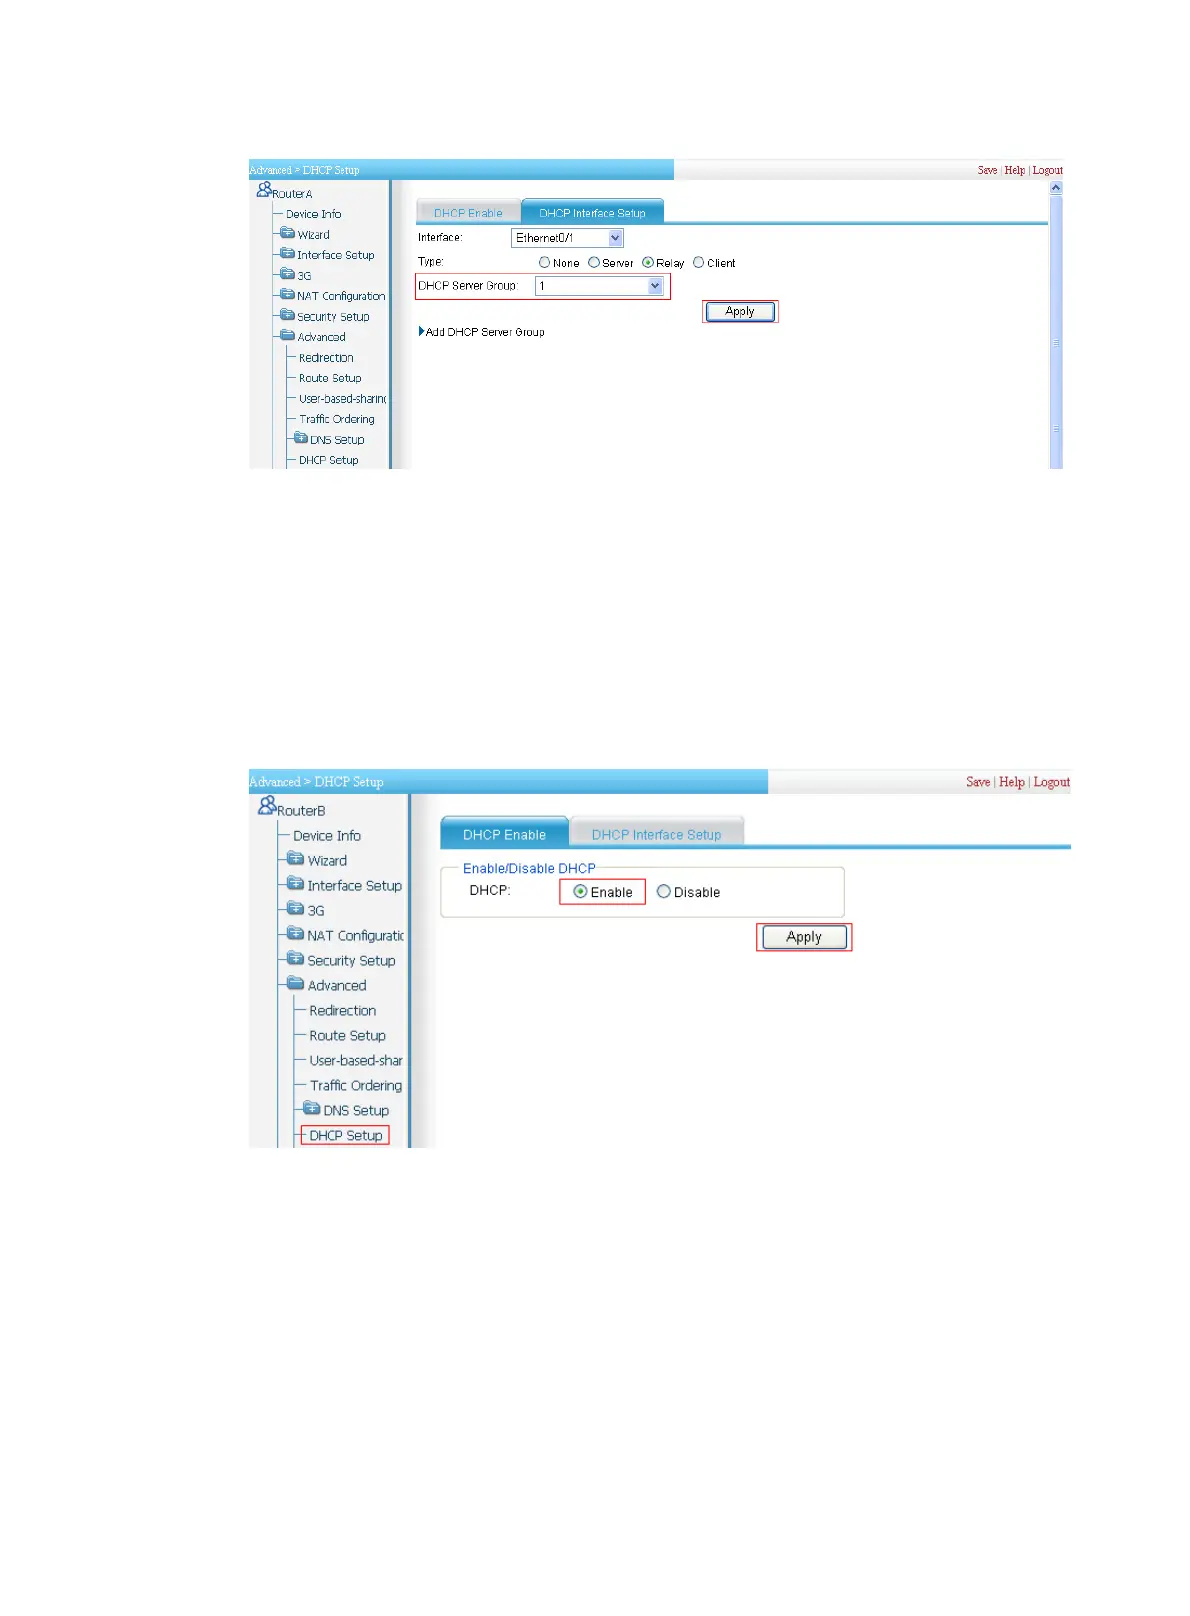
Figure 230 The page for enabling the DHCP relay agent on interface Ethernet 0/1
Configuring the DHCP server (Router B)
1. Specify addresses for interfaces. (Details now shown.)
2. Enable DHCP:
a. Select Advanced > DHCP Setup from the navigation tree of Router B
The default DHCP Enable tab appears, as shown in Figure 231.
b. Select the Enable option in
the DH
CP field.
c. Click Apply.
Figure 231 Enable DHCP
3. Enable the DHCP server on interface Ethernet 0/1. (By default, the DHCP server is enabled on
Ethernet 0/1. Details are not shown.)
4. Configure a dynamic DHCP address pool:
a. Click the DHCP Interface Setup tab.
b. Select the Server option in the Type field and expand the Assignable IP Addresses node.
c. Enter pool1 in the Pool Name field and select the Dynamic Allocation option in the
Address Allocation Mode field.
d. Enter 10.10.1.0 in the IP Address field, select the Subnet Mask box, and then enter
255.255.255.0.
e. Set the Lease Duration to 7 days, 0 hours, and 0 minutes.
f. Select the Domain Name box, and then enter aabbcc.com.
 Loading...