7. Gateway Parameter Setting Tool
381
7.3 Network Setting
Touch [Set] button in the gateway menu screen to show the network setting screen.
7.3.1 Network Setting
Network setting is conducted. Refer to the instruction manual for each controller for the detail
of settings.
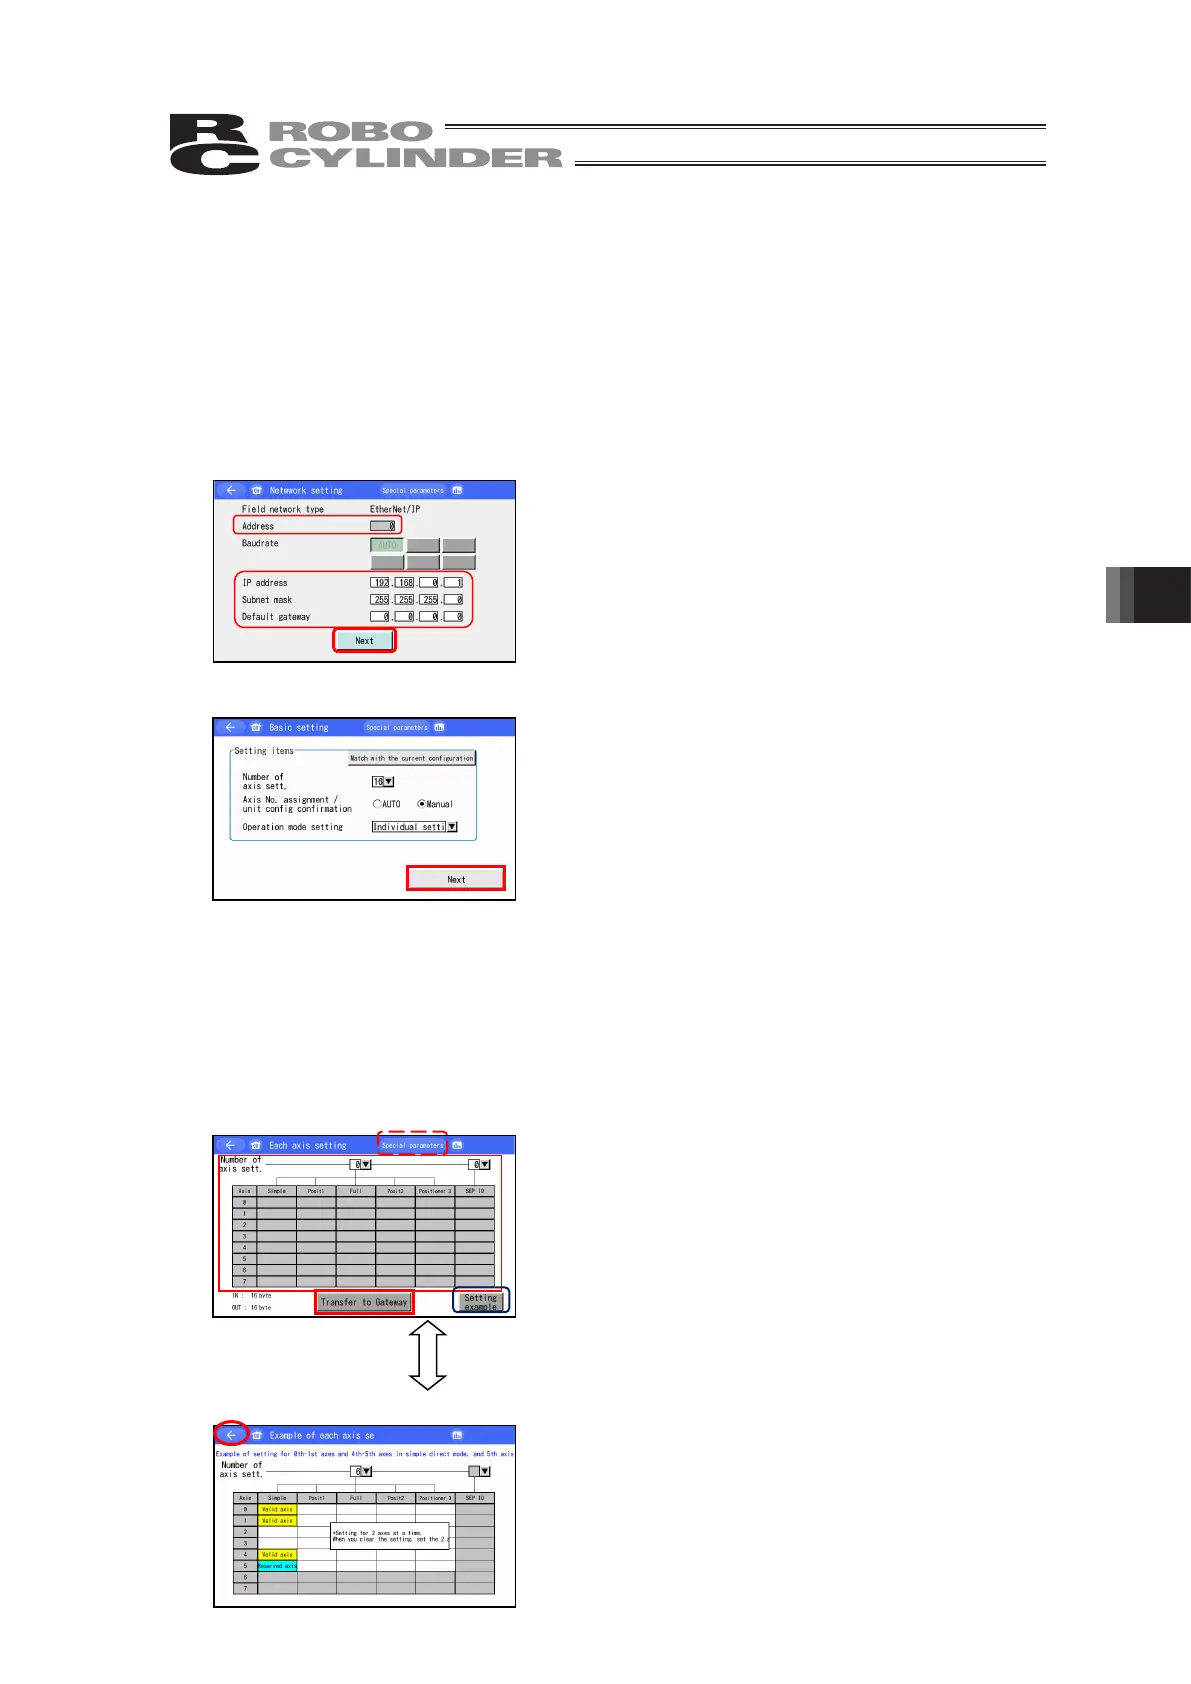
[Step 1] Network Setting Screen
Establish the settings for the address
(Note 1)
, IP address
(Note 2)
,
subnet mask
(Note 2)
and default gateway
(Note 2)
.
Touch [Next] when setting is finished.
(Note 1) Set for those except for EtherNet/IP and PIO
(Note 2) Set for EtherNet/IP
[Step 2] Basic Setting Screen (only for RCON)
Settings for axes number setting, axis number assignment
/ unit construction setting and operation mode setting
should be established.
Touch [Match with the current configuration], and the
setting of such as number of axes should be adjusted to
what can be operated following the current hardware
construction.
Touch [Next] when setting is finished.
If “Auto” is selected in the axis number assignment / unit construction setting and also an
option other than individual setting is selected in the operation mode setting, the procedure will
move on to [Step 4] Transfer Confirmation Screen.
[Step3] Setting of Number of Axes and Operation Mode
(1) Each Axis Setting Screeb for MSEP-C and MCON-C/CG
Set the operation mode and number of axes.
If required to set the special parameters, touch [Special
parameters] button. [Refer to 7.3.2 Special Parameter
Setting]
Touch [Transfer to Gateway] when setting is finished.
Example of each axis setting Screen
Touch [Example for Setting] in the each axis setting
screen, and an example for each axis setting should
appear. Refer to it for setting.
Touch [←] button to return.
 Loading...