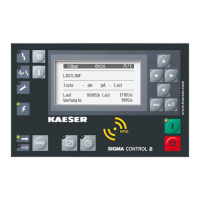
4. Press the «Enter» key.
The setting is applied accordingly.
5. Press the «Right» key.
6. Press the «Enter» key.
The display for hours,
00:
00
flashes.
7. Use «Up» or «Down» to set the hours.
8. Press the «Right» key.
9. The minutes display
00:
flashes.
10. Use «Up» or «Down» keys to set the minutes.
11. Press the «Enter» key.
The setting is applied.
12. Press the «Right » key.
13. Press the «Enter» key.
The
pApB
indicator flashes.
14. Adjust the setting with the «Up», «Down»
pA or pB
keys.
15. Press the «Enter» key.
The setting is applied.
16. Set the other switching points in the same manner.
The timing program is now set.
17. Select the operating mode
pA/pB Clock
: see chapter 8.9.3.3.
8.9.3 Setting the nominal pressure change via timer
Overview
■ Delete the old timer configuration, if necessary
■ Set timer period
pA
and
pB
■ Set starting point for
pA
or
pB
■ Select the operating mode
pA/pB Cycle
: see chapter 8.9.3.3.
8.9.3.1 Set timer period pA and pB
Observe and keep to the configuration sequence. The
pA/pB Cycle
operating mode must not
be activated when configuring the timer period.
➤ First set the timer and then the operating mode, or set another operating mode before‐
hand.
Precondition Password access level 2 is activated.
1. Open the 5.2.3
<Configuration – Pressure control – Load control>
menu.
2. Use the «Up» or «Down» keys to select the
pA/pB Cycle
line.
3. Press the «Down» key.
The
pA
line is displayed.
4. Press «Enter».
The display for the cycle duration in hours,
00
flashes.
5. Use «Up» or «Down» to set the hours.
8 Initial Start-up
8.9 Setting the machine for local mode
No.: 9_9450 13 USE
User Manual Controller
SIGMA CONTROL 2 SCREW FLUID ≥5.1.2
117

 Loading...