215676 126 Revision A
1009285
CXXX
MXXX
CALIBRATING FLOAT
PRESS FLOAT + TO START
C
B
A
Figure 3.154: M155 Header Float Display
4. Press right arrow (B) to select YES. Press SELECT (C).
• TO CALIBRATE SELECT will appear on the upper line.
5. Press left arrow (A) or right arrow (B) until HEADER FLOAT
appears on the lower line. Press SELECT (C).
• CALIBRATING FLOAT will appear on the upper line.
• PRESS FLOAT + TO START will appear on the lower line.
1009286
CXXX
MXXX
CALIBRATING FLOAT
FLOAT ( + ) HOLD
A
Figure 3.155: Positive Header Float Display
6. Press and hold FLOAT + button (A) on the CDM.
• CALIBRATING FLOAT will appear on the upper line.
• FLOAT ( + ) HOLD will appear on the lower line.
NOTE:
The word HOLD will flash during calibration. FLOAT ( + )
DONE will appear on the lower line once calibration is
complete.
7. Release FLOAT + button (A).
• CALIBRATING FLOAT will appear on the upper line.
• FLOAT ( – ) HOLD will appear on the lower line.
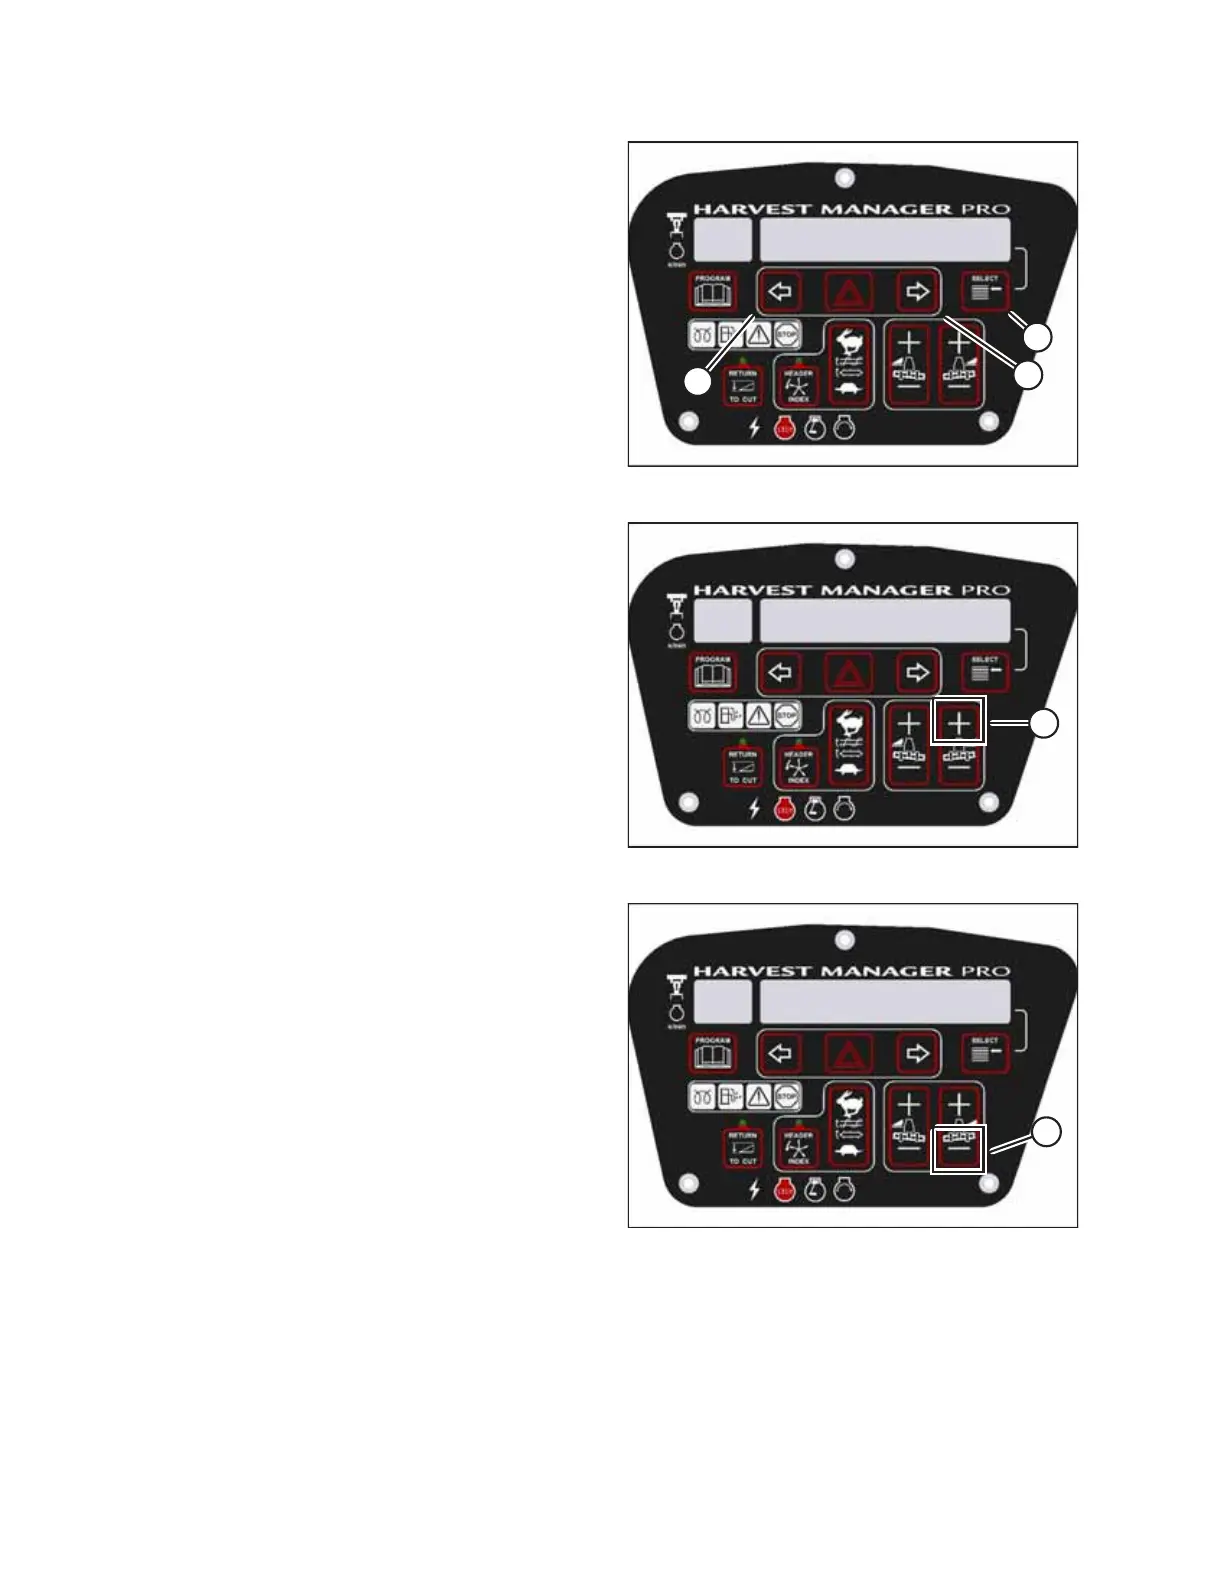
1009287
CXXX
MXXX
CALIBRATING FLOAT
FLOAT ( - ) HOLD
A
Figure 3.156: Negative Header Float Display
8. Press and hold FLOAT – button (A) on the CDM.
• CALIBRATING FLOAT will appear on the upper line.
• FLOAT ( – ) HOLD will appear on the lower line.
NOTE:
The word HOLD will flash during calibration. HDR FLOAT
COMPLETE will appear on the lower line once calibration is
complete.
9. Release FLOAT – button (A).
• TO CALIBRATE SELECT will appear on the upper line.
• HEADER FLOAT will appear on the lower line.
10. Press the right arrow to select the next header sensor calibration or select STOP & EXIT. Press SELECT. For instructions,
refer to Calibrating Header Height Sensor, page 121 or Calibrating Header Tilt Sensor, page 123.
11. Press PROGRAM to exit programming mode.
OPERATOR’S STATION