18. GOT MULTI-DROP CONNECTION
18.4 Connection Diagram
18 - 15
18
GOT MULTI-DROP CONNECTION
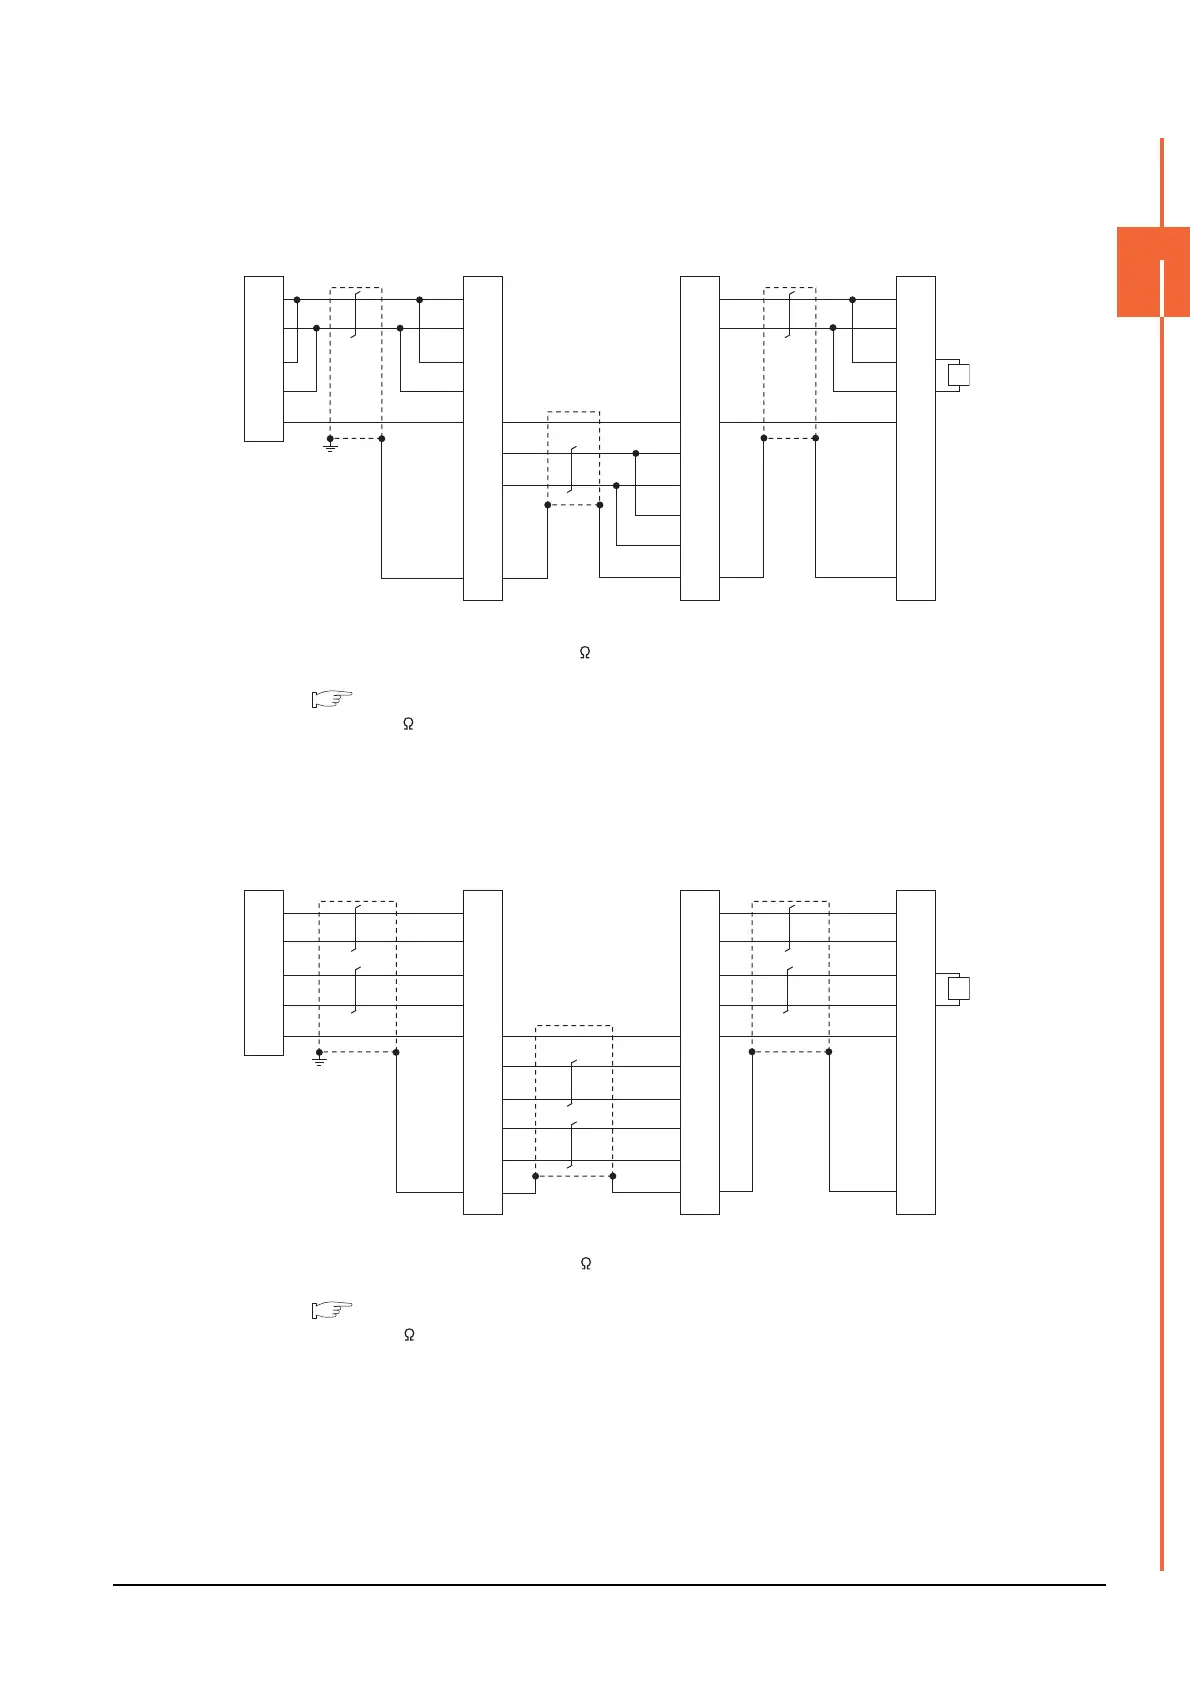
(2) RS485 connection diagram 2)
(For 1 pair wiring)
*1 Use the twisted pair cable for SDA/SDB.
*2 Set the terminating resistor selector to "110 ".
*3 Set the terminating resistor setting switch of the GOT main unit to "Disable".
1.4.3 Terminating resistors of GOT
*4 Connect a 110 terminating resistor to the GOT to be a terminal.
*5 Make sure to ground a cable shield line by applying Class D Grounding.
(3) RS485 connection diagram 2)
(For 2 pair wiring)
*1 Use the twisted pair cable for SDA/SDB, RDA/RDB.
*2 Set the terminating resistor selector to "330 ".
*3 Set the terminating resistor setting switch of the GOT main unit to "Disable".
1.4.3 Terminating resistors of GOT
*4 Connect a 330 terminating resistor to the GOT to be a terminal.
*5 Make sure to ground a cable shield line by applying Class D Grounding.
GOT side
*
3
GOT side
*
3
GOT side
*
3
Serial multi drop
connection unit
*
2
1
2
3
4
9
5
6
7
8
10
SDA
*
1
SDB
*
1
RDA
RDB
SG
SDA1
SDB1
RDA1
RDB1
SG
SDA2
SDB2
RDA2
RDB2
FG
*
5
5
6
7
8
9
1
2
3
4
10
SDA2
SDB2
RDA2
RDB2
SG
SDA1
SDB1
RDA1
RDB1
FG
1
2
3
4
9
5
6
7
8
10
SDA1
SDB1
RDA1
RDB1
SG
SDA2
SDB2
RDA2
RDB2
FG
*
4
R
1
2
3
4
9
5
6
7
8
10
RDA
*
1
RDB
*
1
SDA
*
1
SDB
*
1
SG
SDA1
SDB1
RDA1
RDB1
SG
SDA2
SDB2
RDA2
RDB2
FG
*
5
5
6
7
8
9
1
2
3
4
10
SDA2
SDB2
RDA2
RDB2
SG
SDA1
SDB1
RDA1
RDB1
FG
1
2
3
4
9
5
6
7
8
10
SDA1
SDB1
RDA1
RDB1
SG
SDA2
SDB2
RDA2
RDB2
FG
*
4
R
Serial multi drop
connection unit
*
2
GOT side
*
3
GOT side
*
3
GOT side
*
3

 Loading...