4.6.1 Adjustment procedure 231
4.6 CR Belt Tension Adjustment VJ628XE-M-00
4.6 CR Belt Tension Adjustment
This section describes the procedure to adjust the tension of the CR belt.
When you have removed and installed the CR belt, adjust the CR belt tension.
4.6.1 Adjustment procedure
● Tools & Jigs
Name Remarks
Phillips screwdriver No.2 Generic Products
Thread locker Three bond1401
1 Remove L Side Cover.
"3.2.2Removing Side Cover
2 Tighten the CR tension mounting shaft, and
align the left side (viewed from the front of the
printer) of the graduation alignment pointer
with the center line of graduations on the
driven pulley base.
A : CR tension adjustment screw
B : Graduation
C : Graduation alignment pointer
To align the graduation alignment pointer
with the center line of driven pulley base,
align the left side (viewed from the front of
the printer) of the pointer with the center
line as shown below.
Alignment pointer
Alignment pointer
Align them like this
Printer main body side
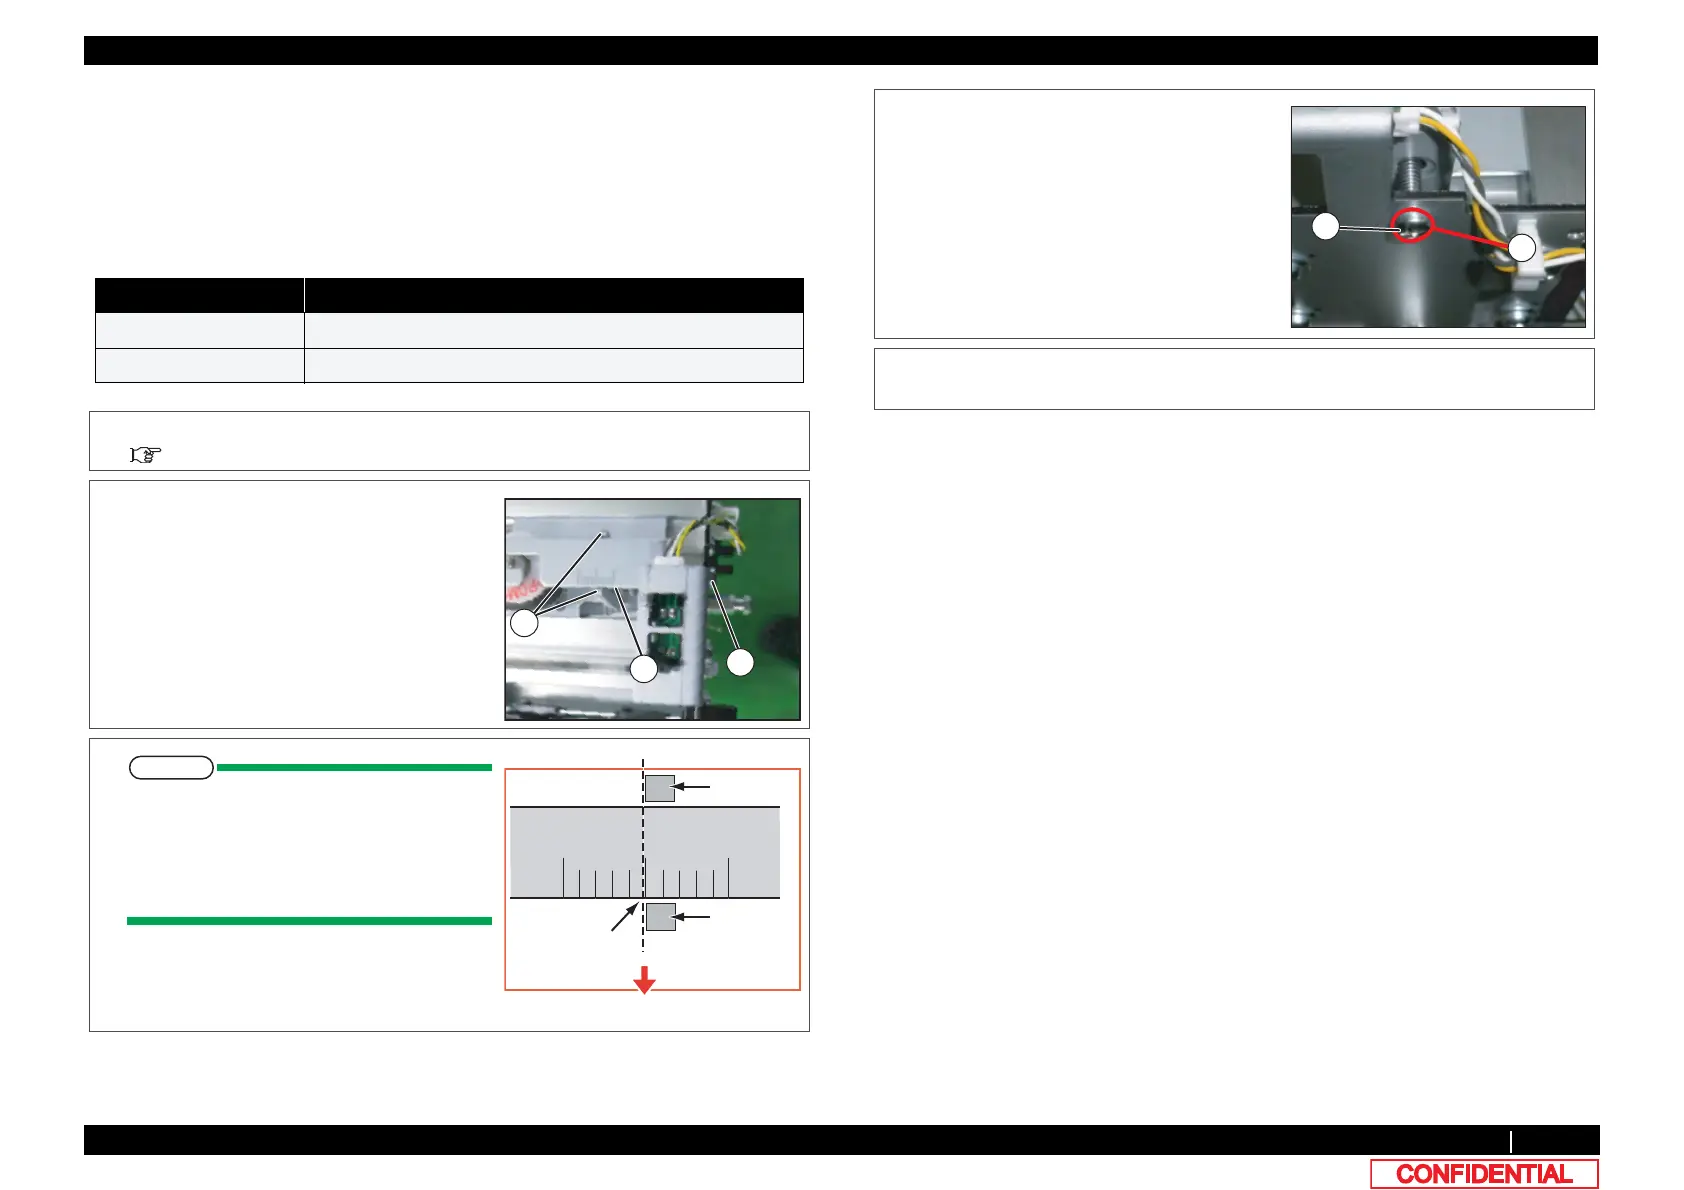
3 After adjustment, apply threadlockert to the
screw head of the CR tension mounting shaft
not to loosen it.
A : Round head screw M4x30
B : applying point
4 To reassemble unit, reverse the removal
procedure.